Buffalo Chicken Rolls

Buffalo Chicken Rolls


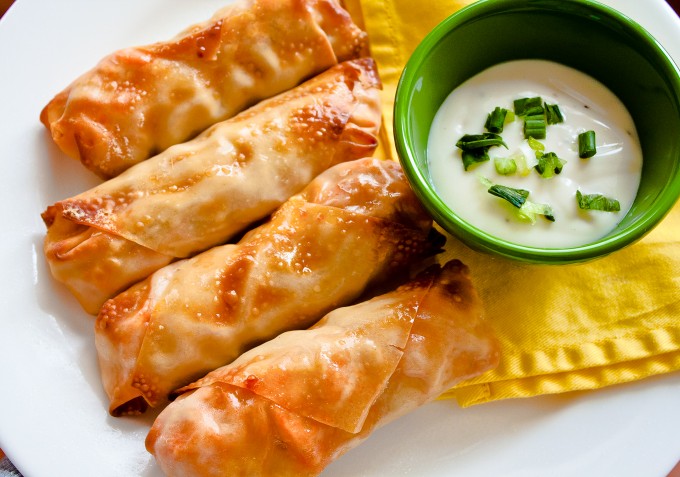
Here’s the easy step by step tutorial on how to make healthy baked buffalo chicken egg rolls with egg roll wrappers, blue cheese, hot sauce, and broccoli slaw! They’re just over 100 calories each, making them a great light appetizer, but they also work as a main meal, too!

I’m thinking we’re very comfortable together at this point, me and you. You and me. At best, we’re virtual soul mates bonded through food and cooking. At worst, we’re in a one-sided pen pal relationship and you’re not keeping up your end of the bargain. I’m tired of paying for postage when you never write back.


But really, it’s mostly good, isn’t it? Beautiful, even. I cook and clean the dishes, you pop in and eat with your eyes. I bake and stow the goodies in the pocket corners of my thighs, you stow them neatly in megabytes of ram. I pour my heart out and it spills onto your computer screen, and you, for your part, keep the mess contained.
Give and take. Take and give.


So today I’m going to ask you a favor. Just going to put everything on the line here and as you to do something for me.

Ready?

Okay.


Please get your cute bottom to the market, pick up a package of egg roll wrappers, some hot wing sauce, blue cheese, toss in a box of Junior Mints for good measure, and then get situated in the kitchen to make these.

Buffalo Chicken Rolls.

They are beyond perfect for the Super Bowl. Beyond perfect for your nagging comfort food craving. Beyond satisfying knowing that bar food has been turned inside out and healthy.


The exterior is a crispy, crunchy flour shell. The interior is moist shredded buffalo-sauced chicken, with creamy, cool, and pungent blue cheese, and a few strands of refreshing slaw. Texturally, tastefully balanced and delicious. If you love buffalo chicken, you’ll adore these little rolls. They’re baked instead of fried, and the chicken isn’t breaded or fried either. Each of them clocks in at approximately 100 calories, so they’re absolutely worth adding to your game day snack roster.

Here’s the step-by-step process to make them yourself:


**Note: Find egg roll wrappers in the refrigerated case of the produce department at your grocery store. They’re usually near the tofu and hummus.

Prep Time15 mins
Cook Time15 mins
Total Time30 mins
Course: Appetizer, Main Course
Cuisine: American, Asian
Keyword: baked buffalo chicken rolls, baked chicken rolls, buffalo chicken recipe
Servings: 12 Rolls
Calories: 104


Ingredients

12 egg roll wrappers buy the ones that are roughly 4" x 4" square
1 cup cooked and shredded chicken 6 ounces
1/2- 2/3 cup Frank’s Red Hot Sauce
1 cup crumbled blue cheese 4 ounces
1 cup broccoli slaw or coleslaw dry
Blue cheese dressing for serving

Instructions

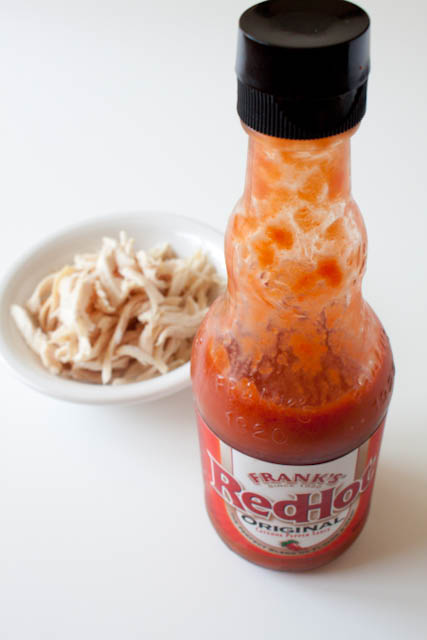
Preheat oven to 400 degrees F. Lay egg roll wrappers on a clean work surface. In a small bowl, stir chicken* (see note below) and hot sauce until well coated, using more or less sauce depending on your spice preference. The meat should be moist with sauce.
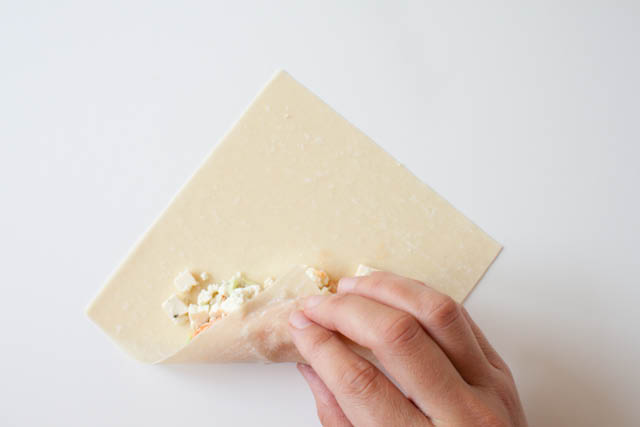
Begin by placing one tablespoon of the broccoli slaw on the diagonal of the bottom right corner of one of the wrappers. Next, place 2 tablespoons of shredded spicy chicken evenly on top of the slaw. Spoon 1 tablespoon of the blue cheese crumbles over the chicken. Do not overfill.
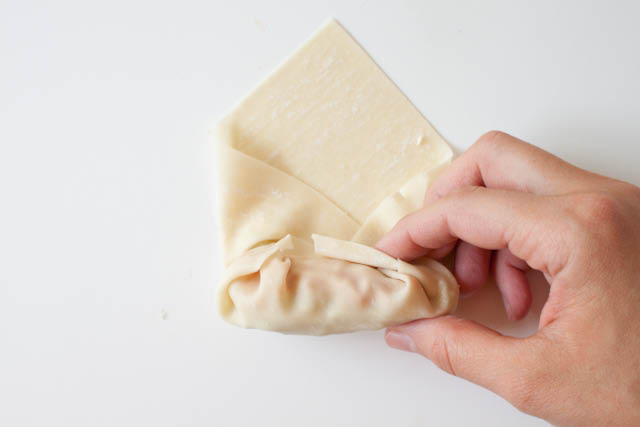
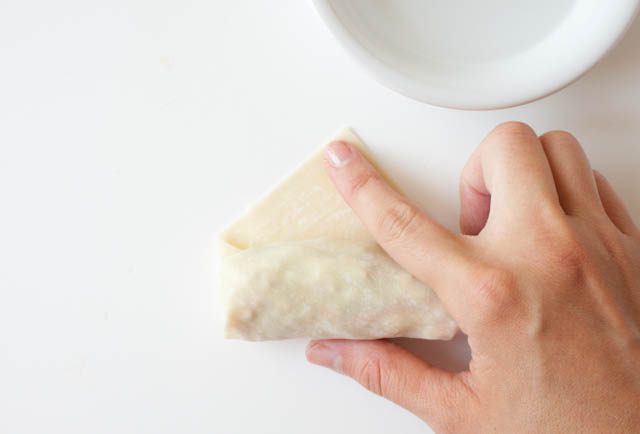
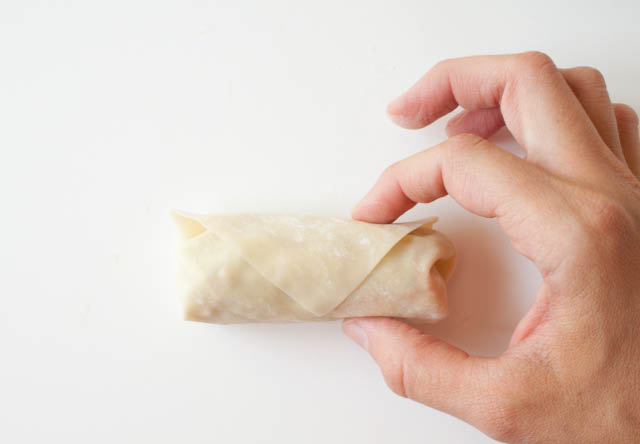
To fold: Fold the bottom right corner over the stuffing mixture so that it covers it completely, with the tip of the corner now pointing to the center of the egg roll wrapper. Fold in the bottom left corner, followed by the right, so that you now have formed an envelope. Roll the wrap upward one time, leaving the top left corner open. Wet your index finger in the small bowl of water and press to moisten the top left corner. Now fold that down on top of the filled roll, sealing it like you would an envelope.
Repeat with remaining rolls.
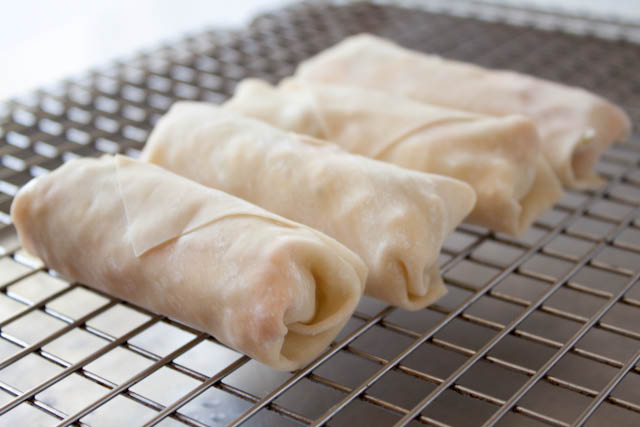
Place the rolls on a wire rack set on top of a cookie sheet (or just on a greased cookie sheet) coated with nonstick cooking spray. Spritz each roll evenly with nonstick cooking spray. Bake for 12-15 minutes, or until the rolls are crisp and beginning to turn a light golden brown.

Notes
*Note: To make the chicken, place 1 large breast (about 6 to 8 ounces) in a small saucepan and fill with enough cold water just to cover the chicken. Bring to a boil, reduce the heat slightly, then simmer for about 12 minutes, or until the chicken is cooked through. Drain and let cool before shredding with two forks, pulling against the grain of the meat.


DILL PICKLE CHICKEN SALAD

DILL PICKLE CHICKEN SALAD


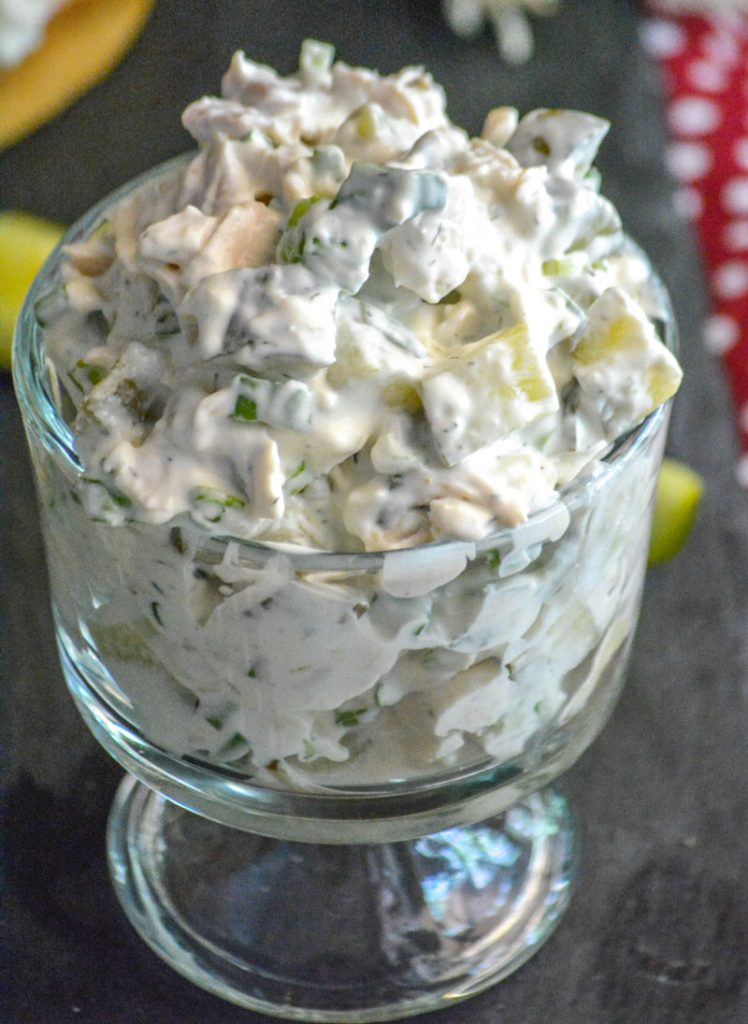
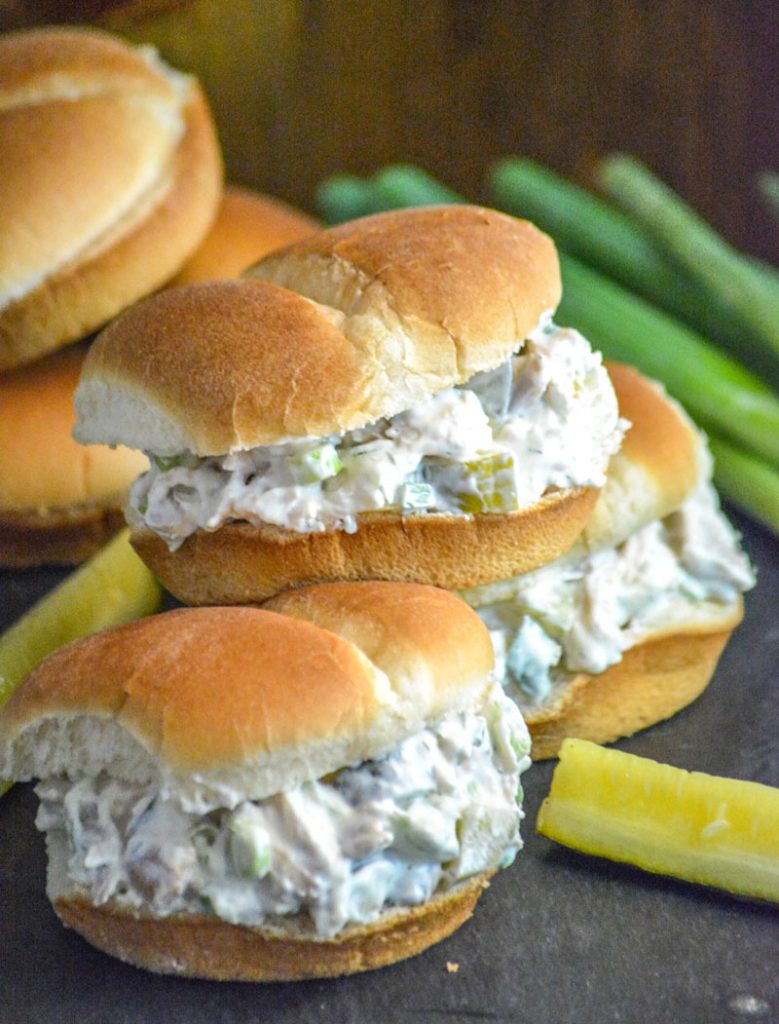
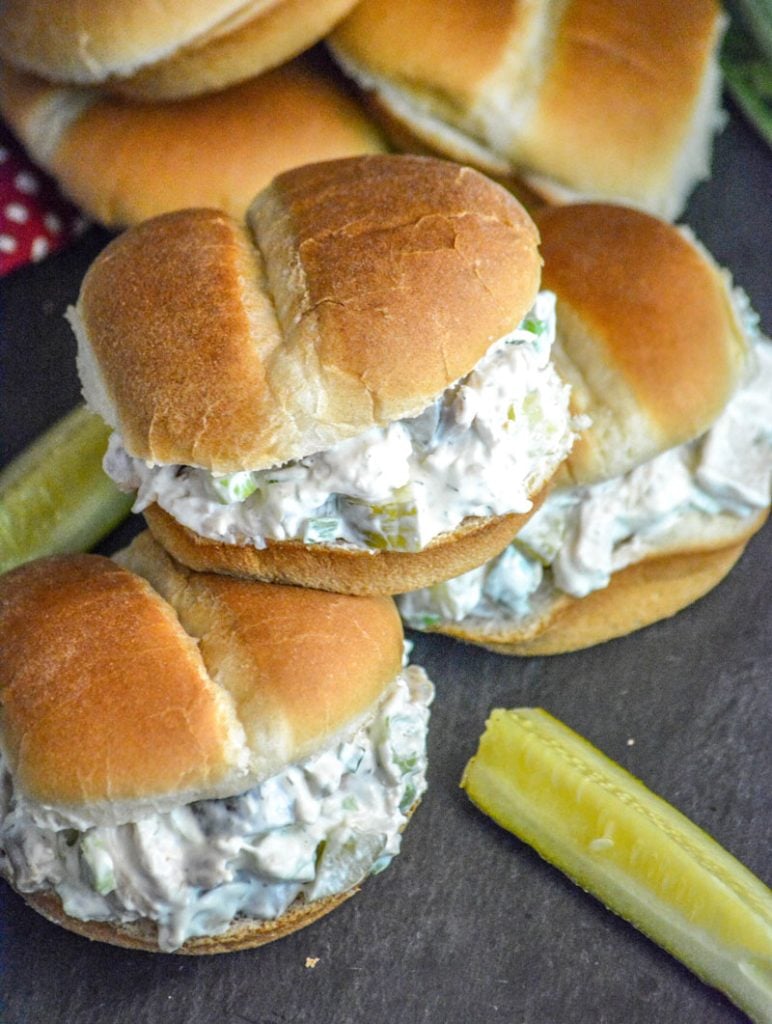
This chicken salad is ultra creamy, and the sauce has real pickle juice stirred right on in. Chunks of rotisserie chicken, diced crisp dill pickle pieces, and a mild garlicky tang from freshly sliced green onions, this is Dill Pickle Chicken Salad makes the definition of a hearty Summer sandwich supper.

Sandwiches seem to reign supreme in the warm weather months. Not that I’m complaining. I totally get it too.

They’re light enough that they don’t/won’t weigh you down, but still filling. There’s also 1,000,000 + different possible flavor combinations. The sky’s the limit. Or should that be the refrigerator? Hmmm…


Either way, it’s a win-win.

They’re yummy, they’re easy, they’re legit finger food, they make hardly any mess, and require even less work.

Sandwiches for lunch, sandwiches for dinner y’all. It happens around here guys, and not one bit of me is ashamed to admit it.

I mean as long as I don’t slap a PB & J or a grilled cheese with only a single slice in the middle on a plate and call it dinner, my guys are happy to have a sandwich as the main part of their evening meal.


They’re my kinda people for a reason!

I’m not one to keep things boring though, or even to make anything I consider ‘boring’. A fact my guys know all to well, which is probably where a lot of their sandwich-for-supper faith comes in if I actually think about it.

Take for example our Chicken Caesar Club Style Sub Sandwich, Chicken Bacon Ranch Subs, Bacon Alfredo Spinach Beer Battered Fish Filet Sandwiches, or even this Ham & Pimento Cheese Bundt Pan Sub Sandwich.

My all-time favorite meal-ish sandwich to make though is always some variation on chicken salad. It’s hearty, it’s usually creamy, and it’s always delicious.

Over the years we’ve tried all kinds of different variations with a multitude of mix-ins. We’ve done cranberry walnut, pesto & sun dried tomato, curry with grapes & pecans, even a Tex Mex version. All of which are searchable here on the site.

Each one has been good enough to earn itself a card in the family recipe box.

Yet, I honestly think I’ve found one that cannot, will not (possibly ever) be topped. Dill Pickle Chicken Salad.

Let’s let that sink in for a minute or two. I mean, me personally, I suggest dedicating a moment of silence to this amazing chicken salad.


Just about anything with pickle in the name is almost guaranteed to be a hit in my book, but this is still an epic home run.

I’m gonna stop right here though, and address the elephant in the room- or what will certainly be brought up later.

Pickles are 100 % one of the most controversial ingredients I’ve ever encountered. Ya either love ’em, or ya hate ’em. Literally, there is no in between.

So let this be your warning, if you do not like pickles- just skip on over to a different recipe, keep scrolling, something- because this recipe wasn’t meant for you. It isn’t for you.

That being said, with this we’re totally callin’ all you pickle-lovers because for you this Dill Pickle Chicken Salad was made.

Now before you get started, here’s a couple things to keep in mind before we actually get into the recipe details!

This chicken salad is creamy. Not just your typical loaded up with mayonnaise creamy either. It’s actually all of the ingredients tossed in a creamy sauce made of a blend of mayo, cream cheese, pickle juice (of course there’s pickle juice in the dressing!), and seasonings. I’m just giving you a heads up so you don’t look at it when you whip it up and wonder if you’ve made a mistake somewhere along the line. Creamy is good!

Also, the type of pickles you prefer can make of break this chicken salad. Don’t use dill pickle relish- A. it has too much liquid, and B. you want chunks of pickles for texture and crunch. I heart a good crunch from my pickles, so I tend to only buy Claussen brand as I find them the crunchiest of the bunch. Non-refrigerated ones will work too, it’s just about personal preference at this point.

If you’re a Greek yogurt fan and looking to make this recipe a tad bit healthier, you can totally sub it for some of the mayo or even all of it. What you shouldn’t ever do, under any circumstances, is swap the mayo in this recipe for Miracle Whip. My friend Jessica from Together As Family told me not to, and for curiosities sake (and at the insistence of the Hubs) I tried it- totally ruined that whole batch. And he likes the stuff! Use the mayo, and use a quality brand.


This chicken salad is ultra creamy, and the sauce has real pickle juice stirred right on in. Chunks of rotisserie chicken, diced crisp dill pickle pieces, and a mild garlicky tang from freshly sliced green onions, this is Dill Pickle Chicken Salad makes the definition of a hearty Summer sandwich supper.

Other Dill Pickle Recipes You Might Also Enjoy: Dill Pickle Potato Salad, Dill Pickle Chips, & Fast & Easy Refrigerator Pickles.

Dill Pickle Chicken Salad

Chopped rotisserie chicken, chunks of crisp dill pickles, & freshly sliced green onions are all tossed in a creamy dressing for an amazing sandwich or cracker spread that should be on any pickle-lovers bucket list.

Course: Sandwich
Cuisine: American
Prep Time: 10 minutes


Ingredients

For The Chicken Salad
4 cups chopped rotisserie chicken meat
1- 1 1/2 cups chopped crisp dill pickles
1 small bunch green onions, thinly sliced

For The Creamy Dressing
6-8 oz cream cheese, softened
1/2 cup mayonnaise
1 tbsp dill pickle juice
3/4 tsp dried dill
1/2 tsp garlic powder
salt & pepper, to taste

Instructions

To Make The Chicken Salad
In a large mixing bowl, add the chicken, pickles, and onions. Lightly toss to evenly combine.

To Make The Creamy Dressing
Add all of the ingredients to a medium sized mixing bowl, use a hand mixer to blend them all together until smooth.
Pour the dressing over the chicken salad, tossing to evenly coat. Season with salt & pepper, to taste.
Cover the bowl tightly with plastic wrap and refrigerate until the chicken salad's nice and cold, about 4 hours.
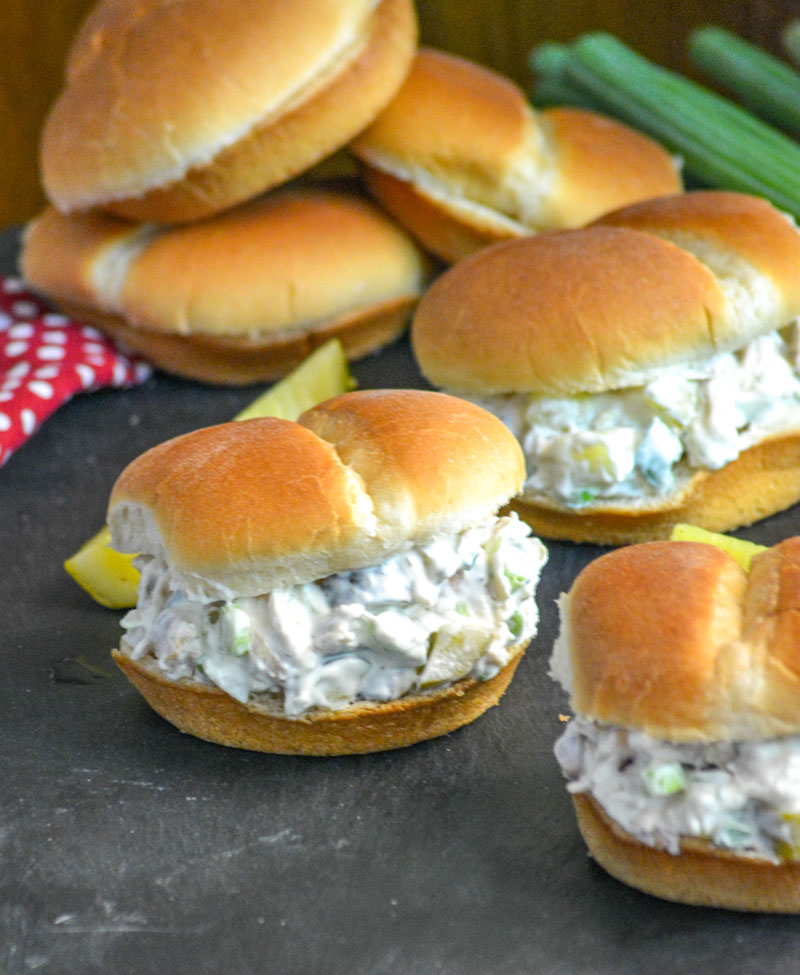
Spoon the mixture onto buns of your choice and serve as sandwiches, or serve in a bowl with crisp crackers for dipping. Trying to avoid carbs? It also tastes delicious wrapped in a lettuce leaf.


Easy Rotisserie Chicken Tacos

Easy Rotisserie Chicken Tacos


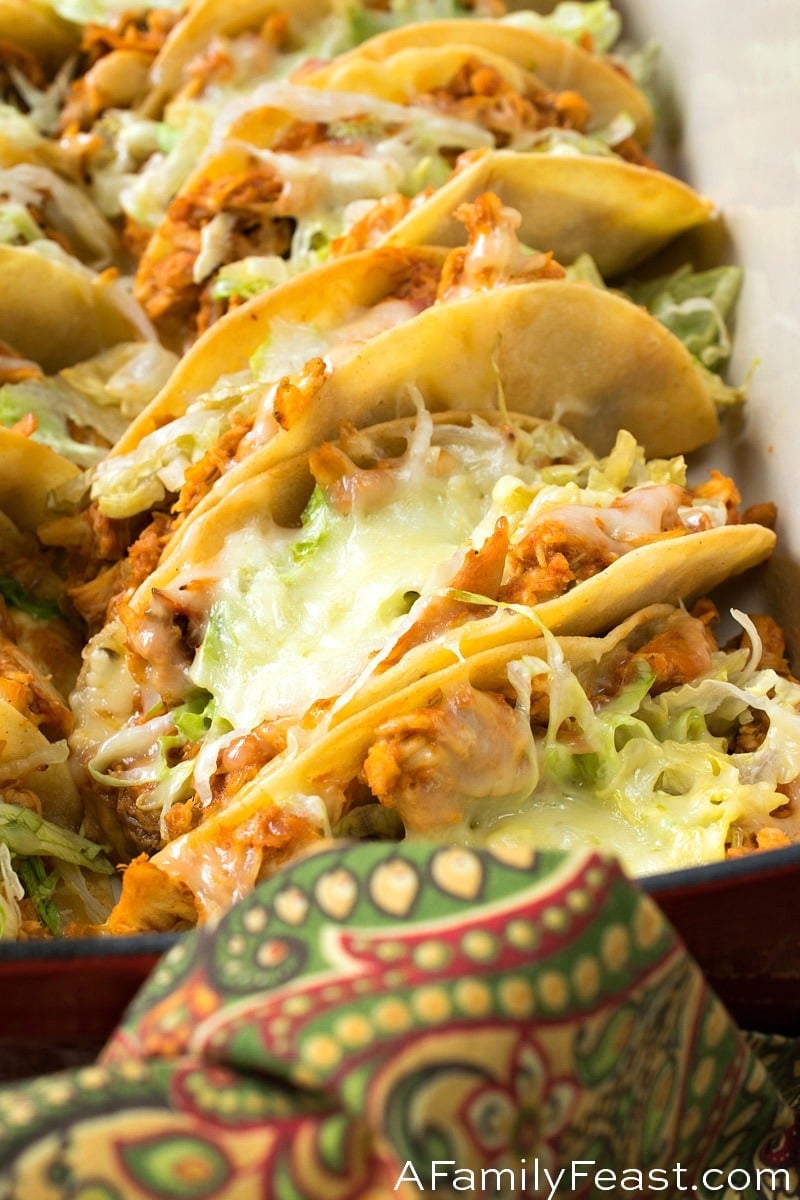
These Easy Rotisserie Chicken Tacos are a quick and delicious weeknight meal, and a great way to feed a crowd at your next game day party.

Taco night just got a lot easier – and even more delicious – thanks to this Easy Rotisserie Chicken Tacos recipe! This is a great way to feed a hungry family – as well a crowd of friends when they come to your house to watch the game.


How to you make Easy Rotisserie Chicken Tacos?

We started with a pre-cooked rotisserie chicken – removing the meat from the bones and shredding the meat.

Next, we tossed the shredded chicken in a mixture of salsa (you can make your own, or use your favorite jarred variety), water, tomato paste, and seasonings including coriander, chili powder, and cumin.

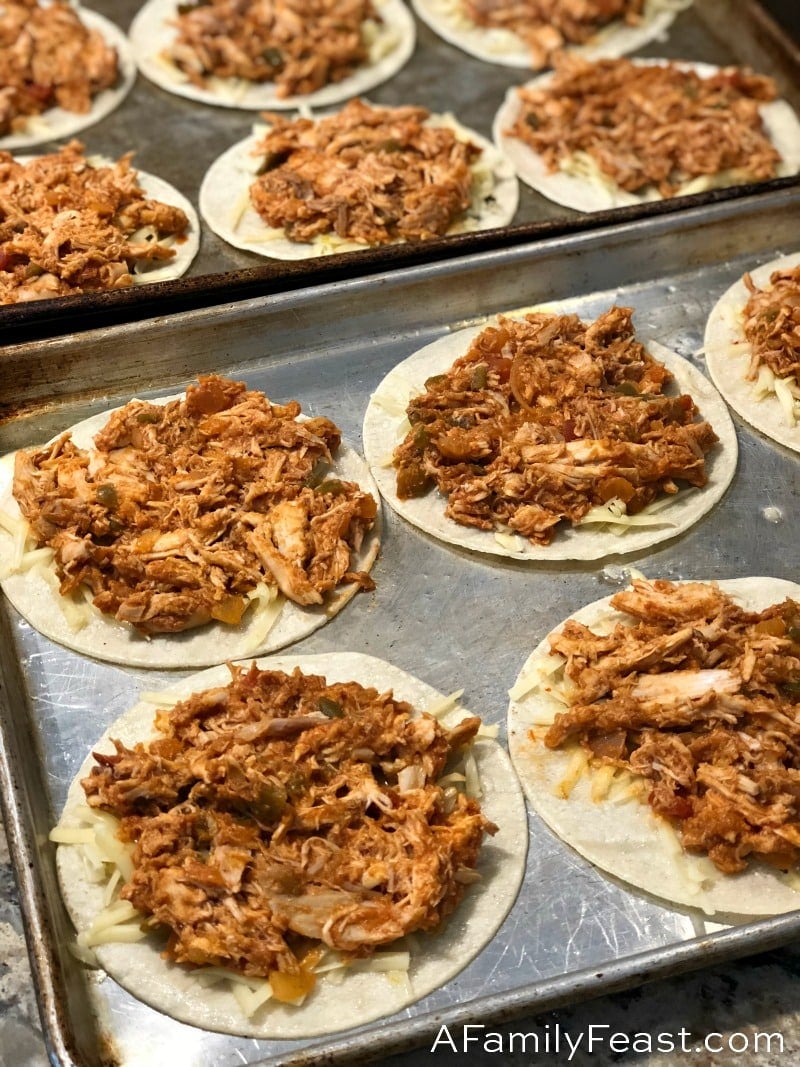
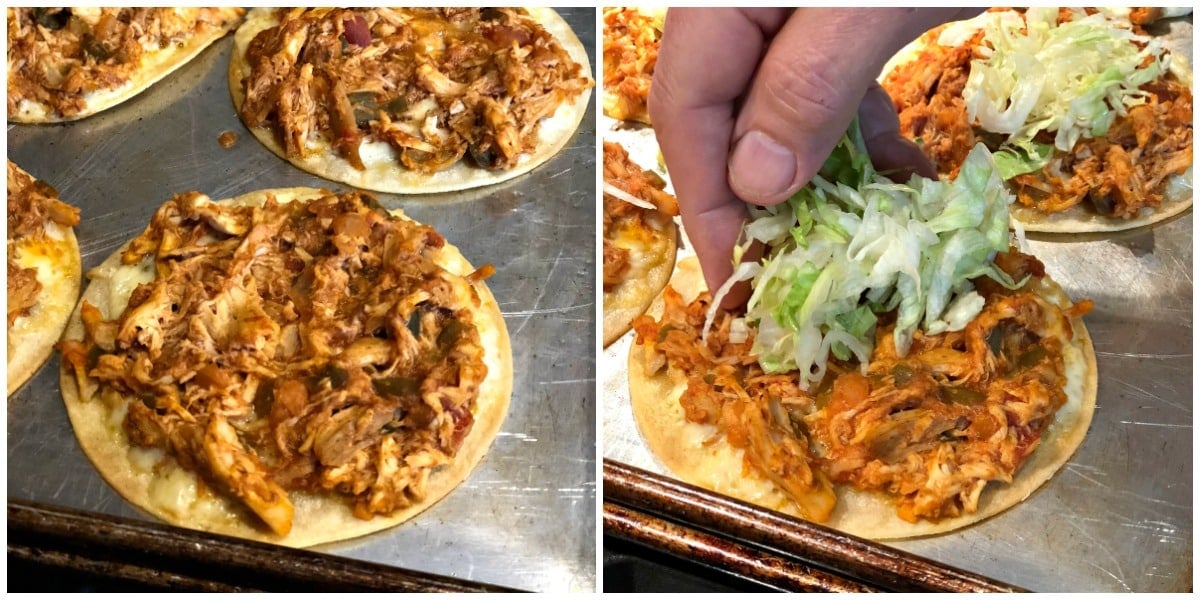
Then we placed corn tortillas on a baking sheet and brushed both sides with oil. Shredded pepper jack cheese and the shredded chicken mixture were placed on top of the tortillas – then placed in the oven for an initial bake to begin cooking the tortillas and melting the cheese.


Once the edges start to turn golden brown, remove the pan from the oven and place the shredded lettuce on top.


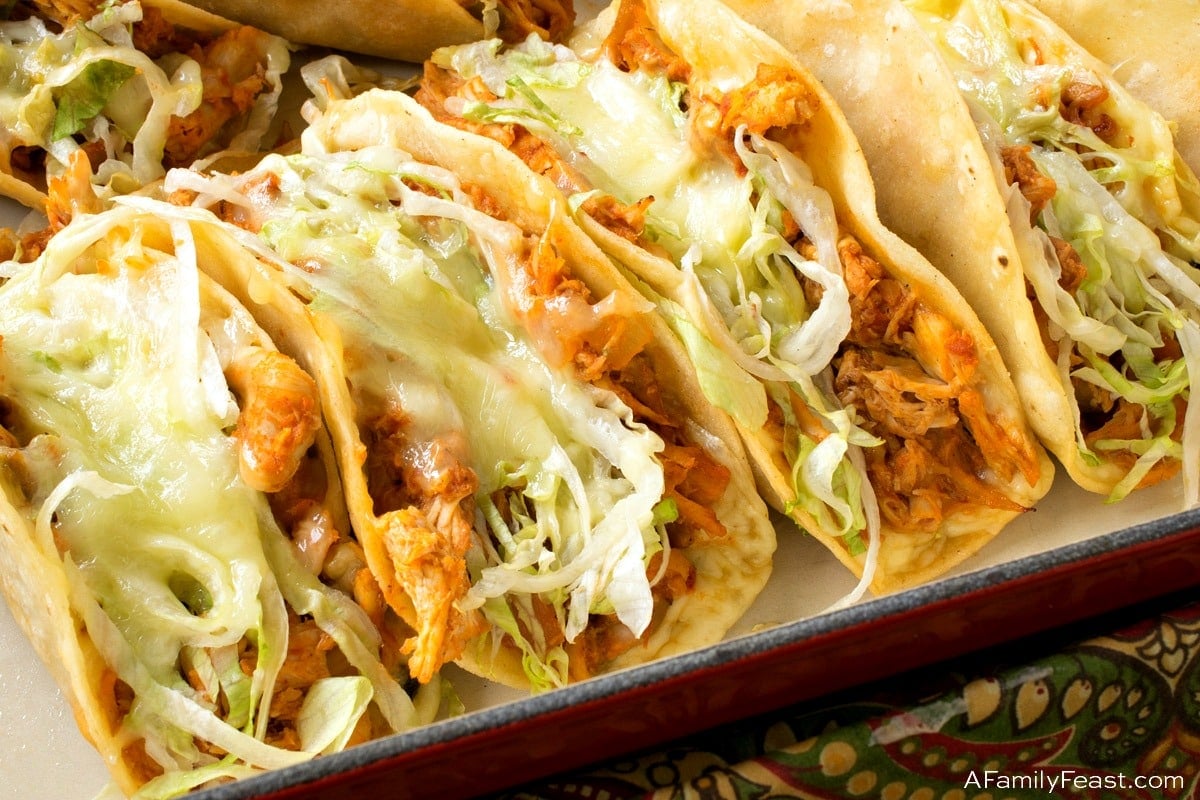
Then fold each tortilla in half, nestle them into a baking pan and top with shredded Monterey jack cheese. Return to the oven, just long enough for the cheese to melt and the tortillas finish cooking.


While we made these Easy Rotisserie Chicken Tacos with shredded cooked chicken, you can just as easily follow this same method using cooked ground beef, pulled pork, fish, or any other favorite taco filling.

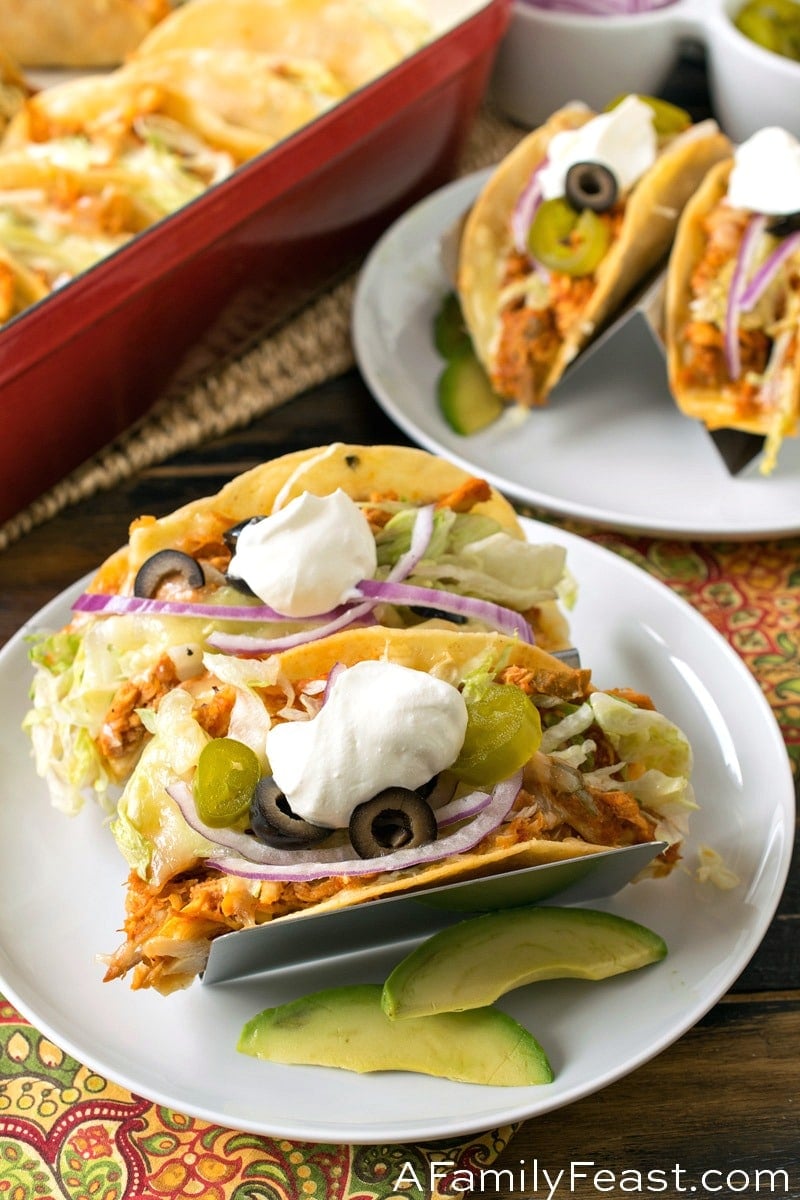
Feel free to serve these Easy Rotisserie Chicken Tacos with your favorite toppings as well. We served them with black olives, pickled jalapenos, sliced red onion, avocado wedges, sour cream, freshly squeezed lime juice and cilantro. Guacamole, more salsa, this fantastic red chile sauce, or a cheesy queso would be other delicious options.


Author: A Family Feast
Prep Time: 20 minutes
Cook Time: 20 minutes
Total Time: 40 minutes
Yield: 12 tacos
Category: entree
Method: baked
Cuisine: Mexican


INGREDIENTS


2 cups salsa (see our homemade recipe here, or use your favorite jarred salsa)

1 cup water

2 tablespoons tomato paste

½ teaspoon coriander

1 teaspoon chili powder

1 teaspoon ground cumin

1 small rotisserie chicken, meat removed from the bones (you’ll want about 1½ pounds of picked chicken meat)

6 tablespoons vegetable oil

12 white or yellow 6” corn tortillas

8 ounces pepper jack cheese, shredded

4 cups shredded iceberg lettuce

8 ounces Monterey jack cheese, shredded

Toppings


Sliced black olives

Sliced pickled jalapenos

Thinly sliced red onion

Avocado wedges

Sour cream

Lime juice

Fresh cilantro


INSTRUCTIONS

Preheat the oven to 450 degrees F.

Have a roasting pan with high sides ready that can hold 12 completed folded tacos (or 2 pans with 6 each).

In a large skillet, place salsa, water and tomato paste. Start burner on medium, stir and combine.

Add the coriander, chili powder and cumin and stir again.


Shred the cooked chicken pieces into the salsa mixture and heat to hot then hold to keep warm.

Brush two sheet pans with half of the oil. Lay out the corn tortillas, 6 per tray and brush the tops with the other half of the oil.

Divide the pepper jack between the 12 tortillas.

Divide the warm chicken mixture between the 12 tortillas, on top of the pepper jack but not completely to the edges.

Place in the oven for 12-15 minutes or until the edges start to get a little crispy and the mixture is hot and bubbly. Rotate pans half way through for even browning.

Remove one pan at a time from the oven and quickly top with half the lettuce. Then pick up each tortilla, fold in half and place in the reserved dish or pan, letting each taco stay folded by leaning on the one next to it, or the side of the pan. They will stay in this shape once folded hot. Repeat for the second pan. Turn off oven. (Note: Tacos are hot so we suggest that you use tongs to remove and fold.)

Then take the 12 folded tacos and top with the Monterey jack cheese and place back in the oven with the oven off for 4-5 minutes. The residual heat will melt the jack cheese over the lettuce.

Serve hot with whatever toppings you want including sliced back olives, pickled jalapenos, thinly sliced red onion, avocado wedges, sour cream, lime juice, fresh cilantro, etc.

THE BEST GREEK CHICKEN MARINADE

THE BEST GREEK CHICKEN MARINADE


Bring all the classic Greek flavors to your kitchen table with this easy and delicious Greek Chicken Marinade. Made with lemon, garlic, and fresh herbs, this chicken marinade takes just minutes to whip together and calls for only a handful of fresh and healthy ingredients.


This is my go-to, multi-purpose, and very favorite Greek chicken marinade. Of course, I have many “favorite” marinades, but this one is extra special.

What makes this particular chicken marinade so much better than the others? It is so dang easy to make. The ingredients are also basic and affordable which means no special orders from Amazon or an out-of-the-way trip to a specialty market.

A perfect balance of lemon, garlic, and fresh herbs, this Greek chicken marinade has all the right flavors in all the right places.

Yes, even my kid (who hates just about everything that isn’t smothered in cheese or shaped like a hamburger) loved this chicken.


GREEK CHICKEN MARINADE INGREDIENTS
Olive oil – I can’t think of a marinade that doesn’t have at least some oil. The oil in the marinade is especially important when cooking chicken breasts as they are naturally lean and low in fat.
Lemon juice AND zest – Lemon is a popular ingredient in many popular marinades and salad vinaigrettes. The high acidity from the lemon juice helps break down the tough fibers of the chicken helping to infuse the delicious lemony flavor of the marinade. Adding zest simply multiplies the awesome lemon flavor. Fresh lemon juice is an absolute must.
Garlic – Garlic is a common ingredient in all Greek cooking and is essential to the balance of flavors in this marinade.
Fresh herbs – I added thyme, oregano, rosemary, and parsley. I also added fresh chopped herbs as it is a personal preference, but dried herbs may be substituted if needed (simply add half of what the recipe calls for). Don’t skip the herbs. Please.
Salt – I recommended that you add 1 teaspoon of salt to the marinade but you are welcome to add more or less depending on your own personal preference. Take care not to over-salt as it will distract from the wonderful, fresh flavors from the other ingredients.
Fresh cracked black pepper – Ok, friends. This is one thing that makes a big difference, freshly cracked black pepper. When it’s freshly cracked it’s as if the flavor radiates throughout the entire chicken breast. I don’t know, I can’t explain it.

HOW TO MAKE THE BEST GREEK CHICKEN MARINADE

Preparing your own marinade is as simple as whisking together a handful of ingredients, tossing it with some chicken breasts, and cooking.

Or is it…

Actually, it kinda is. However, there are a few simple tips and tricks which will make preparing your own marinade (whether it be this Greek chicken marinade, Jerk chicken marinade, or Citrus chicken marinade) a little easier.
Use an oil that makes sense. In other words, use an oil with a matching flavor profile. In this case, olive oil is the best choice. If we were preparing an Asian-style marinade, we would think about adding sesame oil for extra flavor.
Fresh ingredients are the best ingredients. With the exception of certain herbs, you really want to use only fresh ingredients. This is especially important for any kind of citrus juice and garlic. It is worth the extra few minutes of prep time (trust me).
Invest in a microplane. This is one of my top 10 must-have kitchen tools. It’s what I use to zest citrus and grate ginger. In other words, it gets really hard jobs done super duper fast.
You only need to marinate your chicken for 30 minutes. Of course, you can marinate it for longer, but with this Greek chicken marinade, you don’t really need to marinate it for hours and hours.
Never EVER consume used chicken marinade unless it is boiled first. Just think about it- would you lick a raw chicken breast? No. So please, once the marinade has come in contact with raw chicken boil it or DUMP IT OUT.

Now that you have all my tips for preparing a successful marinade, let’s make the thing.

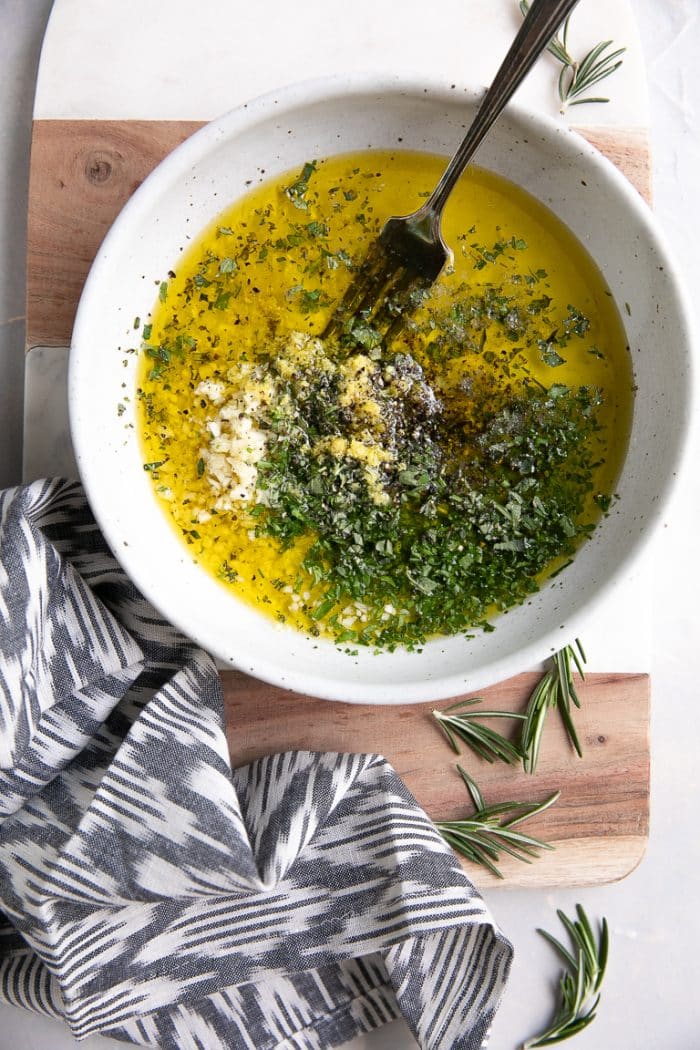
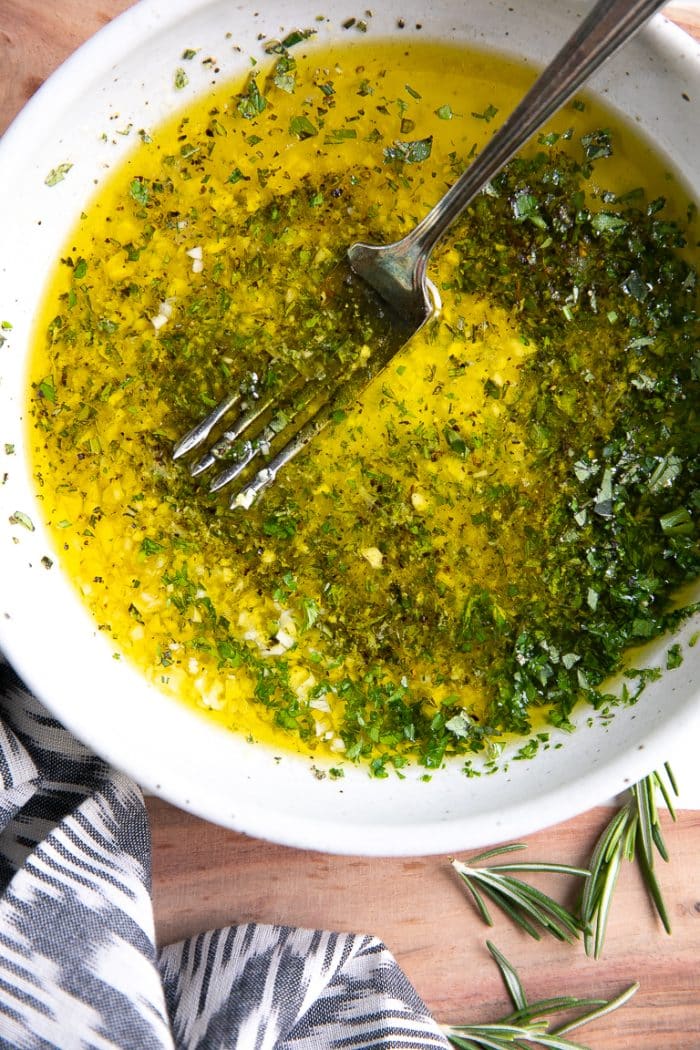
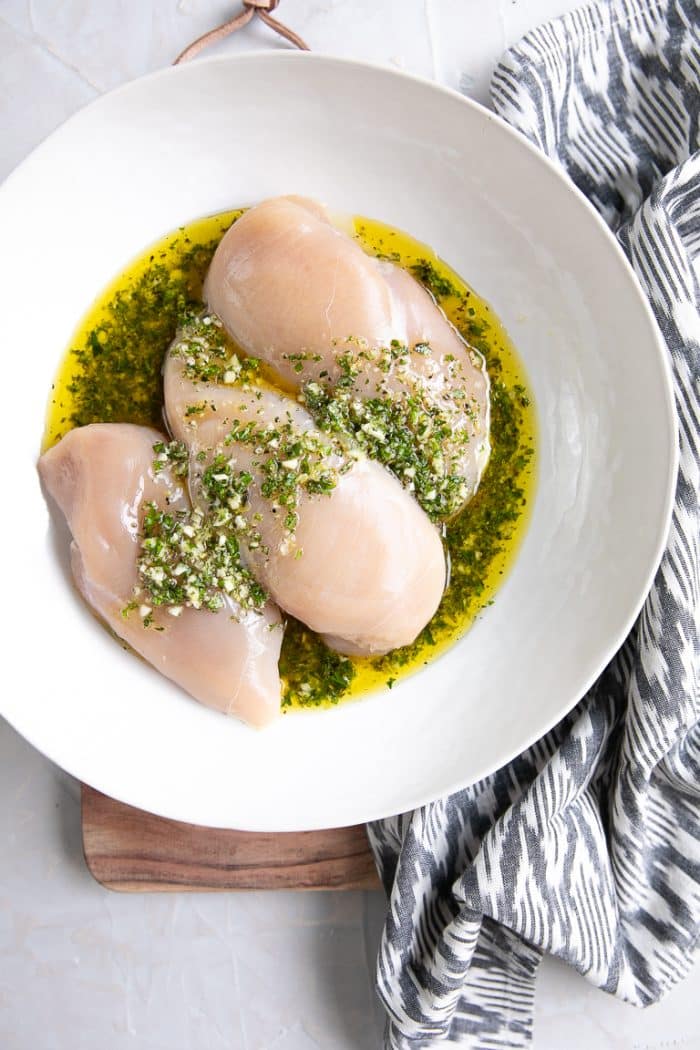
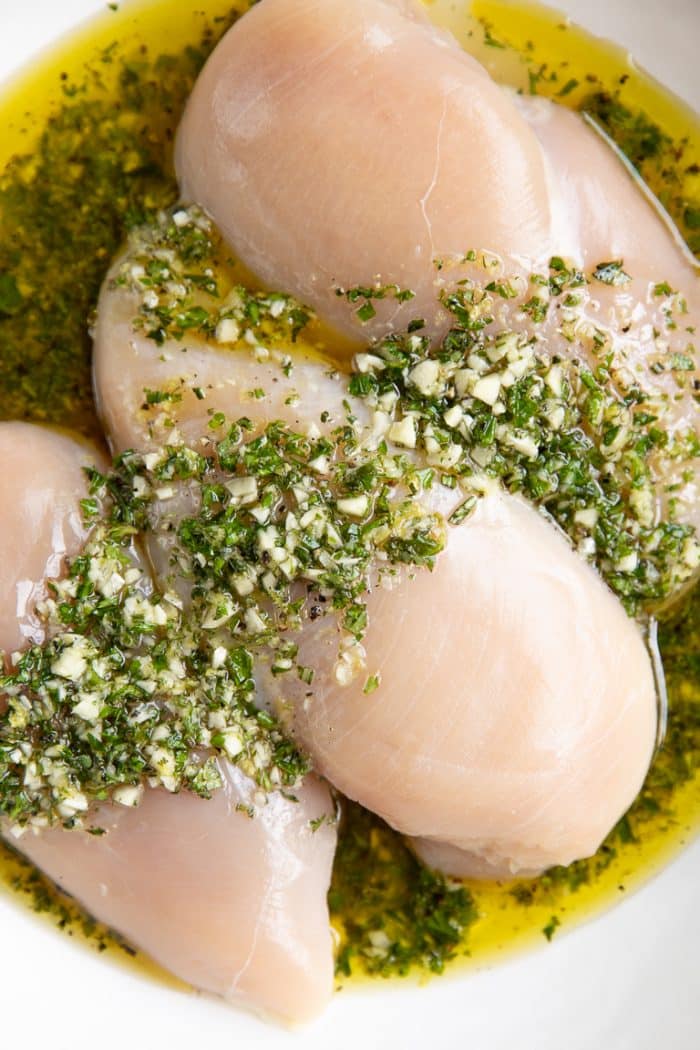
First, add all ingredients for the marinade (olive oil, garlic, lemon juice, lemon zest, fresh thyme, fresh oregano, fresh rosemary, fresh parsley, salt, and black pepper) to a large shallow mixing bowl. Mix well to combine. Add the chicken breasts to the marinade and mix well to coat in the marinade. Allow chicken to marinate for at least 30 minutes to two hours.
HOW LONG CAN YOU MARINATE YOUR CHICKEN?

I have made this Greek chicken marinade many times over the years and each time with a different total marinade time.

Time allowing, I would try to aim for anywhere between 30 minutes to 2 hours. That said, you don’t have to marinate your chicken for that long. If you only have 10 minutes, that’s certainly better than no time at all.

On the flip side, if you are preparing this ahead of time and need to leave the chicken to marinate overnight, that is perfectly fine, too. Simply cover your marinating chicken with plastic wrap and keep stored in the refrigerator until ready to grill.

HOW TO GRILL THIS GREEK MARINATED CHICKEN

Everyone has their own method of grilling chicken. My method is to start with a slightly higher temperature, grill for 5 minutes or so, and then reduce the heat. If you have a grilling method that you know and love, feel free to stick to what you know best.
Marinate the chicken. Add the chicken breasts to the marinade and mix well to coat in the marinade. Allow chicken to marinate for at least 30 minutes to two hours.
Prepare the grill. As the chicken marinates, clean the grill grates and lightly oil with vegetable oil or cooking spray. Set grill to medium-high heat.
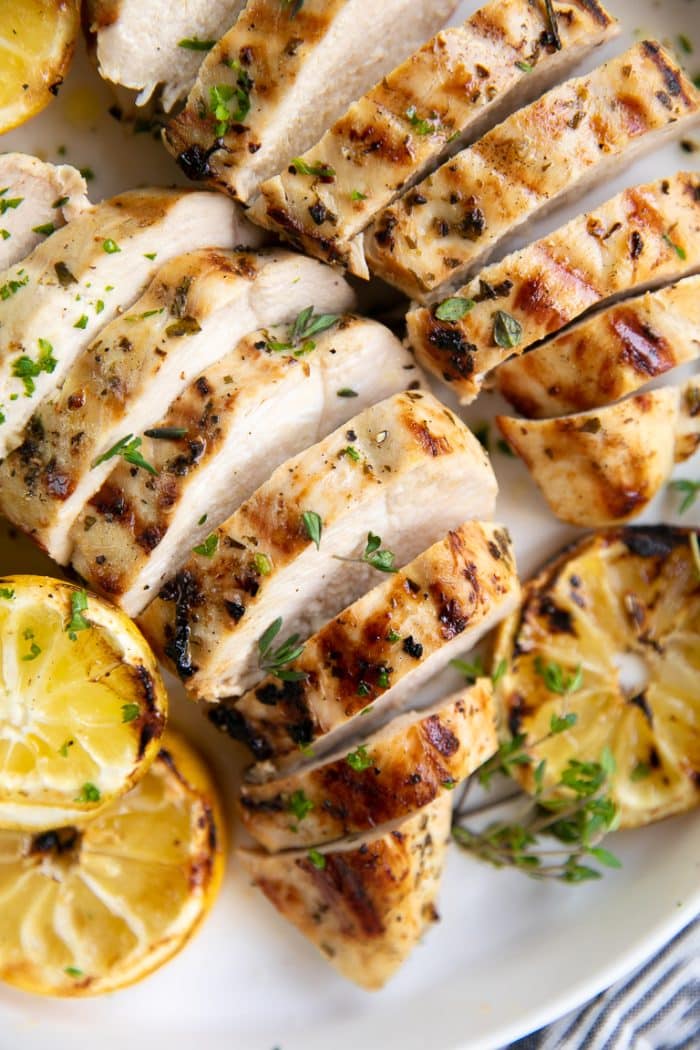
Grill the chicken. Remove the chicken from the marinade and place directly on the grill. Discard remaining marinade. Cover the grill and allow the chicken to cook for approximately 5 minutes before reducing heat to medium. Allow chicken to cook for an additional 2 minutes, then use tongs to flip each breast over. Grill for an additional 5-7 minutes (or longer), or until the thickest part of your chicken registers 160 degrees F. with a digital meat thermometer.
Thicker chicken breasts will take longer to cook. I highly recommend the use of a digital meat thermometer when cooking any and all meats.
Allow chicken to rest. Remove chicken breasts from the grill and set aside to a clean plate. Tent with foil and allow to rest for 5 minutes before slicing and serving.
CAN YOU BAKE GREEK CHICKEN?

Yes, absolutely. I love to bake this Greek marinated chicken recipe whenever I want a more hands-off dinner.
Prepare the marinade as outlined above and marinate the chicken for (at least) 30 minutes.
Preheat the oven to 400 degrees F and line a large baking sheet with parchment paper or aluminum foil.
Arrange the chicken on the prepared baking sheet. Discard any remaining marinade.
Bake until internal temperature reaches 160-165 degrees F as read with a digital meat thermometer.
Remove from the oven and allow to rest for 5 minutes before serving.

HOW TO SERVE GRILLED GREEK MARINATED CHICKEN

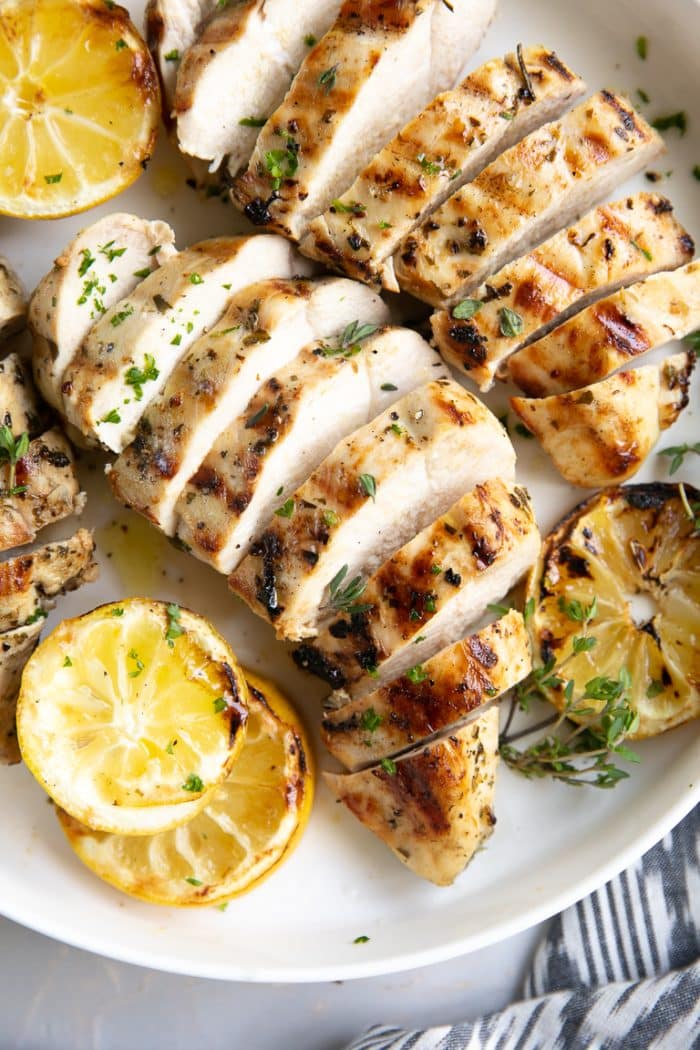
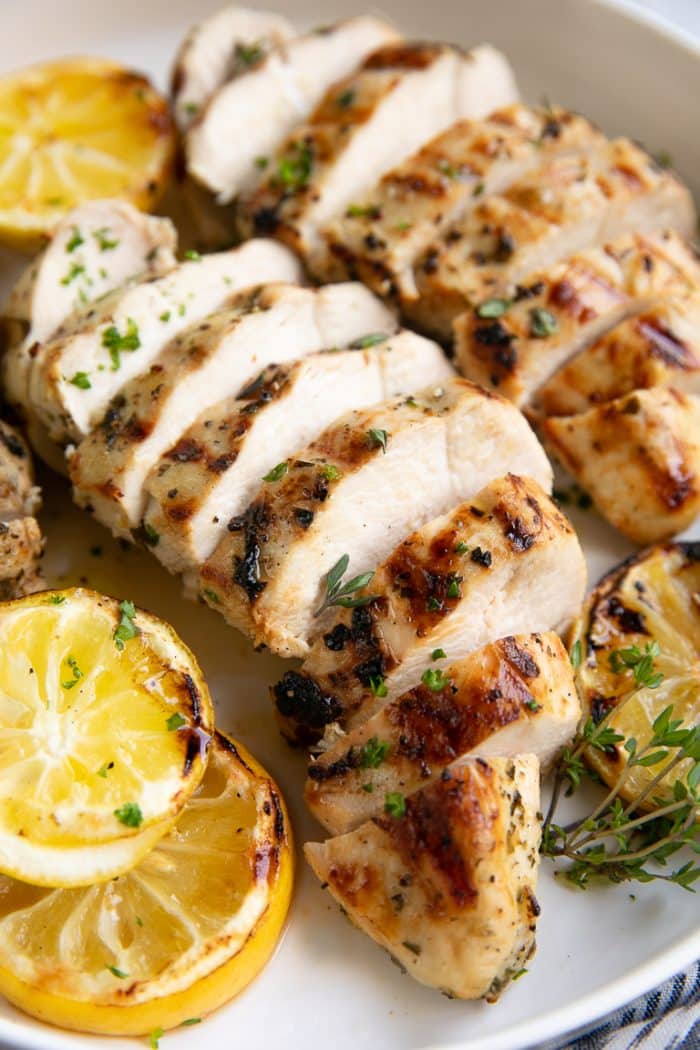
The uses for this rockstar marinated chicken is endless. Here are some of my favorite ideas.
Serve with a platter of hummus, flatbread, and your favorite chopped veggies like cherry tomatoes, cucumber, red onions, and olives.
Add to your favorite cold pasta salad.
Serve with this Easy Chopped Mediterranean Salad for a complete meal.
Make in bulk and turn leftovers into yummy meal prep bowls like these Chicken Shawarma Quinoa Bowls.
Keep things low carb and serve with this flavorful Cucumber Salad.


DON’T FORGET TO PIN AND SHARE THIS EASY AND DELICIOUS GREEK CHICKEN MARINADE RECIPE AND ADD IT TO YOUR NEXT WEEKLY MEAL PLAN!


LOOKING FOR SOMETHING SPECIFIC? CLICK HERE TO SEARCH BY INGREDIENT

REMEMBER TO SUBSCRIBE TO THE FORKED SPOON NEWSLETTER FOR FREE AND RECEIVE WEEKLY RECIPE NOTIFICATIONS DELIVERED STRAIGHT TO YOUR INBOX!


COURSE: Main Course
CUISINE: American, Greek
KEYWORD: Greek Chicken Marinade
PREP TIME:10 minutes
COOK TIME:20 minutes
MARINATE:2 hours
TOTAL TIME:2 hours 30 minutes
SERVINGS: servings
CALORIES: 312kcal


Ingredients

1/2 cup olive oil
5 cloves garlic - minced
2 lemons - juiced
1 lemon - zested
1 tbsp fresh thyme - chopped
1 tbsp fresh oregano - chopped
2 tsp fresh rosemary - chopped
1 tbsp fresh parsley - chopped
1 tsp salt
1 tsp freshly ground black pepper
6 large chicken breasts - (approximately 4 pounds)

Instructions

Prepare the marinade. Add all ingredients for the marinade (olive oil, garlic, lemon juice, lemon zest, fresh thyme, fresh oregano, fresh rosemary, fresh parsley, salt, and black pepper) to a large shallow mixing bowl. Mix well to combine.
Marinate the chicken. Add the chicken breasts to the marinade and mix well to coat in the marinade. Allow chicken to marinate for at least 30 minutes to two hours.
Prepare the grill. Clean grill grates and lightly oil with vegetable oil or cooking spray. Set grill to medium-high heat.
Grill the chicken. Remove the chicken from the marinade and place directly on the grill. Discard remaining marinade. Cover the grill and allow chicken to cook for approximately 5 minutes before reducing heat to medium. Allow chicken to cook for an additional 2 minutes, then use tongs to flip each breast over. Grill for an additional 5-7 minutes (or longer), or until the thickest part of your chicken registers 160 degrees F. with a digital meat thermometer.
Allow chicken to rest. Remove chicken breasts from the grill and set aside to a clean plate. Tent with foil and allow to rest for 5 minutes before slicing and serving. Enjoy!

CRISPY BBQ CHICKEN WRAPS

CRISPY BBQ CHICKEN WRAPS


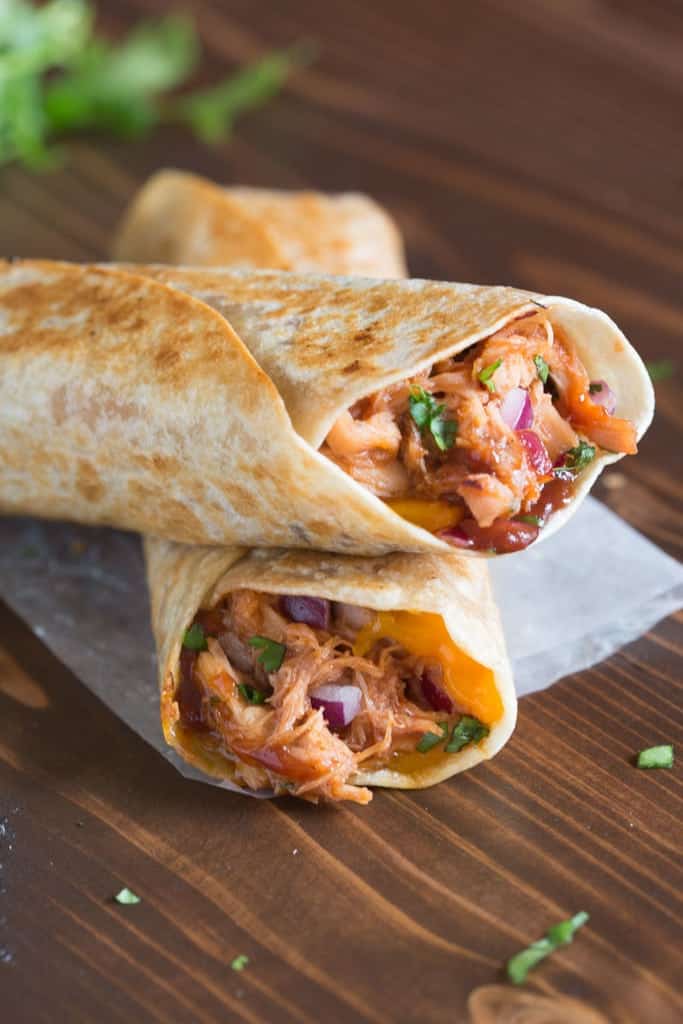
My family loves these Crispy BBQ Chicken Wraps, and I love that they’re such an easy dinner to make! Think all of the yummy, cheesy goodness of a BBQ chicken pizza, toasted in a crispy wrap.


Who needs a super easy dinner idea for their busy week? I’ve got you covered with these BBQ Chicken Wraps! These are the simplest wraps. When your 4-year-old asks for “seconds” at dinner, it’s a total win!


I love these wraps for a few different reasons. First, they are pan fried, so you get that delicious crunch that you love from chimichangas, without the extra fat.

Second, you can easily use leftover chicken or shredded rotisserie chicken to make this meal come together even quicker.

You can use homemade or store-bought BBQ sauce too. The ingredients are super simple and hopefully ones that you already have in your pantry. I would serve them with a side of fresh cold vegetables or a simple green salad.

My family loves these Crispy BBQ Chicken Wraps, and I love that they’re such an easy dinner to make! Think all of the yummy, cheesy goodness of a BBQ chicken pizza, toasted in a crispy wrap.

Prep Time10 mins
Cook Time5 mins
Total Time15 mins
Course: Main Course
Cuisine: American
Servings: 4
Calories: 458kcal

Ingredients

2 cups cooked chicken , shredded (rotisserie chicken works great!)
2 cups shredded cheddar cheese
1/4 cup fresh cilantro , chopped
1/4 cup red onion , chopped
1/2 cup barbecue sauce , your favorite kind
4-5 large flour tortillas
2 Tablespoons oil (vegetable or canola oil)

Instructions

Add chicken, cheese, onion, cilantro and BBQ sauce to a mixing bowl and toss to combine. Add more BBQ sauce if needed, to taste.
Layer tortillas with a 1/2 cup of the mixture. Starting at that end, roll the tortilla up, folding in the sides like a burrito.
Spray a large skillet generously with cooking spray and place the wraps seam side down on the greased skillet.
Gently brush the tops of the wraps lightly with oil, or spray them with cooking spray.
Turn the wraps every minute or two until they are golden and crispy on all sides. Serve immediately.
I love to serve these with Mexican Rice.

BAKED BANG BANG CHICKEN

BAKED BANG BANG CHICKEN


This post may contain affiliate links. Read my disclosure policy here.

Baked Bang Bang Chicken is a crispy chicken Chinese restaurant favorite served in a delicious spicy homemade sauce, ready in 30 minutes.


A chicken recipe that the whole family will enjoy with a cook time that fits into a busy schedule. This version of Bang Bang Chicken is baked rather than pan fried, making it a healthier option for dinner. The nice thing about this delicious recipe is how easy it is to find sides to go with it, because it compliments so many vegetables and proteins. Also, don’t let the breading fool you, Bang Bang Chicken is healthier than fried chicken.

To start, you are going to need four different shallow bowls to put your ingredients in. Mix together the ingredients for the sauce in bowl number one, and then set it aside while you finish making the rest. Whisk the eggs with some salt and pepper in bowl number two, and start drying the chicken with a paper towel. Once they’re dry, cut the skinless chicken breasts down into bite sized pieces. Set out your all-purpose flour in bowl number three, and your breadcrumbs, onion powder and garlic powder in your fourth and last bowl.

Next, you take your boneless chicken pieces, cover them in flour and them dip them in the egg mixture. Once the chicken is coated, set it in the breadcrumbs. Make sure to flip it over so that both sides get enough of the breadcrumbs on them, and then put the chicken on a baking sheet. Spray the chicken with vegetable oil and it’s ready to go in the oven, and with a 30 minute cooking time you have a chance to whip up a tasty side dish.


WHAT IS BANG BANG SAUCE?

Sriracha, mayonnaise, vinegar and sugar are our key Bang Bang Sauce ingredients. The spicy sauce is tangy, with just a little hint of heat to it. If you aren’t a fan of hot sauce, don’t worry: this is a mild heat that won’t melt your face off. To give it a little extra kick, try adding in some red pepper.

VARIATIONS ON BANG BANG CHICKEN

If you like the sauce, next time you should try it on other kinds of protein, like Bonefish Grill Bang Bang Shrimp. Bang Bang Sauce makes meat more tender due to the vinegar, and compliments the flavors of everything from tofu to chicken thighs. You never know what new recipes you’ll come up with by experimenting with Bang Bang Sauce on any variety of dishes.

WHY IS IT CALLED “BANG BANG?”

Bang Bang Chicken, or Bon Bon Chicken, is a beloved Chinese dish that is thought to have come from the Qing dynasty, although some chefs claim that it is even older, from the Ming dynasty. The traditional method for making it came about because of the need to butcher chicken quickly enough to justify the cost of labor. Chefs discovered that beating the chicken with a large stick or hammer broke the meat into smaller pieces that didn’t need to be cut smaller and could be served easier.


We took few shortcuts with our tenderization process (we couldn’t find a hammer). Instead, the vinegar in the sauce keeps the chicken juicy and tender.

SERVE WITH
Peanut Noodles: This is a great way to use that extra peanut butter you have lying around. Peanut sauce is a Thai favorite, and this delicious ramen dish has only five ingredients, so it’s easy to make.
Tofu Stir-Fry: Tofu cooked in soy sauce, sesame oil and rice wine, mixed with fresh vegetables that is ready in 20 minutes. You can also try it with Thai peanut sauce.
Crunchy Asian Lime-Peanut Slaw: Crunchy, zesty and healthy, lime-peanut slaw is a great lunch on the go.
Potstickers: You can’t go wrong with potstickers, they go with pretty much any dish.

FINISHED TEMPERATURE

Chicken is safe to eat once the internal temperature reaches 165 degrees F (73.9 degrees C), according to the USDA’s website. No matter how cooked the chicken looks, you should always test the thickest part with a probe thermometer to make sure it is completely done.

HOW LONG WILL IT KEEP?
Serve: Once you take it off the stove to serve it, don’t leave it out of the fridge for longer than two hours.
Store: If you wrap it in an airtight container, Bang Bang Chicken will be good for three days in the fridge.
Freeze: Don’t freeze it. Reheating frozen breading never turns out right, so you should definitely enjoy it fresh.

An easy dinner that is filling and fun, Baked Bang Bang chicken is easy to make and fun to eat.


Yield: 6 servings
Prep Time: 15 minutes
Cook Time: 15 minutes
Total Time: 30 minutes
Course: Main Course
Cuisine: Chinese

INGREDIENTS
1/2 cup light mayonnaise
2 tablespoons Sriracha
1 tablespoon sugar
1 tablespoon rice vinegar
2 large eggs
1/2 teaspoon kosher salt
1/4 teaspoon coarse ground black pepper
2 chicken breasts , boneless skinless
1 cup flour
2 cups panko breadcrumbs
1 teaspoon onion powder
1 teaspoon garlic powder
Vegetable oil spray

INSTRUCTIONS

Note: click on times in the instructions to start a kitchen timer while cooking.
Mix the mayonnaise, Sriracha, sugar and vinegar in a small bowl and set aside.
Whisk the eggs, salt and pepper in a shallow bowl.
Cut the chicken breasts into 1” chunks.
Place the flour into a shallow bowl.
Mix the breadcrumbs, onion powder and garlic powder together in a shallow bowl.
Preheat the oven to 375 degrees.
Coat the chicken with the flour, then dredge in the egg mixture, then into the panko mixture and add to a large baking sheet.
Spray with vegetable oil spray for 2 seconds.
Bake for 22-25 minutes or until golden brown.
While still hot, toss with the sriracha mayonnaise mixture.