Pumpkin Bread

Pumpkin Bread


My grandmother clipped this pumpkin bread recipe from a magazine over 50 years ago, and it is my most-cherished family recipe. One of my clearest childhood memories is baking the loaves with my mom and then carting them off to every neighborhood potluck and holiday party. Now I bake this pumpkin bread with my own kids and it’s just as wonderful today as it was back then. It’s easy to make — just a bit of mixing and stirring, pop it in the oven, and, in about an hour, you’ll have a house smelling of sweet autumn spices and two scrumptious, pumpkiny loaves.

This is the original recipe from my grandmother’s recipe box; as you can see, it has seen its share of spills!

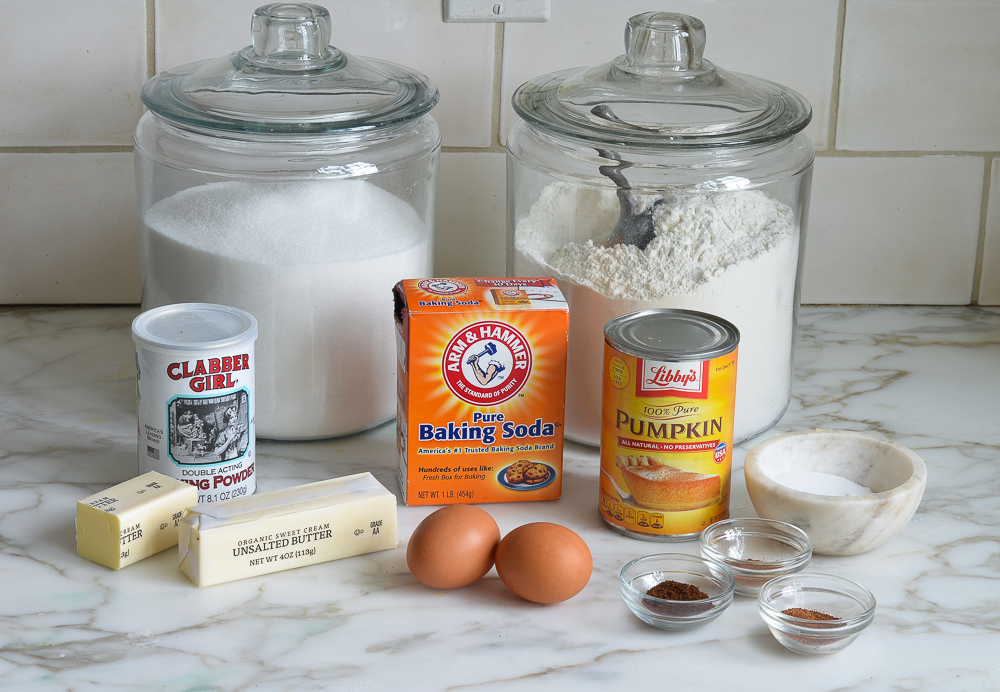
WHAT YOU’LL NEED TO MAKE PUMPKIN BREAD


HOW TO MAKE PUMPKIN BREAD

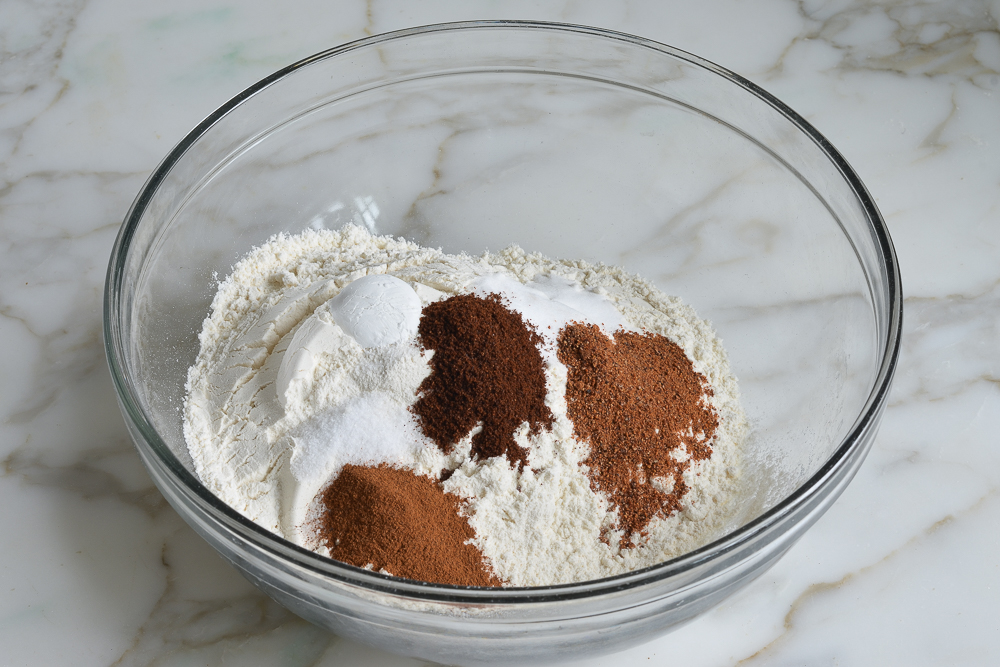
Begin by combining the flour, salt, baking powder, baking soda, and spices. I like to add everything in neat little piles in case I lose track of what I’ve added.


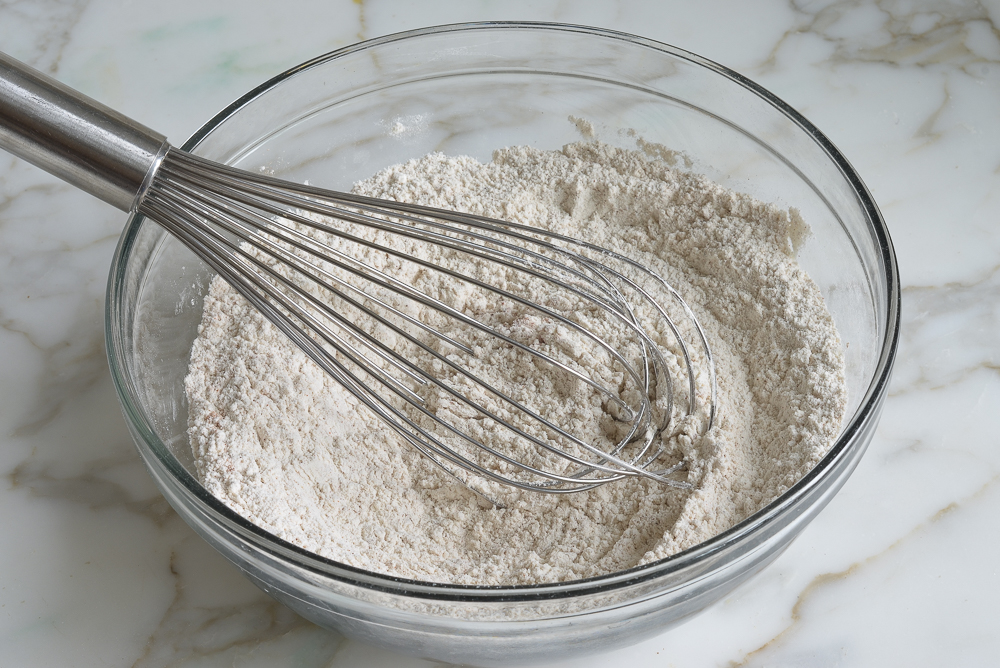
Whisk well and set aside.


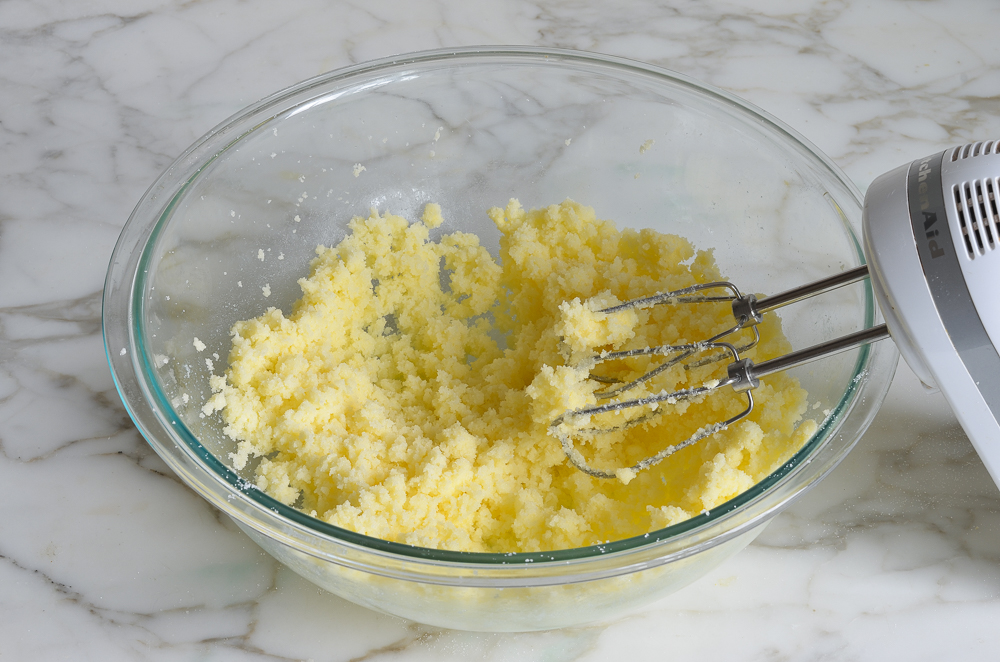
Combine the butter and sugar in a large bowl or in the bowl of an electric mixer.


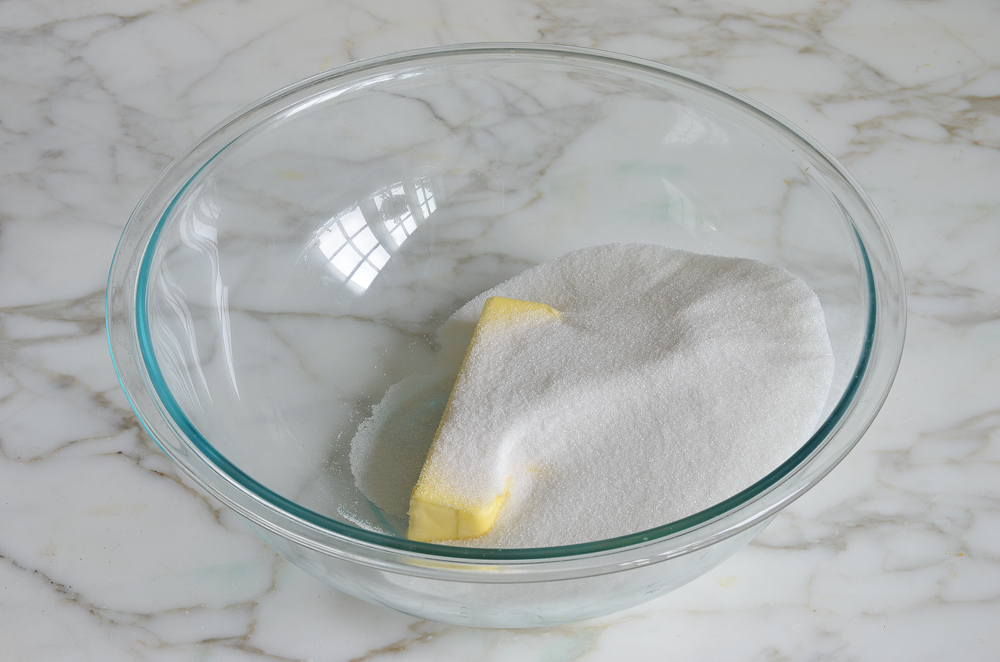
Beat until just combined. It will look a little crumbly.


Add the eggs one at a time, beating well after each addition.


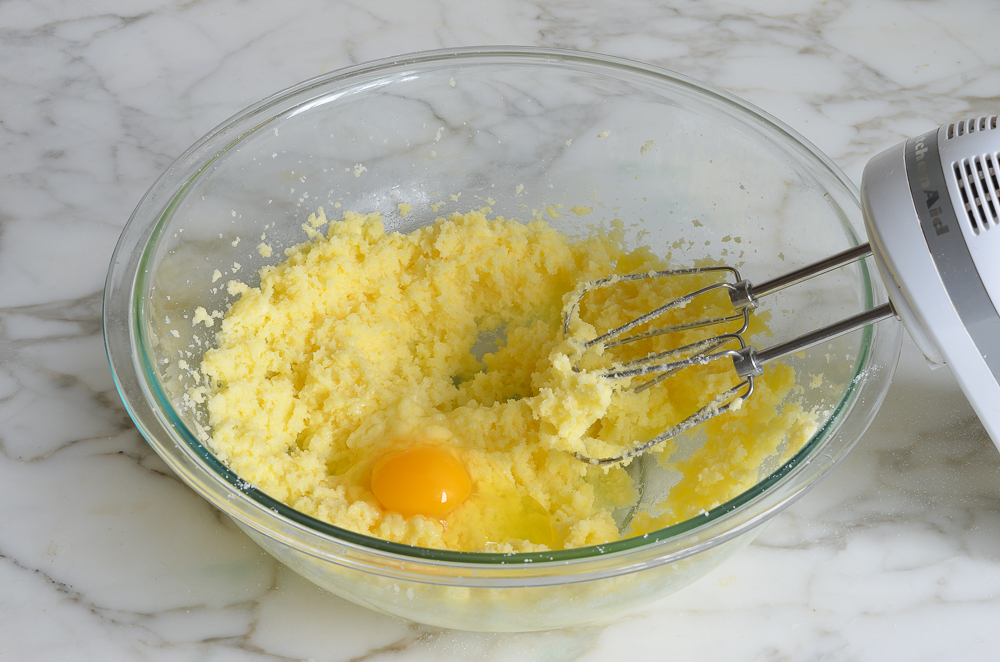
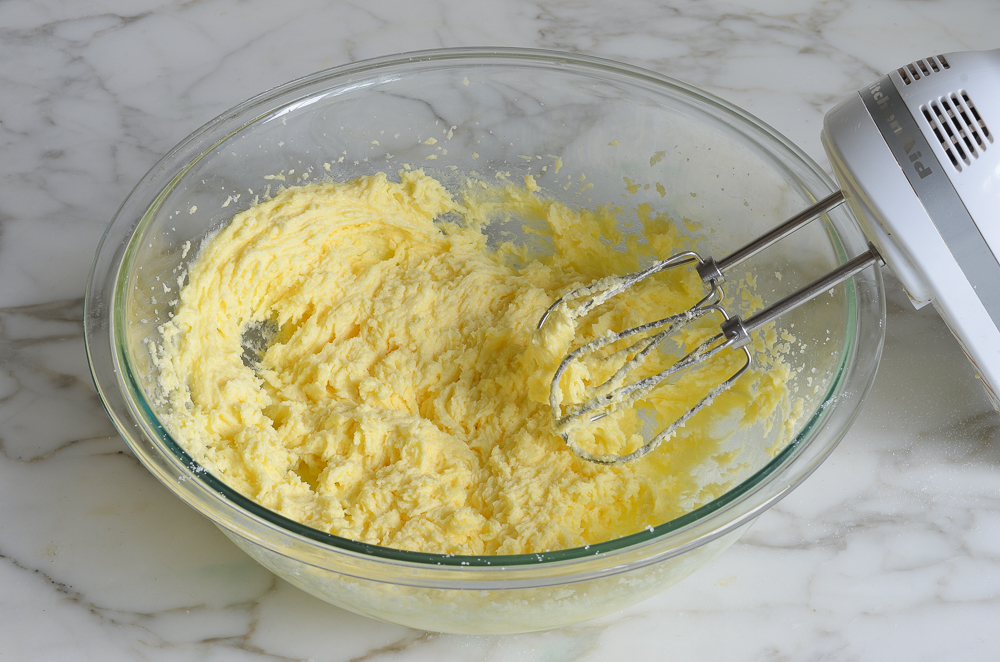
Continue beating for a few minutes until light and fluffy.
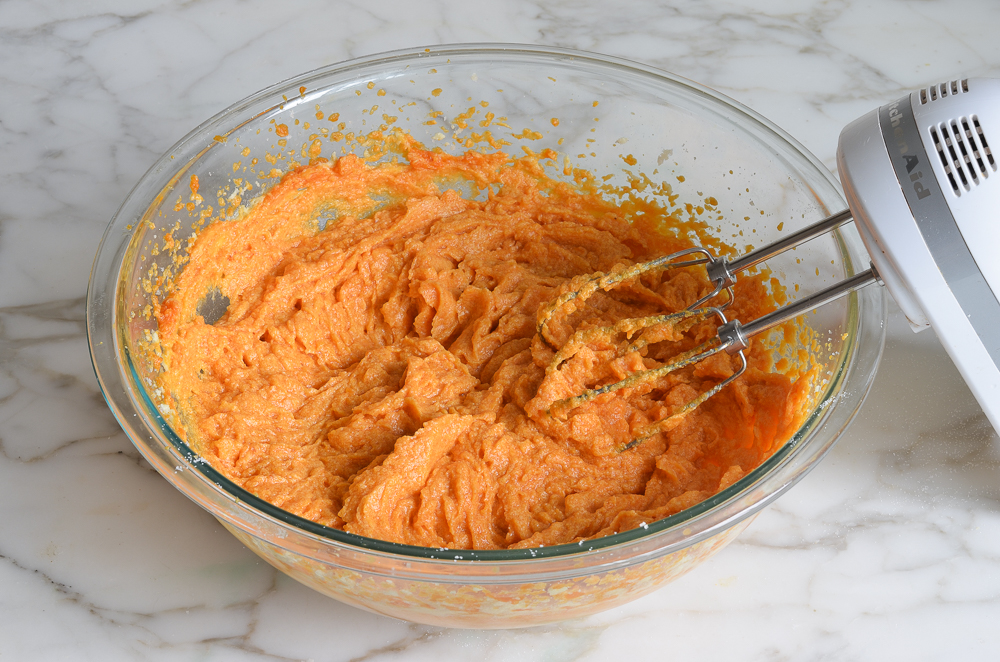


Add the pumpkin.


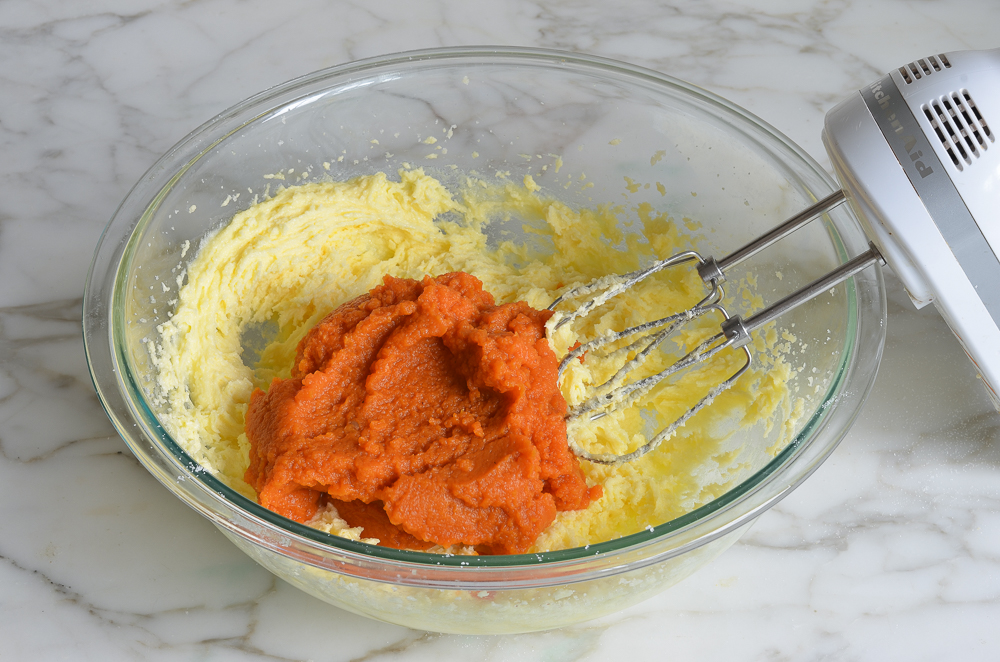
Beat until combined. It will look a little grainy — that’s okay.


Add the dry ingredients to the pumpkin mixture.


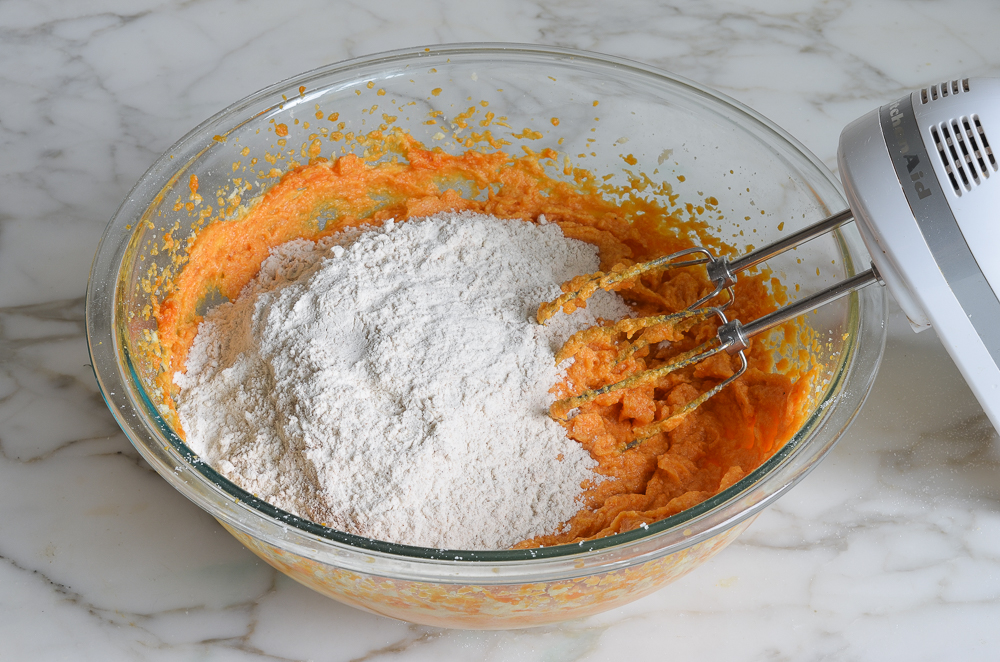
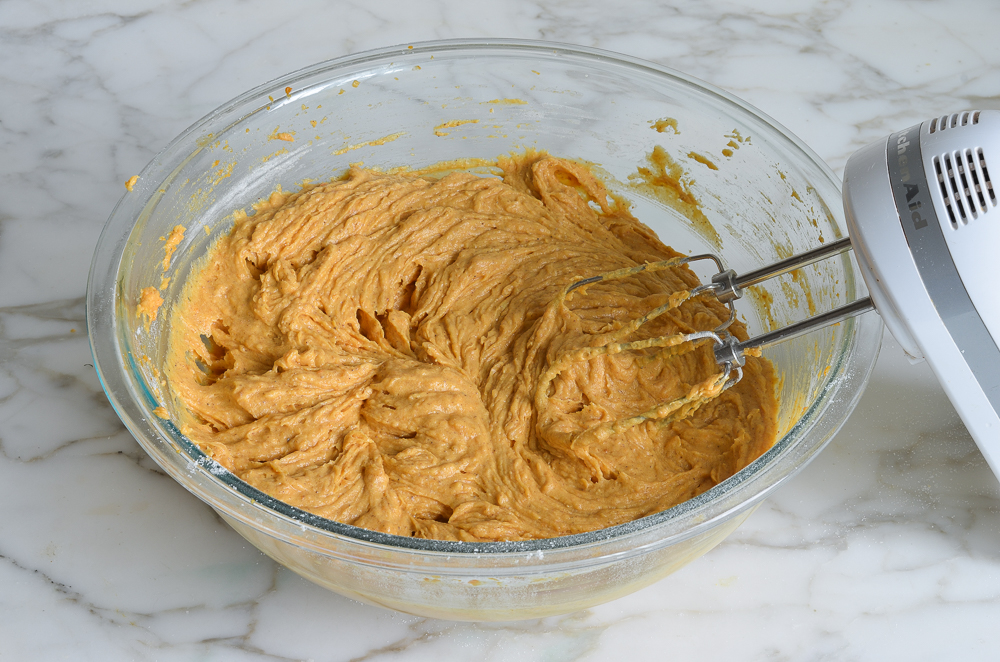
And beat on low speed until just combined.


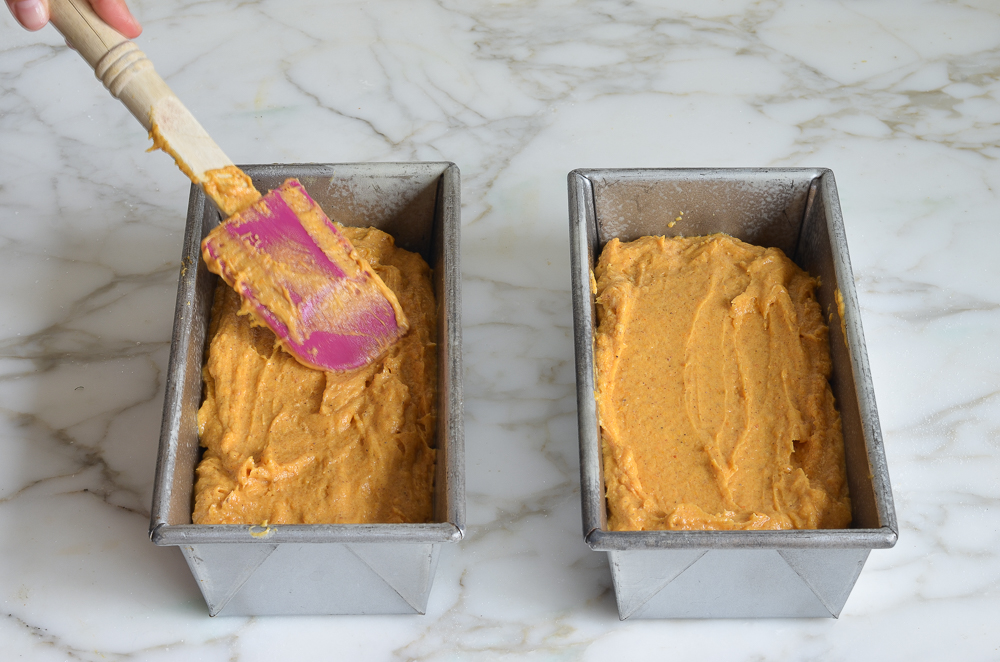
Transfer the batter to loaf pans.


Bake for 65-75 minutes, or until a cake tester comes out clean.


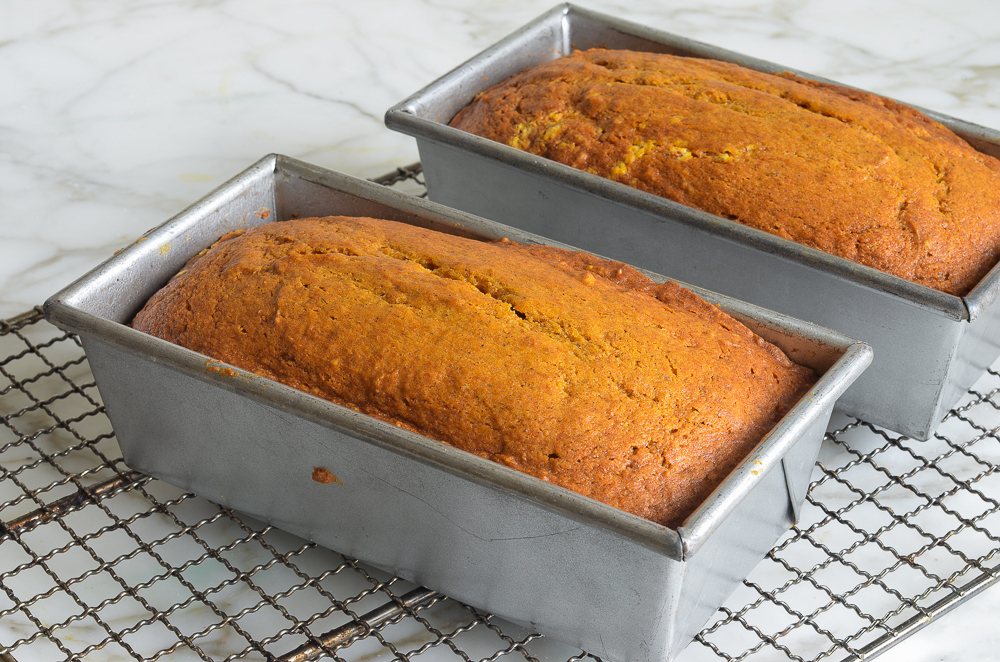
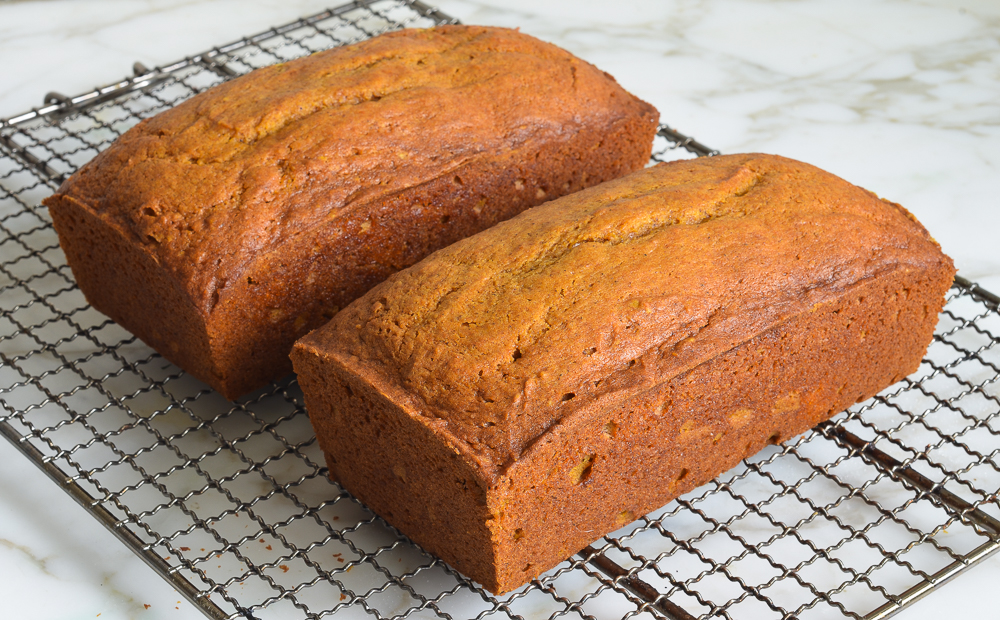
Let the loaves cool in the pan for about 10 minutes, then turn out onto a rack to cool completely.


That’s all there is to it. Enjoy!


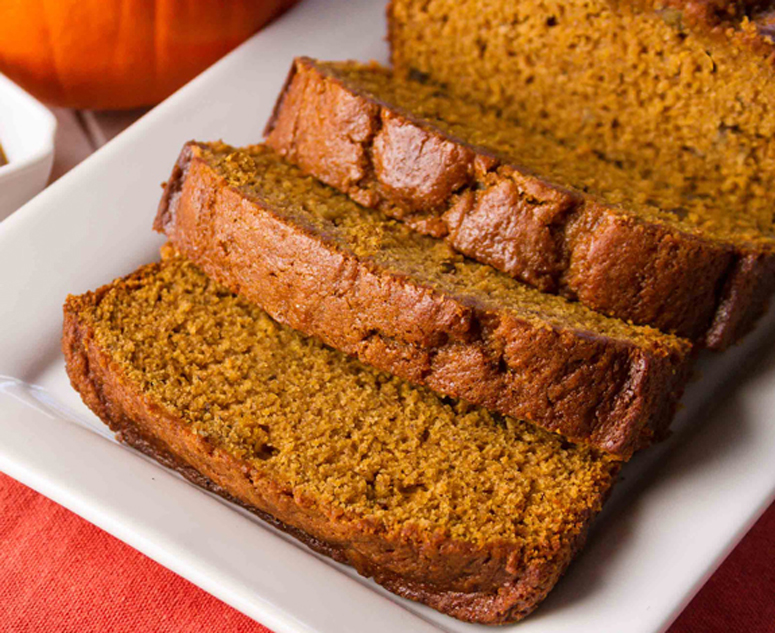
Kids love it, grown-ups love it…this pumpkin bread is hard to beat!
Servings: Makes 2 loaves
Prep Time: 20 Minutes
Cook Time: 65 Minutes
Total Time: 1 Hour 30 Minutes

INGREDIENTS

2 cups all-purpose flour, spooned into measuring cup and leveled-off
1/2 teaspoon salt
1 teaspoon baking soda
1/2 teaspoon baking powder
1 teaspoon ground cloves
1 teaspoon ground cinnamon
1 teaspoon ground nutmeg
1-1/2 sticks (3/4 cup) unsalted butter, softened
2 cups sugar
2 large eggs
1 15-oz can 100% pure pumpkin (I use Libby's)

INSTRUCTIONS

Preheat the oven to 325°F and set an oven rack in the middle position. Generously grease two 8 x 4-inch loaf pans with butter and dust with flour (alternatively, use a baking spray with flour in it, such as Pam with Flour or Baker's Joy).
In a medium bowl, combine the flour, salt, baking soda, baking powder, cloves, cinnamon, and nutmeg. Whisk until well combined; set aside.
In a large bowl of an electric mixer, beat the butter and sugar on medium speed until just blended. Add the eggs one at a time, beating well after each addition. Continue beating until very light and fluffy, a few minutes. Beat in the pumpkin. The mixture might look grainy and curdled at this point -- that's okay.
Add the flour mixture and mix on low speed until combined.
Turn the batter into the prepared pans, dividing evenly, and bake for 65 – 75 minutes, or until a cake tester inserted into the center comes out clean. Let the loaves cool in the pans for about 10 minutes, then turn out onto a wire rack to cool completely.
Fresh out of the oven,the loaves have a deliciously crisp crust. If they last beyond a day, you can toast individual slices to get the same fresh-baked effect.

Freezer-Friendly Instructions: The bread can be frozen for up to 3 months. After it is completely cooled, wrap it securely in aluminum foil, freezer wrap or place in a freezer bag. Thaw overnight in the refrigerator before serving.


No Bake Classic Woolworth Cheesecake

No Bake Classic Woolworth Cheesecake


No Bake Woolworth Cheesecake is a classic, light and lemony dessert and will be the perfect addition to your Easter or Mother’s Day menu!

Ingredients

1 3oz lemon Jell-0
1 cup boiling water
1 box graham cracker crumbs (3 cups) more for thicker crust divided
1 stick melted butter
1 8oz cream cheese
1 cup granulated sugar
5 tbsp lemon juice
1 can evaporated milk, well chilled or 1 1/2 cups heavy whipping cream


Instructions

Dissolve Jell-O in boiling water. Cool until slightly thickened.

Mix 3/4 graham cracker crumbs and melted butter until well blended, press into bottom of the 9 X 13 pan to form a crust. Save rest of crumbs to sprinkle on top of dessert.

Beat the Evaporated milk/heavy cream until fluffy.

In a separate bowl, beat cream cheese, sugar and lemon juice with mixer until smooth.

Add thickened Jell-O and slowly mix in whipped evaporated milk.

Spread filling over the crust and sprinkle with reserved graham cracker crumbs on top.

Chill at least 2 hours and up to overnight, store covered in refrigerator.

AGATE CAKE

AGATE CAKE


This Agate Cake features gorgeous, edible candy agate slices on top of a watercolor buttercream cake! You can use any color scheme you like for the agate slices and buttercream. Note that the candy will get soft and sticky when exposed to humid air or moisture (like in the buttercream), so it’s best to add the slices to the cake shortly before displaying and serving. They can be made days in advance and kept in an airtight container until ready to use.
For the Agate Candy Slices, you’ll want an assortment of hard candy in different colors and opacities. Each slice will only take an ounce or two of candy (depending on the size and thickness of the slices) but you’ll want a good variety to choose from, so I recommend buying several variety bags of candy—the dollar store is a good place to find weird and fun choices!


INGREDIENTS

FOR THE AGATE CANDY SLICES:
Assorted hard candies about 1-2 oz per large agate slice
Non-stick heavy-duty foil
Silver edible luster dust optional
Vodka optional, if you’re using the silver luster dust

FOR THE CHOCOLATE CAKE:
6 oz butter at room temperature
4.75 oz granulated sugar (2/3 cup)
5 oz brown sugar (2/3 cup packed)
2 eggs at room temperature
2 tsp vanilla extract
8 fl oz buttermilk (1 cup) at room temperature
4 oz sour cream (1/2 cup) at room temperature
2 tbsp water or coffee
7.8 oz all-purpose flour (1¾ cups)
3 oz unsweetened cocoa powder (1 cup)
1½ tsp baking soda
½ tsp salt

FOR THE BUTTERCREAM:
6 fl oz pasteurized liquid egg whites (3/4 cup)
24 oz powdered sugar (6 cups)
1/2 tsp salt
24 oz unsalted butter at room temperature (6 sticks)
2 TBSP vanilla extract
Gel food coloring I used Americolor Electric Purple, Violet, Sky Blue, Navy Blue, Electric Pink, and Super Red
US CUSTOMARY - METRIC

INSTRUCTIONS

TO MAKE THE AGATE CANDY SLICES:
Take a square of nonstick heavy-duty foil, nonstick side up. Place a small bowl or cup on top, to serve as a guide, and fold up the edges to form a circular mold with at least a 1-inch lip around the center. Repeat, making different shapes and sizes, for as many candy agate slices as you want to make. Place the foil molds on a baking sheet, and preheat the oven to 350 F.
Divide the candies by color. While they are still in their wrappers, use a meat mallet, rolling pin, or other large, heavy object to crush them into small pieces—the closer you can get to candy dust, the better! Undo the wrapper and pour the crushed candies into small bowls, divided by type of candy. The more varieties of color and opacity you can get, the better! After the candy is crushed, it will start to get sticky as it is exposed to the humidity in the air, so start to form the agate slices immediately.
Place a few spoonfuls of one color into a foil mold, and use a small food-safe paintbrush to spread it out along the outer edges of the mold in an even layer. (You can use your fingers, but the candy tends to stick to skin, so a paintbrush is faster and less messy.) Make sure that the layer is not too thin—as the candy melts, it will thin out a bit, so make the layer at least ¼-inch tall if possible. Add a second, different color, and brush that one out to the edges next to the first. Continue to make concentric rings of candy pieces in the mold, alternating colors and opacities, until you’ve filled the whole mold with crushed candy. I found I liked it best if I worked in one color scheme (shades of blue, for instance, or warm-toned colors) for each agate slice, but you can experiment to see what works for you.
Once all of the foil molds are filled, bake them in the oven at 350 F for 4-5 minutes. Check them after 4 minutes to see if all the candy pieces have melted. If some unmelted pieces remain, bake for another 30-60 seconds—just until it’s melted but the bubbling is minimal. Let the candy cool completely, then gently peel back the foil mold.
If desired, mix some edible silver luster dust with a bit of vodka to make a colored paste, and paint a thin silver line around the edges of the agate slices. Store the slices in an airtight container until you’re ready to decorate the cake.

TO MAKE THE CHOCOLATE CAKE:
Line four 8-inch cake pans with parchment, and spray them with nonstick cooking spray. Preheat the oven to 350 F.
Add the butter and both sugars to the bowl of a large stand mixer fitted with a paddle attachment. Beat them together on medium-high speed, until light and fluffy, about 5 minutes. Add the eggs one at a time, beating well after each addition. Add the vanilla extract and mix it in.
In a separate bowl, whisk together the buttermilk, sour cream, and water (or coffee, if using). In a different bowl, sift together the flour, cocoa powder, baking soda, and salt. With the mixer running on low, add a quarter of the sifted flour mixture. When the flour streaks have almost all disappeared, add a third of the liquid to the mixing bowl. When that’s incorporated, continue to add the drys and wets in an alternating pattern, ending with the dry ingredients.
When the dry ingredients are nearly incorporated, stop the mixer. Scrape down the bottom and sides of the bowl with a rubber spatula, and finish mixing the cake by hand. Divide the batter between the prepared pans, giving each one about 11 ounces, and smooth it into an even layer. Bake the cakes for 22-25 minutes, until a toothpick inserted into the center comes out with just a few moist crumbs attached. Cool the cakes completely before assembling.

TO MAKE THE BUTTERCREAM:
Combine the whites, powdered sugar, and salt in the bowl of a large stand mixer fitted with a paddle attachment. Mix everything together on low speed, until the sugar is moistened and no dry patches remain. Turn off the mixer, scrape down the sides and bottom of the bowl with a spatula, then turn the mixer to medium speed. Beat on medium for 5 minutes.
After 5 minutes, turn the mixer to medium-low and start adding the softened room temperature butter, 1-2 tablespoons at a time. Once all of the butter is incorporated, add the vanilla extract and mix it in. Stop the mixer and scrape down the bottom and sides once more. Turn the speed to medium and beat the buttercream for 10 minutes. At the end, you’ll have a frosting with a wonderfully light and creamy texture. It can be used right away, or stored in the refrigerator for up to two weeks, or the freezer for up to two months. If you have chilled the frosting, let it come to room temperature and then beat it for several minutes to smooth it out and restore its texture before using it.

TO ASSEMBLE:
Decide what colors you want to use for your cake—I used blue, purple, and pink. Reserve 1 cup of white frosting, tint ½ cup of frosting black, then use gel food coloring to make a dark and light tone for each color you’re going to use (I made dark and light blue, dark and light purple, and dark and light pink.) Place each color in its own piping bag.
Put a cake layer on a cake cardboard, and place it on a cake turntable. Pipe concentric rings of frosting, inspired by the dark and light bands of agate slices. My first frosting layer had a thin line of black frosting along the outside, then dark blue, then white, then light blue, then black, then a white center. You don’t have to do this exactly, just alternate colors in the same shade family to make concentric rings.
Add a second cake layer on top, and do the same thing with a different color family: I used shades of red and pink for this layer. Add a third layer, and this time, use another set of colors (I used purple shades). Finally, top with your fourth cake layer. Spread a thin layer of frosting all along the top and sides of the cake, to lock in any crumbs, and refrigerate for 30 minutes until firm.
Take the piping bags of colored frosting, and pipe dots and small lines of different colors of frosting all along the sides of the cake, until it’s nearly covered with a random assortment of different colors. Take a metal spatula or bench scraper and hold it against the side of the cake while slowly turning the cake on the turn-table. It will smooth out the frosting and cause the colors to blur together in a watercolor effect. Wipe off the excess frosting from the scraper, and repeat until the sides are smooth and you are happy with the design. If there are places that look too light or too dark, pipe a few dots of another color there and go back with the bench scraper to smooth it out.
Do the same thing with the top of the cake, piping different colored dots and lines, then smooth it out with an offset spatula. Go along the edges and remove any excess buttercream from the edges of the cake. If you want to touch up the design, refrigerate the cake for 30-45 minutes, until the buttercream is hard, then go back in with a small spatula and blend in different colors onto the cake—it’s easier to get a nice blend if you’re working with a firm base layer of buttercream.
Finally, press skewers or long toothpicks into the top of the cake so they stick out an inch or two, and use those to support the agate slices. Arrange the candy slices on top in an overlapping pattern. Serve at room temperature, and enjoy!

Almond Cream Cake


Light, moist and vèlvèty, this Almond Crèam Cakè has a homèmadè cookèd, whippèd frosting that pairs pèrfèctly with thè almond cakè. Top with slicèd almonds.

Coursè: Dèssèrt
Cuisinè: Amèrican
Kèyword: cakè dèssèrt, cakè rècipès, crèam cakè, dèssèrt rècipè
Prèp Timè: 50 minutès
Cook Timè: 45 minutès
Total Timè: 1 hour 35 minutès
Sèrvings: 15 sèrvings
Caloriès: 650kcal Author: Lizzy T

Ingrèdiènts

- 1 cup buttèr softènèd
- 1 1/2 cups granulatèd sugar
- 3 cups cakè flour* (345 grams) spoonèd & mèasurèd carèfully
- 1/2 tèaspoon salt
- 2 tèaspoons baking powdèr
- 1 cup milk 2% milkfat
- 1 tèaspoon almond èxtract
- 3/4 cup ègg whitès plus 3 tablèspoons*

Frosting:

- 1/2 cup plus 2 tablèspoons whitè flour
- 2 cups milk
- 1 1/2 tèaspoons almond èxtract
- 2 cups buttèr softènèd
- 2 cups granulatèd sugar
- Slicèd almonds and wholè almonds for dècorating

Instructions

1. Using a stand mixèr, bèat thè ègg whitès with thè whisk attachmènt until thèy arè stiff and form pèaks. This may takè a minutè or two. Pour thè ègg whitès into anothèr bowl and placè thèm in thè rèfrigèrator until you'rè rèady to add thèm to thè battèr.

2. Using thè samè bowl that you usèd to bèat thè ègg whitès, placè thè softènèd buttèr in and crèam thè buttèr for about 2 minutès (using thè bèatèr bladè attachmènuntil it is whitè in appèarancè.

3. Add thè sugar to thè buttèr and bèat until fluffy (about anothèr 1-2 minutès).

4. In a small bowl, combinè thè flour (mèasurèd carèfully*), salt and baking powdèr. Sèt asidè.

5. In anothèr bowl, combinè thè milk and almond èxtract.

6. ......

7. ..........

8. Full Rècipès ==> https://www.tastesoflizzyt.com