Juicy Oven Baked Chicken Breast Recipe

Juicy Oven Baked Chicken Breast Recipe

This Juicy Oven Baked Chicken Breast Recipe is ultra tender every time thanks to these tips and tricks I’m sharing with you!
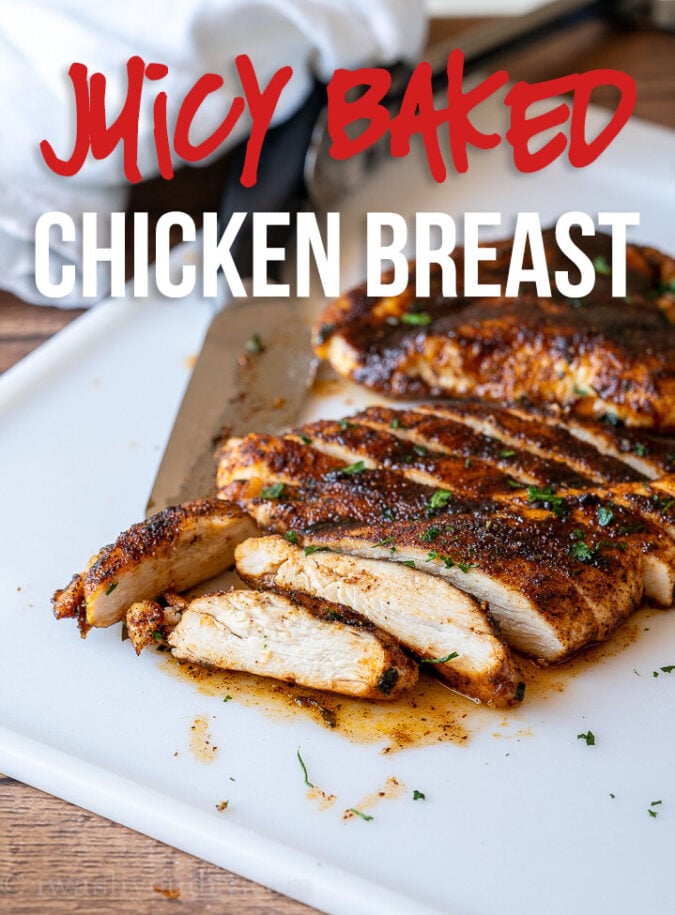
Say goodbye to boring, bland and dried out baked chicken breasts.

Yes, it’s true, you CAN have tender and juicy white meat chicken that’s BAKED in the oven!

Oven Baked Chicken Breast Recipe
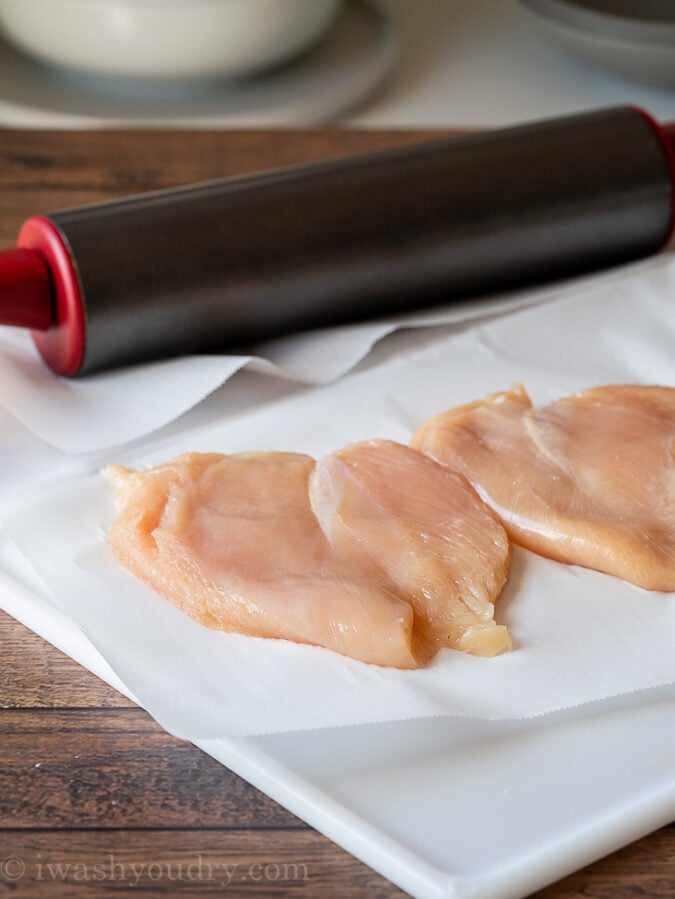
Start by using a heavy rolling pin or meat mallet to pound your chicken breast to an even thickness.
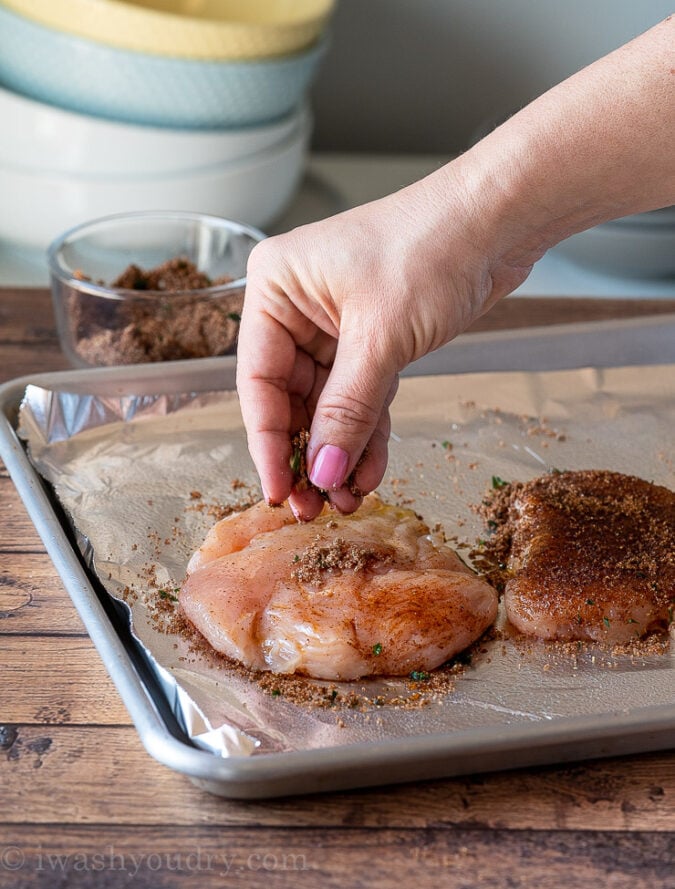
Season liberally with my special seasoning blend (in the recipe card below).
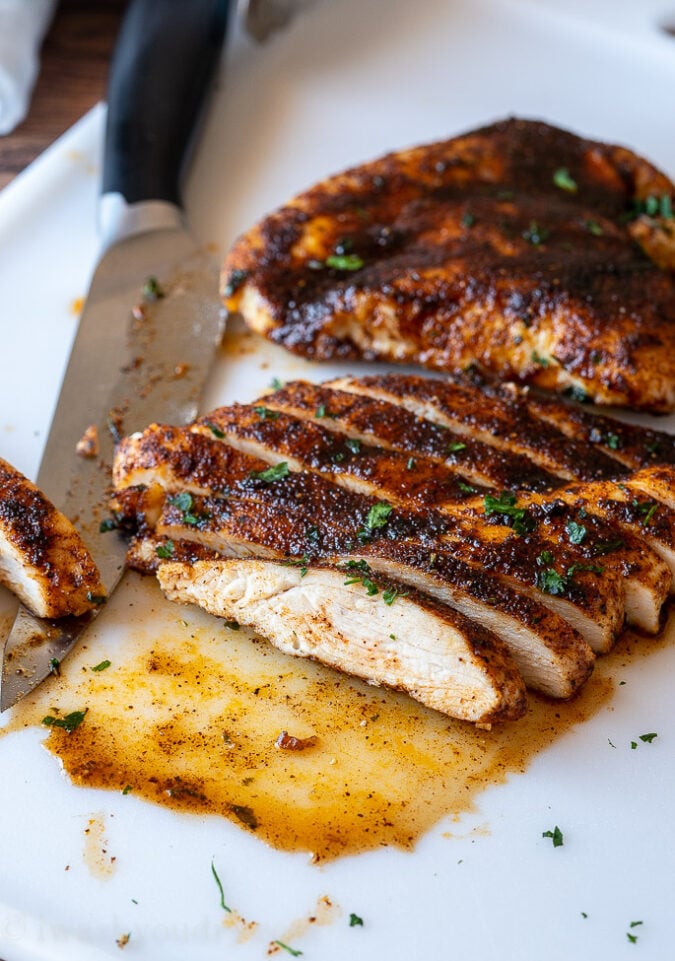
Bake for just 20 minutes, then let rest for 5 minutes under foil before slicing.


How To Get Juicy Baked Chicken

Is it really necessary to pound the chicken breasts to an even thickness before baking? Yes, it is absolutely necessary if you want juicy chicken. Here’s why…

The natural shape of a chicken breast is teardrop, with a thicker, meatier portion at the bottom of the teardrop. Chicken must be cooked to 165 degrees F before safely consuming. If you do not pound the chicken down, the thicker portion will take longer to cook to the safe temperature, while the thinner section of chicken breast will get overcooked and result in a dried out, choke-it-down chicken breast.

Do yourself a favor and pound the chicken.


The Perfect Chicken Seasoning Blend

I’m sure you could season your chicken breasts with just salt and pepper and they would still come out fine, but this blend of spices will take your baked chicken to the next level.
Brown Sugar – the sugar helps to tenderize the chicken, trust me, it’s a good idea.
Chili Powder – adds a delicious smoky flavor, plus gives great coloring to chicken
Parsley – great for adding a balanced herb flavor
Salt – the seasoning of life
Pepper – because it goes with salt
Garlic Powder – adds delicious flavor
Onion Powder – compliments the garlic powder
Cumin – this really gives the chicken something special

Combine the spices together and rub generously into the chicken breast before baking.

How Long To Bake Chicken Breast?

Since we’re not going to sear chicken in a skillet before finishing of in the oven, you’ll want to start your chicken at a high temperature in the oven.

Make sure your oven is preheated to 425 degrees F before baking. Cooking at a high temperature will help to lock in those juices, resulting in tender, juicy chicken every time.
4 to 6 ounce chicken breasts – 18 minutes
7 to 8 ounce chicken breasts – 20 minutes
9 ounce and above – 22 minutes

Remember to use a meat thermometer to check for an internal temperature of 165 degrees F. Let chicken breasts rest for 5 minutes under a loose sheet of foil before slicing.

More Baked Chicken Breast Recipes
Broccoli Cheese Stuffed Chicken Breasts
Salsa Chicken and Rice
Chicken Caprese Skillet

I’m confident that you’ll get fantastic results with this recipe as long as you follow the tips and method I’ve shared here.

Author: Shawn
Prep Time: 5
Cook Time: 20
Total Time: 25 minutes
Yield: 4 to 6 1x
Category: Dinner
Method: Baked
Cuisine: American

INGREDIENTS
4 (7 to 8 oz) boneless, skinless chicken breasts
2 tsp olive oil
3 tbsp brown sugar
1 tbsp chili powder
1 tsp parsley flakes
1/2 tsp salt
1/2 tsp black pepper
1/2 tsp garlic powder
1/2 tsp onion powder
1/2 tsp cumin

INSTRUCTIONS


Pre heat oven to 425 degrees F. Line a baking sheet with foil and spray with non stick spray.

Place the chicken breasts between two sheets of parchment paper and pound to an even thickness. Drizzle both sides of chicken with olive oil.

Combine seasonings and sprinkle generously over both sides of the chicken breasts. Bake for 20 minutes. Remove from oven and cover loosely with foil for 5 minutes before slicing. Enjoy!

NOTES

If your chicken breasts are smaller in size, reduce the cook time to 18 minutes. If the chicken breasts are larger, increase cook time to 22 minutes. Check that internal temperature reaches 165 degrees.

INSTANT POT ROTISSERIE CHICKEN

INSTANT POT ROTISSERIE CHICKEN


I love a good rotisserie chicken. I mean, I really love a good rotisserie chicken.

It’s so versatile, and has so many uses. It’s great on its own with a few roasted veggies and it’s great with pastas and soups as a fill in. But more importantly, they are so perfect with nachos and quesadillas during the wee hours of the night.
Or wait. Am I the only one making leftover rotisserie chicken nachos at 10PM?
I hope not.
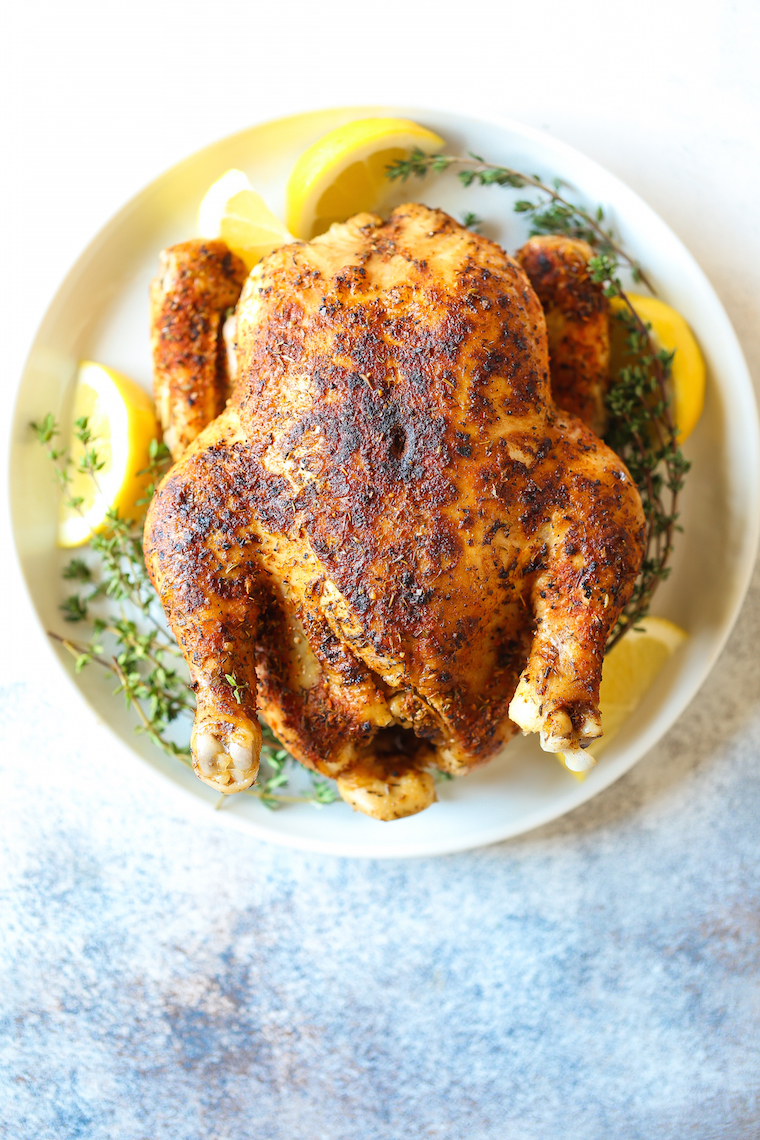
But nonetheless, I am now sharing an effortless Instant Pot rotisserie chicken recipe! It’s made in the IP completely from start to finish – with a quick sear on both sides for that beautiful golden brown color before it sits in that IP for 28 minutes. Boom. Done.

Just let it release naturally as you prep your sides for dinner.

Oh and when I say dinner, I really mean nachos.

yield: 6 SERVINGS

prep time: 45 MINUTES

cook time: 40 MINUTES

total time: 1 HOUR 25 MINUTES

INGREDIENTS:

2 teaspoons kosher salt
1 teaspoon freshly ground black pepper
2 teaspoons dried thyme
1 1/2 teaspoons paprika
1 teaspoon dried oregano
1 teaspoon onion powder
1/2 teaspoon garlic powder
1 (4-pound) whole roasting chicken
1 lemon, halved
2 tablespoons canola oil
1 cup chicken stock

DIRECTIONS:


In a small bowl, combine salt, pepper, thyme, paprika, oregano, onion powder and garlic powder.
Remove giblets and excess fat from the chicken cavity. Dry chicken thoroughly with paper towels. Season chicken and chicken cavity with salt mixture. Stuff cavity with lemon.
Set 6-qt Instant Pot® to the high saute setting. Add canola oil and chicken, breast side down, and cook until evenly golden brown, about 4-5 minutes. Using tongs, flip, and cook for an additional 4 minutes; set aside.
Place metal trivet into the pot and add chicken stock. Gently place chicken on top of the trivet. Select manual setting; adjust pressure to high, and set time for 28 minutes. When finished cooking, naturally release pressure according to manufacturer’s directions, about 20-30 minutes. Let rest 10-15 minutes.
Serve immediately.


Instant Pot Chicken Fried Rice

Instant Pot Chicken Fried Rice


Chinese take-out right in your Instant pot. Packed with chunks of tender chicken, scrambled eggs, carrots and peas, this Instant pot chicken fried rice is easier and healthier. No more take-outs!!!

I’m having a love affair with my Instant pot these past few months. Check out all these amazing Instant Pot Recipes

It took a while to get going ( I mean, mine was still in the original packaging for at least 2 months after purchase). But, once I realized the convenience, there is no stopping.

My favorite part of a fried rice in an instant pot is that it does not require cooked, cooled leftover rice. No planning needed!

I’m all set to make chicken fried rice when the craving hits or in need a quick fix for school lunch box. An absolutely perfect side dish for all your favorite Chinese dishes or just a simple meal in itself.

Instant Pot Shrimp Pasta with Tomato Cream Sauce – delicious instant pot pasta recipe that is ready in under 30 minutes

Why Instapot chicken fried rice?

Instant pot was a game changer. I began with cooking white rice and slowly exploring more variations like this Instant Pot cilantro Lime Rice. So simple and is a great base for all your Mexican meals.

Ever since, I have been putting my instant pot to good use. Chicken makes it’s appearance at least three nights a week in our home. So, chicken fried rice instant pot was a no brainer. My favorite part is that you don’t have to depend on leftover rice to enjoy hot pressure cooker chicken fried rice whenever your craving hits.

It is so convent that it is perfect for weekday meals and a balanced one as well <— carbs, protein and veggies, all in one.

Wanna another reason? If I haven’t sold this recipe to you already:) Leftovers make great lunch box for next day. Click here for more lunch box ideas.

Instant Pot Pasta with Chicken Meat Sauce <—- Another delicious Instant Pot dinner recipe

How to make chicken fried rice in instant pot?

Step-1 : Heat oil in instant pot, scramble eggs and transfer

Step-2: If using frozen peas, add frozen peas in the now empty pot and cook for about a minute until thawed. Transfer

Step-3: Add a touch more oil, saute chicken, then onion and garlic.

Step-4: Add rinsed and drained rice, saute for about 20 seconds.

Step-5: Stir in chicken stock and chopped carrots.

Step-6: Cook —> There are two different methods given. Scroll below for more details.

Step-7: Stir in soy sauce, toasted sesame oil, ground black pepper, scrambled eggs and peas.

Instant pot fried rice for the win!
How to make non-mushy chicken fried rice in Instant pot?

It totally depends on your rice, yes! Many, many readers have had huge success with this recipe and there are a few who have had mushy rice. Reason? it depends on the basmati rice you are using. Not all brands, packages of rice are the same though they all say basmati rice in the package —> Some need more water and some less. Some need more cooking time and some less.

How do we solve this? I came up with two different cooking methods for you (you are welcome!). So, which method is right for you?
Cooking method-1
If you have tried this recipe already and you have had great success. Just stick to this.
If you cook different rice recipes in your Instant pot and use the rice setting and love the way the rice gets cooked , then this is right for you.
Cooking method-2
If you have tried this recipe before and had a mushy outcome, then go for this.
If you are not sure about your rice or cooking method.

Another important note for cooking rice in instant pot —–> It depends on the size of your Instant pot.

I tried making this recipe in a 3-quart Instant pot and a 8-quart Instant Pot. Result? Fried rice in 8-quart was much more firmer that the 3-quart. So, if you a own a larger Instant Pot, then use that for firmer rice.
Few notes on making this instant pot chicken fried rice recipe:
Rinse rice in a strainer and let it hang out for couple of minutes to drain as much water as possible. This step is important to not only wash the rice, as well as remove excess starch <— less mushier rice
Do not double the recipe. It’s just too much to work with and makes the rice overcooked in the process.
I used 1 cup of 33% less sodium chicken stock and the salt was perfect along with soy sauce. But, if you have regular sodium chicken stock, then I’d suggest using 3/4 cup stock + 1/4 cup water.

Check out the shrimp version of this chicken fried rice —-> Instant Pot Shrimp Fried Rice

Can I make Instant pot Chicken Fried Rice with Brown Rice?

One of my reader made it with great success. Here is how she made it:

Followed cooking Method #1 AND doubled the recipe (she used the Duo Plus 8 qt and the rice setting was 12 minutes as well).

“The recipe came out PERFECT. I added a level teaspoon of pepper (for the original recipe, I would do 1/2 a teaspoon) and an additional teaspoon or two of soy sauce. Tasted it, and it really is just perfect!”

I love you guys!!!

Instant Pot Pasta with Chicken Meat Sauce <—– Delicious Instant pot pasta recipe made with ground chicken

More Instant pot weeknight meal favorites:

Instant Pot Chicken Parmesan Pasta – All the flavors of classic chicken parmesan made into a one pot, comforting meal.

Instant Pot Shrimp Fried Rice – Chinese take-out right in your Instant pot. Packed with chunks of succulent tender shrimp, scrambled eggs, carrots and peas, this Instant pot shrimp fried rice is easier and healthier.

Instant Pot No-Cream Pasta with Tomato Cream Sauce – So creamy, so rich, so amazing yet so much healthier Instant pot no-cream pasta with tomato cream sauce. You will never miss the cream!

Instant Pot Thai Curry Soup with Shrimp and Sweet Potato – It is the perfect cozy, comforting soup anytime!!! Loaded with shrimp, spinach and sweet potato, this Instant pot Thai curry soup is quick and easy.

Baked Barbecue Chicken Meatballs with Avocado – Incredible chicken meatballs baked in muffin tin!! Moist, saucy, easy and delicious baked barbecue chicken meatballs with avocado are easy enough for weeknight dinner and great for meal prep.

Chinese take-out right in your Instant pot. Packed with chunks of tender chicken, scrambled eggs, carrots and peas, this Instant pot chicken fried rice is easier and healthier. No more take-outs!!!

Prep Time5 mins
Cook Time18 mins
Total Time23 mins
Course: Main Course
Cuisine: Chinese
Servings: 4


Ingredients

3-4 tablepsoons vegetable oil
2 large eggs, whisked to combine
1 cup frozen peas
2 boneless skinless chicken thighs, cut into bite size chunks
1 cup chopped onion
3 garlic cloves, minced
1 cup white basmati rice, rinsed and drained well
1 cup (33% less sodium) chicken stock refer notes
2 medium carrots, peeled and chopped into 1/4 inch cubes
3 tablepsoons soy sauce (more or less as desired)
1/2 teaspoon toasted sesame oil
ground black pepper to taste

Instructions

Set instant pot in saute mode. When hot, add 1-2 tablespoons vegetable oil. Add eggs and scramble, remove on to a plate when done. (You don't have to continuously stir eggs. Stir 'em every 20 seconds or so, until cooked. This will yield larger pieces of scrambled eggs)
Into the now empty pot (still in saute mode), add frozen peas. Saute, until thawed completely . The moisture from peas will help in loosening the eggs sticking to the bottom of the pan. Try scraping most of it. Transfer peas to the plate.
Add 1-2 tablespoons oil to the now empty instant pot, Add chicken in a single layer, cook undisturbed for 2 minutes. Stir around and then add chopped onions and garlic, cook (stirring occasionally) for another 2-3 minutes.
Add rinsed and drained rice and saute for about 20 seconds and then stir in chicken stock and carrots. Scrape sides, close Instant pot, lock lid, set valve to sealing, press cancel. (Refer notes below to see which method is right for you).
Cooking Method-1 : Select rice mode. (This is an automatic setting and mine took 12 minutes). When cook time is done, let the Instant pot be in warm mode for 5 minutes. When 5 minutes is done, turn valve to vent and let pressure release.Press cancel and open lid. Stir in cooked eggs, peas, soy sauce, sesame oil and ground pepper.
Cooking Method-2 : Cook for 3 minutes on manual mode. When cook time is done, let it be in warm mode for 10 minutes (for al dente rice) and 15 minutes (for more softer rice) When cooking time is done, turn valve to vent and let pressure release.Press cancel and open lid. Stir in cooked eggs, peas, soy sauce, sesame oil and ground pepper.
Some readers have suggested that doubling the recipe results in slightly overcooked rice. So, I'd suggest using the recipe as is.
Remove pot insert from the instant pot base and place on a wire rack to cool for 5-10 minutes, before serving.
Enjoy hot Instant pot chicken fried rice for lunch/dinner or cool and pack into meal prep containers for the week.

Notes
Which cooking method is right for you?
Cooking method-1

If you have tried this recipe already and you have had great success. Just stick to this.
If you cook different rice recipes in your Instant pot and use the rice setting and love the way the rice gets cooked , then this is right for you. Cooking method-2

If you have tried this recipe before and had a mushy outcome, then go for this.
If you are not sure about your rice or cooking method. Rice - any long grain white basmati rice can be used. Rinse rice in a colander until water runs clear. Let it hang out in the strainer at least for 5 minutes, to drain almost all the water.
Chicken stock - I used 1 cup of 33% less sodium chicken stock and the salt was perfect along with soy sauce.


Instant Pot Tuscan Chicken Pasta

Instant Pot Tuscan Chicken Pasta


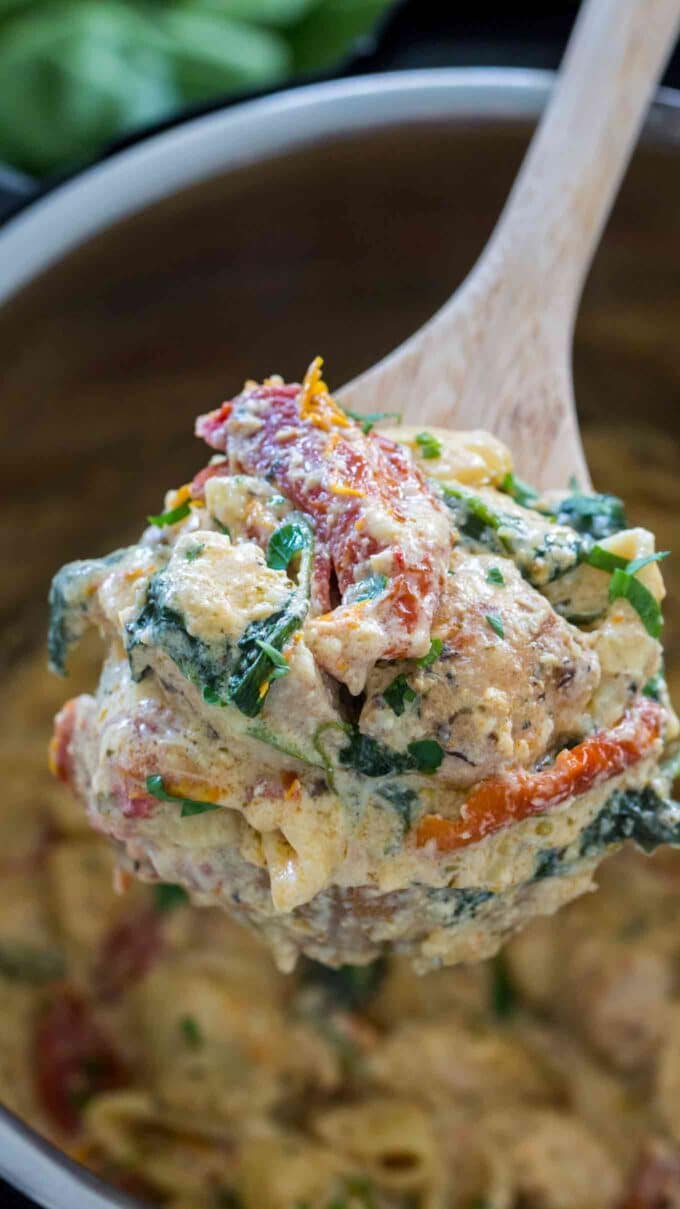
Instant Pot Tuscan Chicken Pasta is very easy to make, creamy and delicious with perfect juicy chicken, sun-dried tomatoes and spinach.

We love making easy and delicious pasta in the Instant Pot, like our popular Chicken Pot Pie Pasta, IP Pizza Pasta, and the cheesy Pressure Cooker Cheeseburger Macaroni.

Instant Pot Tuscan Chicken Pasta is one of my favorites takes on the Italian classic dish. This recipe is very easy to make. I love that you only have to dirty your pressure cooker and the end result is a very creamy and cheesy pasta with sun-dried tomatoes, chicken and spinach.

After you cook the pasta it may look a little runny, don’t worry, you need all that liquid to create the amazingly creamy sauce. I like to use a mix of cream cheese and Parmesan cheese because it combines the most amazing texture and flavor. The secret ingredient that I am also sharing with you, is adding evaporated milk to the pot. As a result, the pasta turns out perfectly cheesy, rich and very creamy.

The sun-dried tomatoes add a bit of chewiness and tartness, while the spinach adds some freshness and a pop of color. Such a hearty and delicious dinner!

Instant Pot Tuscan Chicken Pasta Recipe Tips:
Preferably use organic chicken for this meal.
Also, you can use chicken breast meat or boneless/skinless chicken thighs meat.
You don’t have to pre-cook the pasta for this recipe, you add the uncooked pasta to the pot and cook for 4 minutes.
In addition, you can make this dish with turkey as well, the cooking time will still be the same if you use the same amount of the other ingredients listed in the recipe.
For a spicier kick, add red pepper flakes.
If desired, use add some basil. Use about 1 tsp dried or fresh basil.
You can also add 1 cup of shredded mozzarella or provolone cheese at the end.
For a vegetarian version, skip the chicken.
Similarly, this meal can be made with other types of pasta, I like to use large shells or fusilli pasta.
Instant Pot – I have the 6 quarts one. It makes weeknight meals so much easier.
How Long Do You Cook Pasta In The Instant Pot?

Pasta is cooked in an Instant Pot or other electric pressure cookers, usually between 4-6 minutes, depending on the recipe and type of pasta. Most of the time followed by a Quick Pressure Release.
Substitutes For This Tuscan Chicken Pasta Recipe
You can use frozen-thawed and drained spinach instead of fresh.
Also, light cream cheese will work in place of regular if preferred.
Garlic powder could replace fresh, I’d go with about 3/4 tsp.


How To Make Tuscan Chicken Pasta In The Slow Cooker?

Making this delicious pasta in the slow cooker is a great alternative. We have the Crockpot version of this recipe in this link.
How Do You Reheat This Dish On The Stove?

Usually, when refrigerated the sauce will thicken because the pasta will also absorb the liquid. To reheat, add pasta to a medium-large saucepan over medium heat and add 1/2 to 1 cup of milk. Start with 1/2 cup, stir to combine and if needed add more, until you achieve the desired sauce consistency. You can also add cream instead of milk, or chicken broth.
What Seasoning Can You Use For The Chicken?

Chicken doesn’t have to be bland if you take a few minutes to mix these dried herbs and sauté the chicken you will end up with a very flavorful Instant Pot Tuscan Chicken Pasta dish! Here are the herbs that I used:
Garlic Powder and Onion Powder
Oregano
Paprika
Cayenne Pepper Powder or Red Pepper Flakes – if you want to add a spicier kick.
Dried Rosemary and Dried Thyme

Author: Catalina CastravetServes: 4 servings
Prep time: 10 minutesCook time: 20 minutesTotal time: 30 mins


Ingredients

Chicken:
1/4 teaspoon salt
1/4 teaspoon ground black pepper
1 teaspoon dried rosemary
1 teaspoon dried thyme
1 teaspoon dried oregano
1 teaspoon garlic powder
1 teaspoon onion powder
1 teaspoon paprika
2 tablespoons olive oil
2 regular boneless (skinless chicken breasts (or 4 smaller ones))

Pasta:
1 tablespoon olive oil
1 small onion (chopped)
1 tablespoon minced garlic
1 tablespoon Italian seasoning
1 cup sun dried tomatoes (drained and roughly chopped)
2 cups chicken broth (water or veggie broth)
1 cup evaporated canned milk
3 cups shell pasta
8 ounces cream cheese (room temperature)
1 1/2 cups parmesan (grated)
4-5 cups fresh spinach


Instructions
Add salt, pepper, dried rosemary, dried thyme, dried oregano, paprika, garlic powder and onion powder to a large shallow bowl and stir to combine.
Set Instant Pot to Sauté. Once the IP is hot, add the oil.
Toss chicken in the seasoning mix to coat on both sides and add to the hot oil.
Cook on both sides for 2-3 minutes until golden brown. Remove from pot and set aside on a plate, cover with aluminum foil to keep it warm.
If needed add 1 tablespoon of oil to the pot still in Sauté mode.
Add the diced onion and minced garlic and cook for 1-2 minutes, stirring occasionally.
Add Italian seasoning and chopped sun dried tomatoes, stir to combine.
Add chicken broth and using a wooden spoon, scrape well the bottom of the pot, trying to remove any bits that stuck to it.
Add the pasta and evaporated milk. Stir gently and top with the chicken breasts.
Cover and seal the lid. Make sure the valve points to Sealed. Change setting to manual and adjust time to 4 minutes on High Pressure.
Once Instant Pot beeps to show that it's done, do a quick release, by changing the position of the valve to Vent. Carefully remove cover.
Remove chicken from pot, and set aside on a cutting board. Cover with foil.
Select Sauté mode and add the cubed cream cheese. Gently stir to combine for 1 minute.
Add the parmesan cheese and gently stir to combine for 1 minute.
Add the spinach and stir to combine.

Turn off the pressure cooker.
Cut the chicken into cubes and add to the pot, gently give everything a final stir.
Serve immediately garnished with parmesan cheese.


Instant Pot Creamy Lemon Chicken Breasts

Instant Pot Creamy Lemon Chicken Breasts


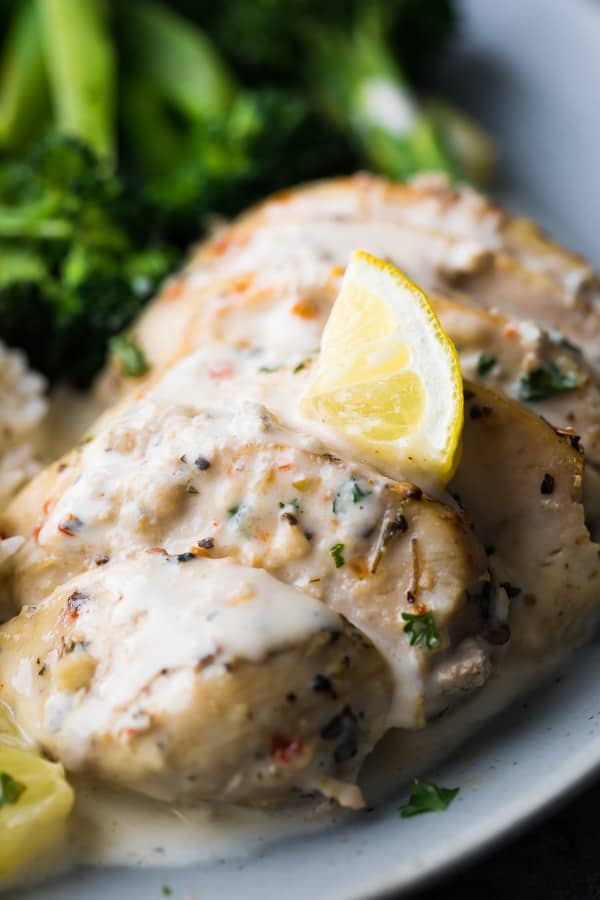
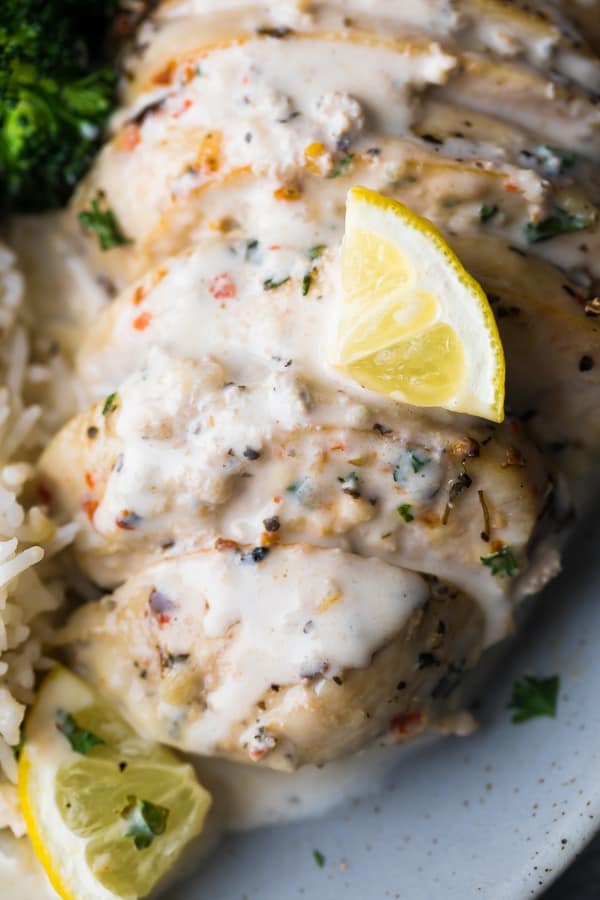
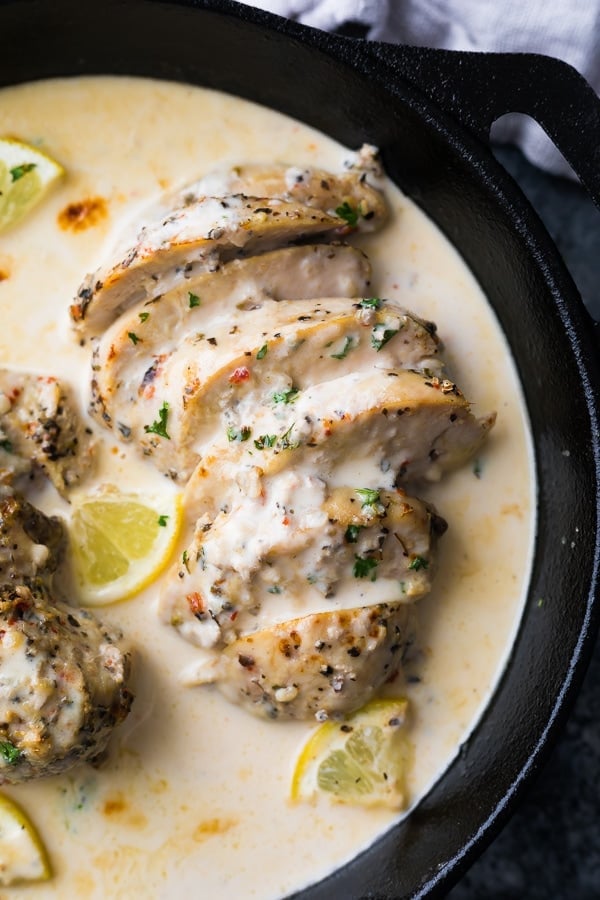
Instant Pot creamy lemon chicken breasts get dinner on the table in under 30 minutes! Juicy chicken breasts are smothered in a creamy lemon parmesan cream sauce. Low carb and gluten-free.


After sharing SEVEN Instant Pot Chicken Breast Recipes on the blog last month and showing you how you can assemble them ahead and freeze (hello…perfect for when chicken breasts go on sale!), I’m working my way through them to show you the finished product.

Now as a family, we have tended to stay away from cream sauce chicken recipes, mostly because they seem to take so long. Thank you Instant Pot, because this recipe is not only simple, but gets dinner on the table in under 30 minutes!


NEW: looking for Instant Pot Chicken Breast Recipes? Check this post out!


How to make this recipe ahead and freeze it

Chicken breast freezer packs are a staple in my freezer and are an absolute lifesaver during busy weeks! Here’s how you can turn this creamy lemon chicken breast recipe into a freezer pack:
Assemble the boneless skinless chicken breasts, spices, garlic and chicken stock in a gallon-sized freezer bag.
Squeeze out as much air as possible.
Freeze flat for up to 3 months.

So incredibly simple! When you’re ready to cook, you will need to thaw completely before placing everything in the Instant Pot and pressure cooking for 8 minutes.


Wait, what about the lemon garlic cream sauce?

The lemon garlic cream magic happens after the chicken is cooked!
Remove the chicken breasts from the Instant Pot
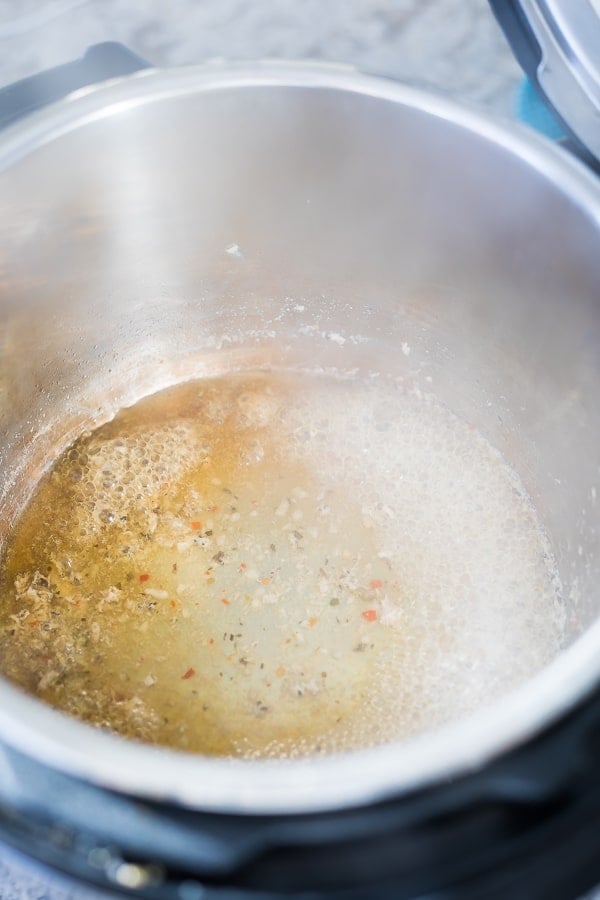
Select the sautee function and simmer your cooking liquid for 7-8 minutes until reduced to roughly 1/3 of a cup
Add in some parmesan cheese, fresh lemon juice, and heavy cream. Stir until heated through and then remove from the Instant Pot

You slice the chicken and add it back to the pot to get it nice and hot or serve as is and spoon the sauce over top. So so so yummy!


What to serve with this Instant Pot creamy lemon chicken?

I have a ton of ideas for ya!
steamed broccoli
Parmesan Roasted Snap Peas
Parmesan Mashed Cauliflower
this 10 minute Spiralized Cucumber Salad
rice or cauliflower rice
roasted potatoes or these cute Herb and Garlic Potato Stacks


Tips and Equipment for this recipe:
I used my 6 quart Instant Pot; this recipe has not been tested in an 8 quart or mini
make sure you use heavy duty freezer bags if you are going to make freezer packs
you can swap for boneless skinless chicken thighs but will need to adjust cook time to 10 minutes
I have not tested cooking these from frozen however it may be possible
Looking for more chicken breast recipes? Check out these 7 Chicken Marinade Recipes You Can Freeze, and this sequel with 7 (more) Freezer Friendly Chicken Breast Marinades. And of course, the


Course: Dinner
Cuisine: Instant Pot
Calories: 271kcal
Servings: 4
Prep Time10 mins
Cook Time20 mins
Total Time30 mins

Ingredients

2 boneless skinless chicken breasts roughly 1 lb
1/2 teaspoon dried oregano
1/2 teaspoon dried basil
1/4 teaspoon red pepper flakes
4 cloves garlic minced
1 cup chicken stock

AFTER REDUCING SAUCE:
2 tablespoons lemon juice
1/4 cup parmesan cheese freshly grated
3/4 cup heavy cream aka: whipping cream for Canadians

Instructions

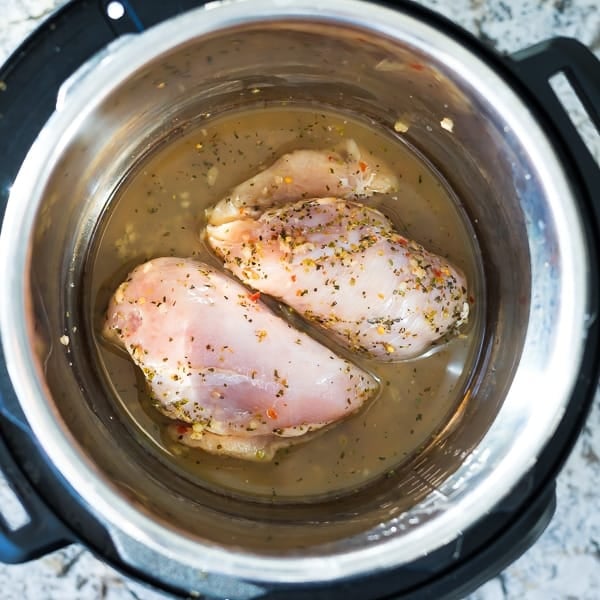
Combine all ingredients in a 6 quart Instant Pot (unless listed as 'after reducing sauce').
Cook on high pressure for 8 minutes (for average 7 oz chicken breasts). Release the pressure when the Instant Pot beeps (quick pressure release).
Using a pair of tongs, carefully remove the chicken from the Instant Pot and allow to rest while you reduce the sauce.
Reduce the sauce: select 'sautee' on the Instant Pot, and simmer, stirring occasionally, for 7-10 minutes.
When roughly 1/3 of a cup of the sauce remains (and you start to see the bottom of the IP as you stir), stir in the parmesan cheese, cream, and lemon (for the lemon garlic chicken only). Stir until cheese is melted and sauce is heated through (but not boiling), and remove the pot from the Instant Pot base using oven mitts.
Spoon the sauce over chicken breast, rice and veggies.

To prepare freezer pack:
Combine all ingredients in a gallon freezer bag (unless listed as 'after reducing sauce').
Squeeze out as much air as possible. Freeze for up to 3 months.
Thaw completely before cooking as instructed above.


Recipe: Instant Pot Meatloaf and Mashed Potatoes

Recipe: Instant Pot Meatloaf and Mashed Potatoes


Have you discovered pot-in-pot Instant Pot cooking yet? The technique, which allows you to make two distinct dishes in your Instant Pot in just one round of cooking, is especially revolutionary for weeknight dinners.

My favorite of these pot-in-pot recipes is meatloaf and mashed potatoes. The potatoes are boiled to tenderness in the bottom of the pot, while homey meatloaf is cooked in a cake pan set atop the Instant Pot’s trivet. With pot-in-pot cooking, you can have homemade meatloaf and mashed potatoes in under an hour. Here’s how to do it.

Pot-in-pot cooking is a simple way to create layers within your electric pressure cooker’s insert. You’ll use a trivet (the one that came with your Instant Pot is ideal) to elevate a pan over another dish cooking in the Instant Pot at the same time. Cake pans or disposable aluminum pans are the most popular “pots” for pot-in-pot cooking.

Terms of Use and Privacy Policy

Perhaps the most crucial step in pot-in-pot cooking is ensuring that once you set your pan inside your pot, there is enough room around it for steam to move freely and help build pressure. A six-inch cake pan is idea for this endeavor because it easily slides in and out of the Instant Pot.

It’s also helpful to create a sling for your pan, which makes it easier to remove from the hot Instant Pot. You can buy a silicone version or make a simple aluminum foil one for a single use.


Instant Pot Meatloaf and Mashed Potatoes

This is a pretty basic — albeit delicious — meatloaf and mashed potatoes adapted to the Instant Pot (meaning there are no special ingredients exclusive to this method). However, it’s important that you cook the potatoes in water, rather than broth or milk, which prevents receiving a “burn” message from your pot and ensures the pot reaches pressure.

As for getting a gorgeous glaze on you meatloaf, don’t attempt this in the Instant Pot! There’s too much steam and quite a bit of fat rendering off the meatloaf while it cooks. Instead, move the cooked meatloaf to the oven to achieve a glossy finish. This will give you just enough time to finish the potatoes anyway.


SERVES4 to 6
PREP TIME:25 minutes
COOKING TIME:13 minutes

INGREDIENTS

For the meatloaf
2 pounds lean ground beef
1/2 cups panko breadcrumbs
1/3 cup whole milk
1 small yellow onion, grated on the large holes of a box grater
1 large egg, lightly beaten
1 teaspoon kosher salt
1/4 cup ketchup
2 tablespoons packed ight brown sugar
2 tablespoons Dijon mustard

2 pounds large Yukon gold potatoes, peeled and quartered
2 cups water
1/2 teaspoon kosher salt
1 cup half-and-half
4 tablespoons unsalted butter


INSTRUCTIONS

Place the ground beef, breadcrumbs, milk, onion, egg, and salt in a large bowl. Use your hands to gently combine until homogeneous. Shape the meat mixture into a loaf, about 6 inches long and 4 inches wide, and set inside a 6-inch round cake pan; set aside.
Combine the potatoes, water, and salt in the Instant Pot insert and stir to combine. Place a trivet over the potatoes.
Create a sling for the meatloaf pan by folding a 12-inch long piece of aluminum foil lengthwise into a 3-inch wide strip. Place the meatloaf pan in the center of the strip and then fold up the sides — you should have 3 to 4 inches of overhang (handles) on either side.
Lower the meatloaf pan into the Instant Pot and place on top of the trivet. Seal the Instant Pot and set to MANUAL pressure on HIGH for 35 minutes. While the meatloaf cooks, arrange a rack in the middle of the oven and heat to 400°F. Stir the ketchup, brown sugar, and mustard together in a small bowl to make the glaze.

When the cook time is over, let the Instant Pot naturally release pressure for 10 minutes. Manually release any remaining pressure. Open the Instant Pot and use the foil sling to carefully remove the meatloaf — there will be quite a bit of fat and juices around the meatloaf, don’t worry if any of this drips into the potatoes. Carefully drain off the fat and juices around the meatloaf. Brush the meatloaf with the glaze and bake until it is glossy and caramelized, 8 to 10 minutes.

While the meatloaf bakes, add the half-and-half and butter to the potatoes and mash to desired consistency. Slice the meatloaf and serve with the mashed potatoes.

RECIPE NOTES

Storage: Leftovers can be refrigerated in an airtight container for up to 4 days.


HOMEMADE PUMPKIN CREPES

HOMEMADE PUMPKIN CREPES


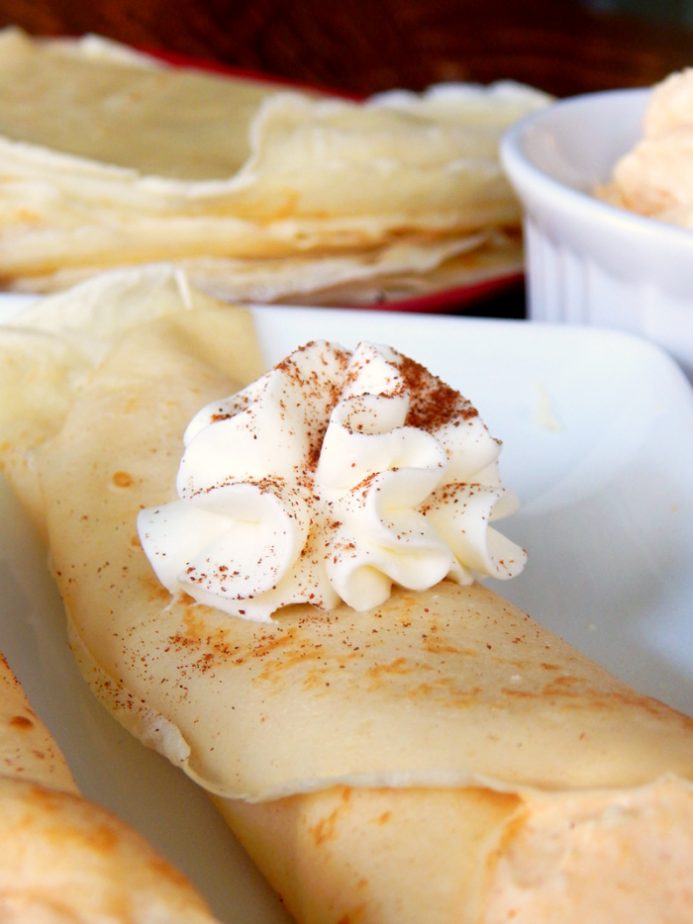
I am obsessed with these Homemade Pumpkin Crepes because they are just the best of what Fall is all about!

I am a sucker for Pumpkin flavored food and I am also a sucker for crepes. So it totally makes sense that this has become a favorite recipe in our home.


When you first think of the word “crepe” you might instantly think of breakfast. But the beauty of pumpkin crepes is that they can be enjoyed any time of the day which means breakfast can now become dinner!

WHAT YOU WILL NEED TO MAKE PUMPKIN CREPES:

For the Crepes:
Eggs
Flour
Milk
Water
Melted Butter


For the Pumpkin Filling:
Canned Pumpkin (or more if desired)
Softened cream cheese
Heavy Whipping Cream
Powdered Sugar
Pumpkin Spice (sprinkle on top of crepes-optional)

HOW TO MAKE PUMPKIN CREPES:

In a large bowl mix all wet ingredients first then add in the flour. Mix well. Note: mixture will be runny.

Heat a small skillet to medium heat and then spray in with oil so that the crepe won’t stick.

Add about ¼ Cup of crepe mixture into the hot skillet and pick it up and swirl it into the size of the bottom of the pan.

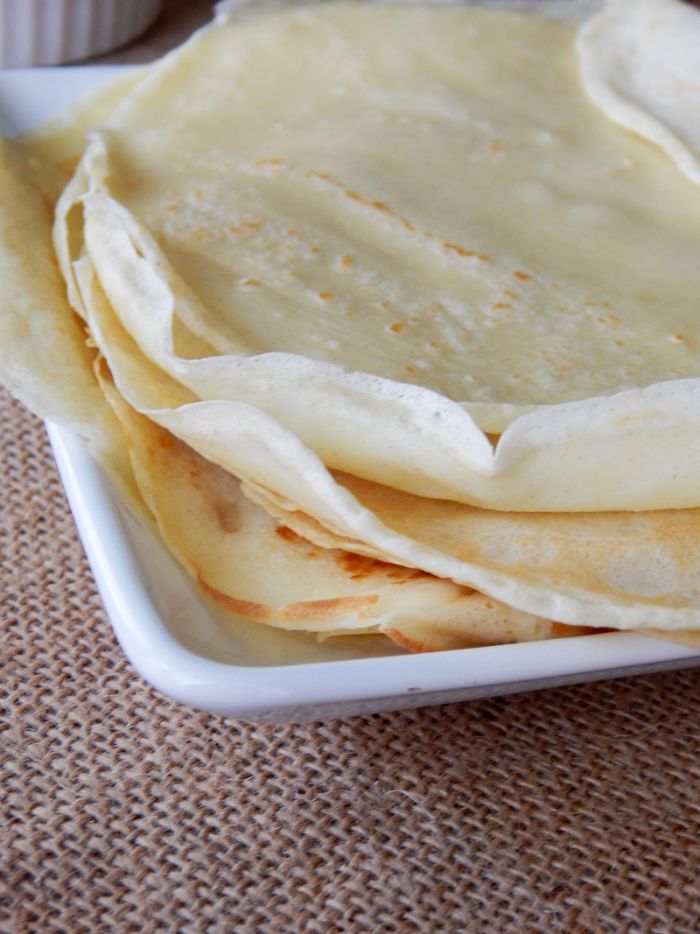
Cook for about 30 seconds to a minute and then flip on the other side and repeat. Note: it should be just a tiny bit brown on some spots for it to be done.


Cook remainder of the crepe batter and then set aside.

To make the pumpkin filling whip the softened cream cheese in a large bowl. Set aside.

Whip the cold 2 Cups of heavy whipping cream with the ½ Cup powdered sugar until stiff peaks form.

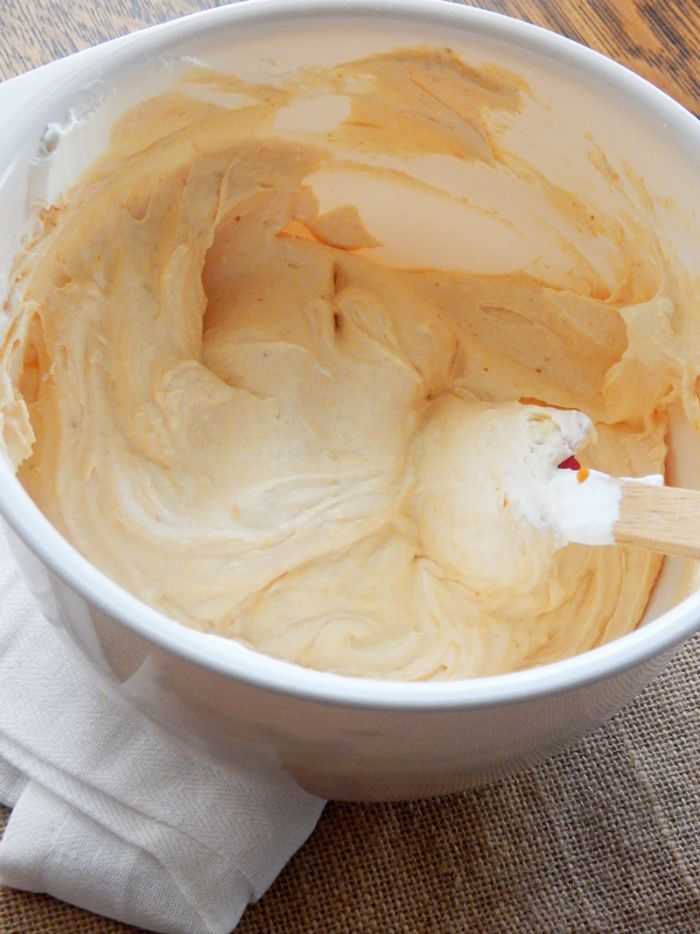
Add whipped cream into cream cheese bowl and blend until mixed. At this point I like to reserve some of this mixture for piping some on top of the crepes, then sprinkling with the cinnamon. But, you could just use the remainder after you put the canned pumpkin in. I just like the look of the white.


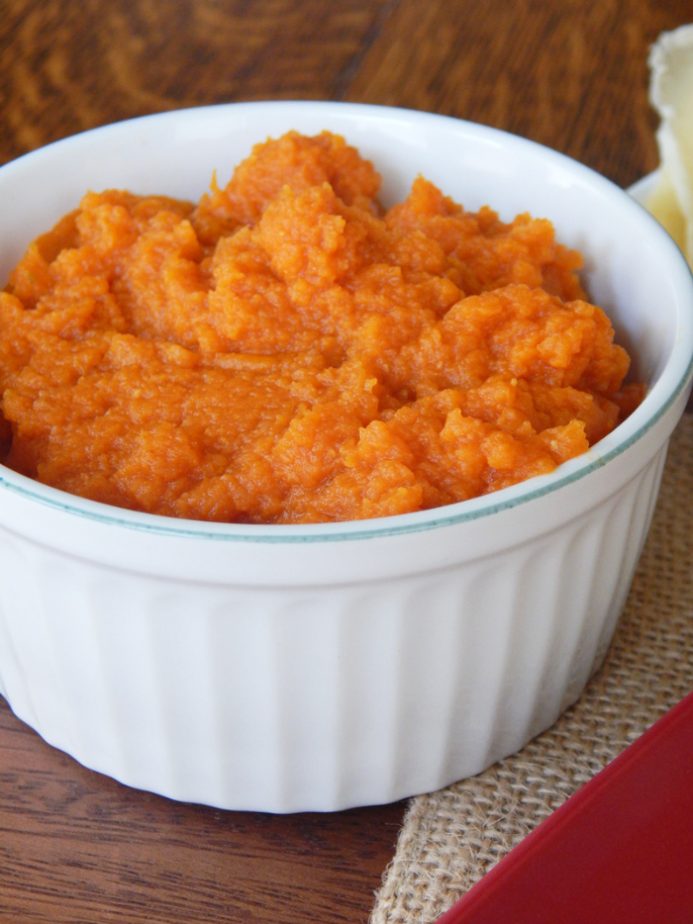
Fold in the pumpkin (as much as you desire…taste as you go!)


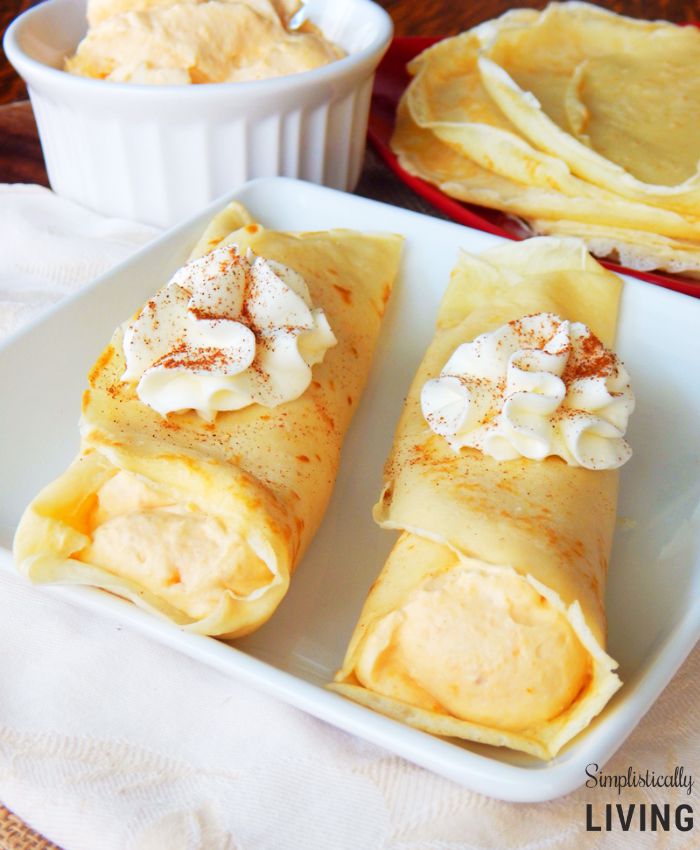
Add filling to the crepe by lining the middle of the crepe and then roll it up.

Pipe some filling on top and then sprinkle with some pumpkin spice.

Serve and Enjoy!


INGREDIENTS
For the Crepes:
2 Eggs
1 Cup Flour
1 Cup Milk
½ Cup Water
2 Tablespoons Melted butter
For the Pumpkin Filling:
4 Tablespoons Canned Pumpkin (or more if desired)
8 oz Softened cream cheese
2 Cups Heavy Whipping Cream
½ Cup Powdered Sugar
Pumpkin Spice (sprinkle on top of crepes-optional)

INSTRUCTIONS
In a large bowl mix all wet ingredients first then add in the flour. Mix well. Note: mixture will be runny.
Heat a small skillet to medium heat and then spray in with oil so that the crepe won’t stick.
Add about ¼ Cup of crepe mixture into the hot skillet and pick it up and swirl it into the size of the bottom of the pan.
Cook for about 30 seconds to a minute and then flip on the other side and repeat. Note: it should be just a tiny bit brown on some spots for it to be done.
Cook remainder of the crepe batter and then set aside.
To make the pumpkin filling whip the softened cream cheese in a large bowl. Set aside.
Whip the cold 2 Cups of heavy whipping cream with the ½ Cup powdered sugar until stiff peaks form.
Add whipped cream into cream cheese bowl and blend until mixed. At this point I like to reserve some of this mixture for piping some on top of the crepes, then sprinkling with the cinnamon. But, you could just use the remainder after you put the canned pumpkin in. I just like the look of the white.
Fold in the pumpkin (as much as you desire…taste as you go!)
Add filling to the crepe by lining the middle of the crepe and then roll it up.
Pipe some filling on top and then sprinkle with some pumpkin spice.
Serve and Enjoy!


Spider Cupcakes for Halloween

Spider Cupcakes for Halloween


Easy to make spider cupcakes with a pumpkin cupcake base and cream cheese frosting! With grain-free, gluten-free, whole grain and all-purpose flour options. Perfect for Halloween! Scroll down for a how-to recipe video.

This year, I’ve seen a lot of those super cute peanut butter cup spider cookies (like these from What the Fork Blog!). I wanted to make something similar, but I wanted the base to be pumpkin.

I couldn’t come up with a seriously delicious + chewy pumpkin cookie, so I turned to my favorite pumpkin cupcake recipe, which I posted on Monday.

I’m terrible at all things decorating but these were really so easy to put together! I was sick when I made these and had been sick for a while and had a deadline (this recipe was a contribution to another blog).

So I used some ingredients I wouldn’t normally use, just to get them done. But fear not – there are homemade + allergy-friendly options for everything!


So yeah. The candy eyeballs I used on these cupcakes are pretty nasty ingredient-wise. There’s even a warning on the back of the package about how some of the ingredients may have an adverse effect on activity and attention of children. We picked them off before we ate the cupcakes.


If you don’t want to use store-bought candy eyes, use the homemade chocolate eyes in my monster mouth post for a much less processed version. Or actually, it may just be easier to pipe the white chocolate right onto the cookie, let it harden, and then pipe the semi-sweet chocolate pupil over that.

I also used Oreos, another ingredient I never use on the blog. But at least they’re delicious and don’t come with a warning. ;) But here are some dietary-friendly + homemade options!
For a grain-free version, use Paleo Oreo Cookies from Gluten-free on a Shoestring.
For a gluten-free version, you can buy these or make these homemade gluten-free Oreos, which is a gluten-free adaptation of Smitten Kitchen’s recipe.
For a whole wheat version, use these Faux-reos.

The pumpkin cupcakes have gluten-free, whole grain and all-purpose flour options, but for a grain-free option, use 1 batch of these pumpkin spice latte muffins instead of the below recipe.

Omit the espresso powder and the Nutella topping. It only makes 16 so you won’t need as many cookies, eyes or chocolate for piping the legs.

Don’t want a pumpkin cupcake base? These paleo chocolate cupcakes would also be great here! I also have an amazing chocolate cupcake recipe with gluten-free, whole wheat and all-purpose flour options.

No matter what ingredients you use, I really think these are sure to be a hit. Enjoy! :D


Prep Time: 40 min
Cook Time: 24 min
Ready in: 2:04 h
Yield: 20 cupcakes

For a grain-free version, use 1 batch of these pumpkin spice latte muffins instead of the below recipe. Omit the espresso powder and the Nutella topping.

Ingredients
Cupcakes:
2 cups (250 grams) whole wheat flour, whole spelt flour, all-purpose flour or 1 cup (134 grams) 1-to-1 gluten-free baking flour for a GF version
2 teaspoons baking powder
1 teaspoon baking soda
1/2 teaspoon salt
2 teaspoons ground cinnamon
1 teaspoon ground ginger
1 teaspoon ground nutmeg
4 large eggs (50 grams each, out of shell), room temperature
2 cups (480 grams) canned pumpkin puree
2 cups (400 grams) brown sugar, raw sugar or coconut sugar
1 cup (240 milliliters) olive oil1 (or another neutral-tasting oil that's liquid at room temperature like canola oil)

Cream Cheese Frosting:
1/2 cup (113 grams) unsalted butter, softened
12 ounces (340 grams) cream cheese, softened2
1/8 teaspoon salt
1/2 teaspoon vanilla extract
1 1/2 cups (195 grams) powdered sugar

Decoration:
20 Oreos (use these for a gluten-free version or these homemade Paleo Oreo Cookies for a grain-free version - see the post for other homemade options)
1 cup (170 grams) semi-sweet chocolate chips or chopped chocolate
40 candy eyes (use the homemade chocolate eyes in my monster mouth post for a much less processed version)

Directions
Preheat the oven to 350 °F (175 °C). Line two muffin pans with 20 paper liners.
In a medium bowl, mix together the flour, baking powder, baking soda, salt, cinnamon, ginger, and nutmeg.
In a larger bowl, whisk the eggs, pumpkin puree, sugar, and oil.
Add the dry mix to the wet and stir just until combined. Do not over mix!
Divide the batter among the liners, filling each one almost full, and bake for about 20 – 24 minutes, or until a toothpick inserted in the center comes out clean. Let cool for 3 minutes in the pan and then remove to a wire rack to cool completely, about 1 hour.
Once the cupcakes have cooled, prepare the frosting. Beat the butter and cream cheese until soft and smooth. Add the salt and vanilla and beat until combined. Add in the powdered sugar, 1/2 cup at a time, and beat until fluffy.
Spread about 1 ½ tablespoons of frosting over each cooled cupcake.
Twist the Oreos apart and place the side without frosting face up on the cupcake. You can also use whole Oreos if you prefer.
Melt the chocolate in a small saucepan over low heat, stirring constantly until melted. Pour into a piping bag.
Pipe 4 legs on both sides of the Oreo. Pipe a tiny bit of chocolate on the bottom of two eyes and place on the Oreo.
Keep decorated cupcakes refrigerated for one day until ready to serve. Keep undecorated cupcakes at room temperature for up to 3 days. The Oreos get slightly soft over time so decorate just a few hours before serving, if possible.
Notes
If you use olive oil, the batter will taste like olive oil but the taste disappears after baking.
If you live outside of North America and have the kind of cream cheese that's meant for toast (that comes in a little plastic tub) rather than American style brick cream cheese, then get a 300 grams of cream cheese, place it in the center of a cheesecloth, and wring out the liquid until you have 225 grams of cream cheese left.

crispy honey orange glazed salmon

crispy honey orange glazed salmon


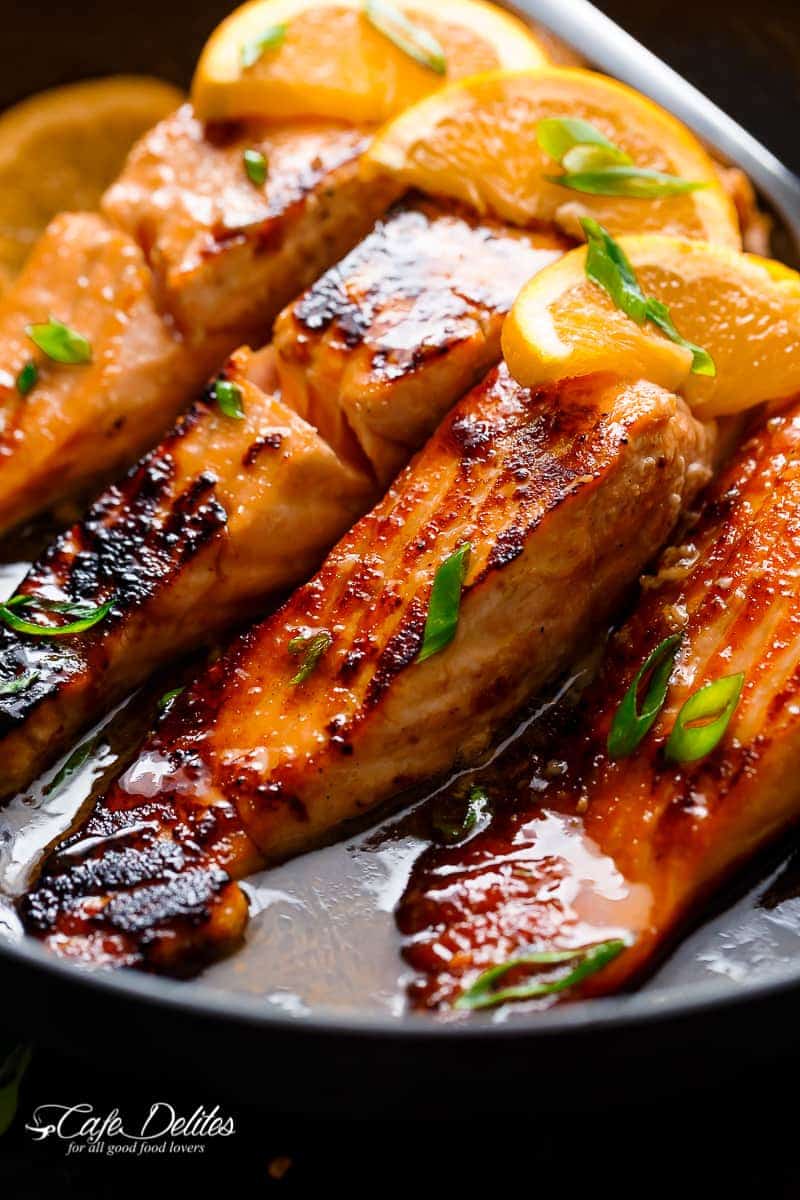
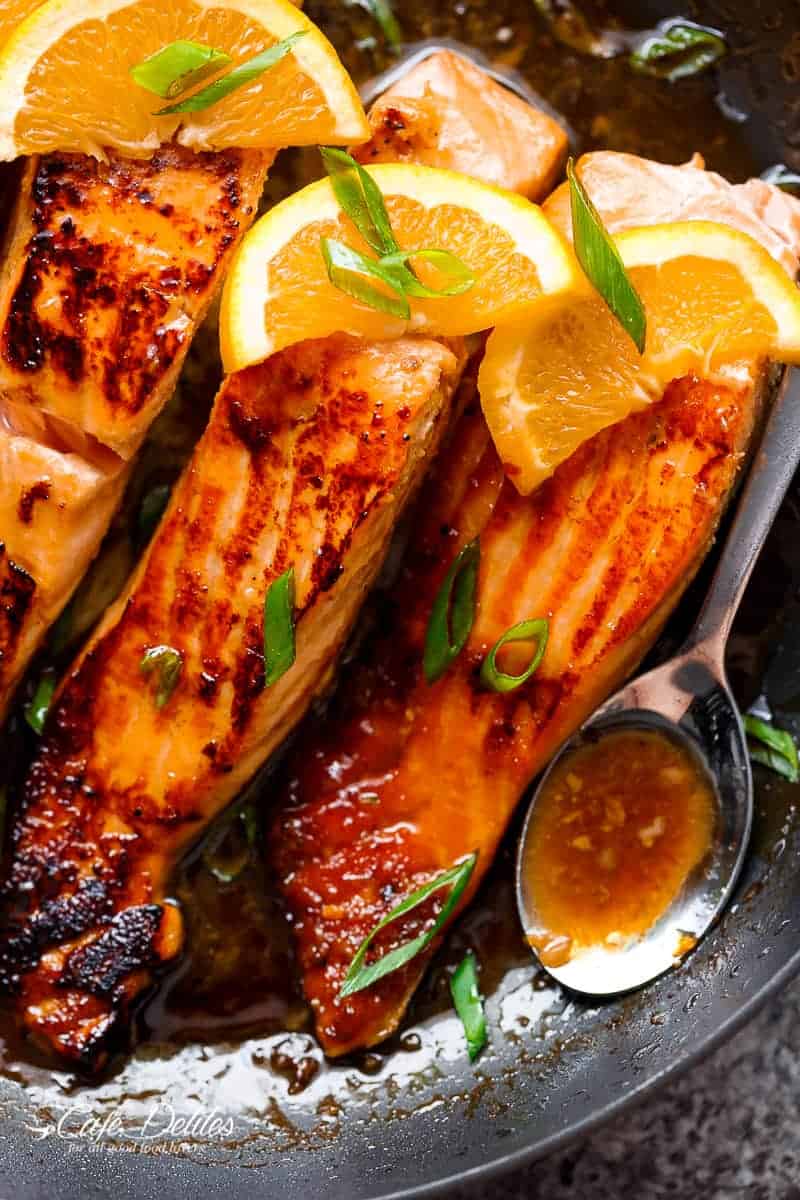
crispy honey orange glazed salmon fillets are pan-fried in the most beautiful honey-orange-garlic sauce, with a splash of soy for added flavour!

Where do I start with these Honey Orange Glazed Salmon fillets? I think I just said it all! I don’t know which was the best part: the juicy salmon with crisp and charred edges; or the flavour of this sauce. Who would’ve thought salmon and honey with orange could go together so incredibly well?

honey orange glazed salmon

How did this one come about? One of my readers wrote in and asked about subbing out lemon juice for orange juice in this Honey Garlic Butter Salmon recipe, and what flavours would work well. IMMEDIATELY my brain went into CRISPY over drive. No foil or baking. Just good old fashioned searing in a skillet, with charred edges and a soft and juicy centre.

how to pan sear salmon

Make sure your pan or skillet is hot over medium-high heat
Sear salmon skin-side up for 3-4 minutes. Flip and sear for 2 minutes, until nice and crispy
make the sauce for salmon
Move salmon to the side of the skillet and add sauce ingredients into the pan
Simmer to thicken into a nice honey orange syrup.
Baste salmon fillets in the syrup and continue cooking until done!


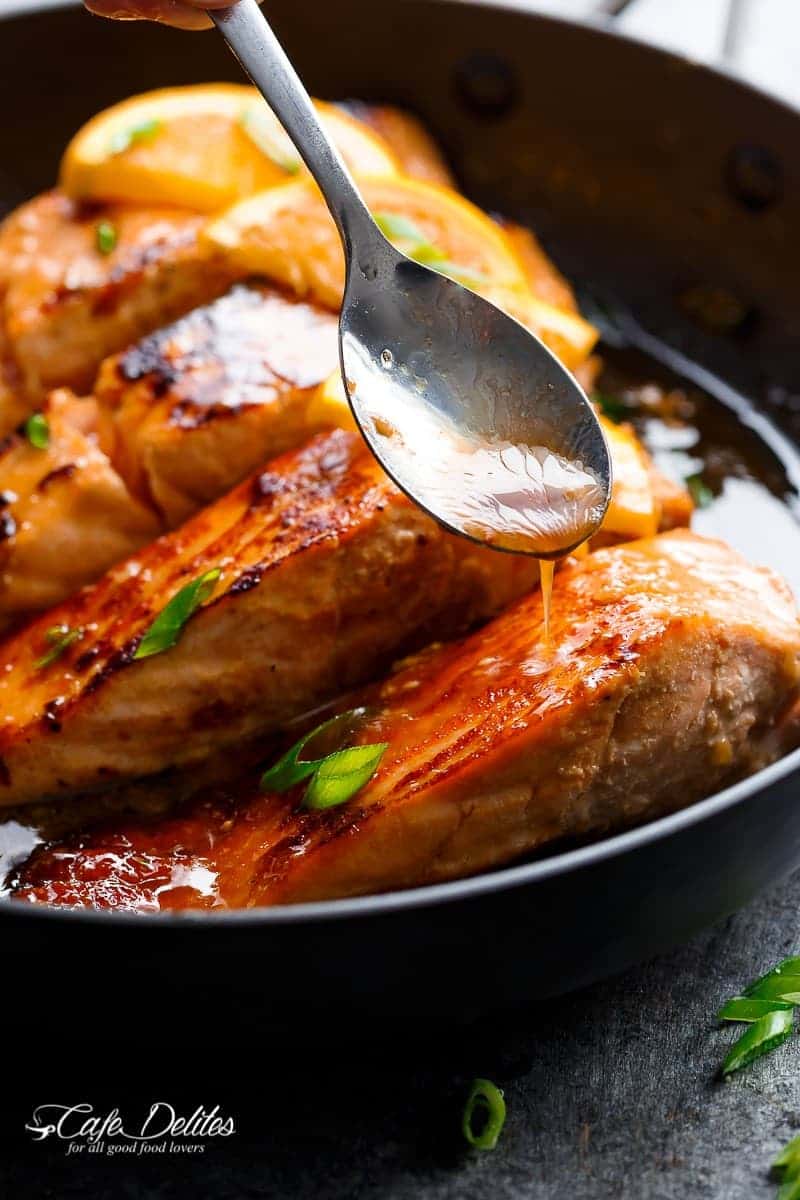
This is it. The salmon recipe of our dreams. Forget honey orange chicken when salmon takes over! And as per usual, drizzle those fillets in those saucy pan juices.
sides with salmon
Fried Rice
Mashed Potatoes
Asparagus
Roasted Potatoes
Side Salad
Roasted Broccoli and Green Beans
Smashed Potatoes

ENJOY!


PREP:10 MINS
COOK:10 MINS
TOTAL:20 MINS
SERVES: PEOPLE

INGREDIENTS

2 tablespoons butter (or use olive oil if you wish)
4 x 6-ounce salmon fillets (or 170 grams each), with or without skin
Juice from half an orange (about 1/4 cup fresh squeezed orange juice)
3 tablespoons honey
2 tablespoons soy sauce
4 cloves garlic , crushed
Kosher salt and ground pepper , to taste
Half an orange , sliced to serve

INSTRUCTIONS


Heat butter (or oil) in a pan or skillet over medium-high heat. Sear salmon skin-side up for 3-4 minutes. Flip and sear for 2 minutes.

Pour in the orange juice and allow to reduce to half the quantity (it takes about 1 minute to reduce down if your pan is hot enough). Add the garlic and cook until fragrant (30 seconds). Move the salmon to the sides of the pan and add in the honey and soy sauce, stirring well to combine all of the flavours together.

Bring to a simmer until reduced to a nice syrup (this takes about another 30 seconds to 1 minute), and move the salmon around in the sauce to evenly coat. Remove from heat once the salmon is cooked to your liking.

Season with salt and pepper to your tastes. Drizzle with the sauce to serve. Best served over rice, noodles, steamed vegetables or with a salad.


THE BEST BAKERY-STYLE PUMPKIN CHOCOLATE-CHIP COOKIES

THE BEST BAKERY-STYLE PUMPKIN CHOCOLATE-CHIP COOKIES


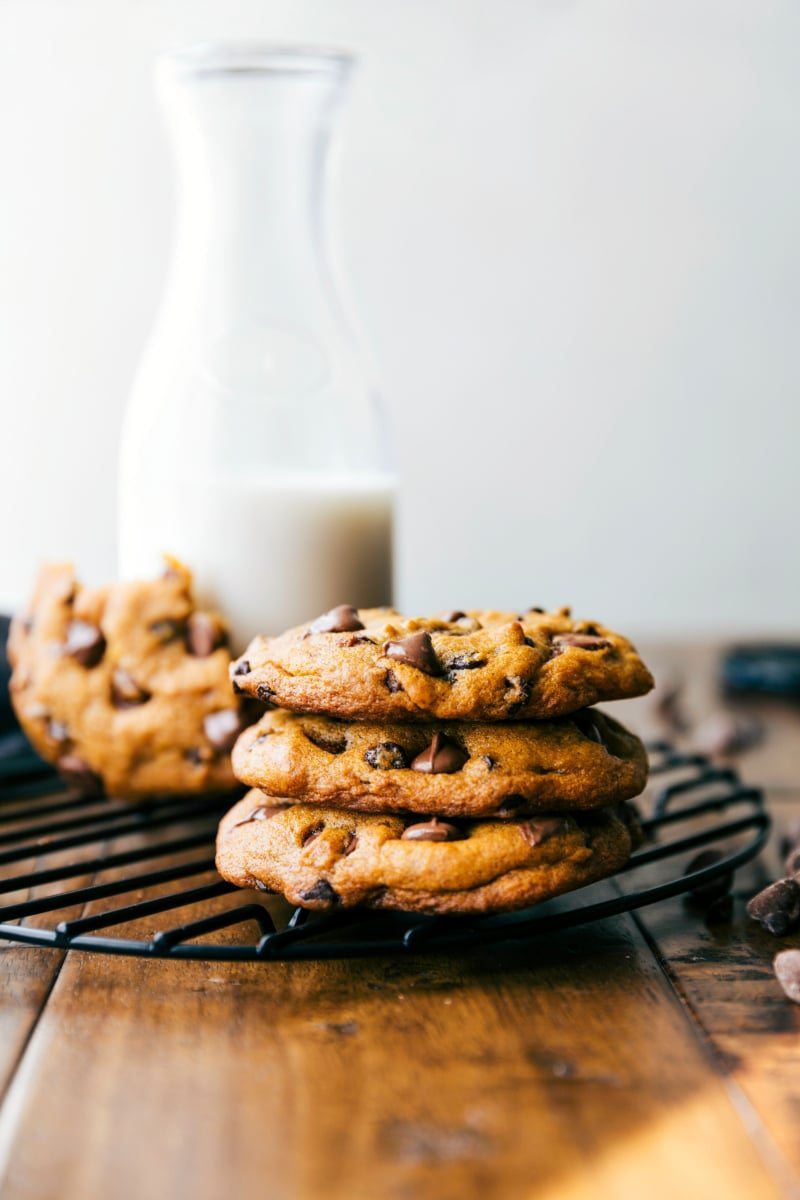
Super big, chewy and soft, muffin-top like pumpkin chocolate-chip cookies that taste like they are straight from a bakery! These bakery-style pumpkin cookies are made in ONE bowl!

Several months ago, being the very mature daughter that I am, I told my dad that “someone” said he looked like an owl. (Their natural response is supposed to be “Who?!” and you laugh to yourself as that person is making an owl sound.) Except it didn’t quite work like that. At first he just kind of ignored me and chuckled quietly about it.

A few minutes later, after some obvious deep contemplation, he said, “Did they say that because they think I am wise?”

I suppose that is what I get for trying a grade-school joke out on my very literal father.He just had a birthday this past week and it was great to celebrate him. My boys are especially crazy about their “Papa” as he’s all jokes, wrestling, tickling, and way too much fun.

The toddler blew out his Papa’s candles on his birthday cake because he’s the kind of guy that gets more excited about others being happy than he is ever worried about his own happiness. And, we were all very grateful that my mom used two number candles instead of using up 3 boxes of candles and having us all wait while my toddler blew air/spit (mostly spit) all over the cake. With only 2 candles, the spit is definitely minimized.

I wish I could nicely transition talking about my dad and his birthday into this recipe and these cookies by telling you that they are his favorite or that we made them together growing up, but neither is true. And while he does love pumpkin cookies, he’d pick oatmeal cookies over pumpkin any day. And baking? Never with my dad. He was more of the dutch oven, camp-fire cooking kind of guy.
So, with that said, here’s my non-existent transition into telling you about these cookies. Last year, I shared “non-cakey” pumpkin cookies. If you are craving a solid cookie texture with the flavors of pumpkin pie spice, THIS is your recipe. These cookies however, are quite cakey. They are thick, chewy, soft, and resemble a muffin top.

These are similar to the pumpkin cookies my mom made growing up and while some would argue they aren’t technically cookies, they are one of my favorite Fall treats. And now my family’s as well.

The toddler has been OBSESSED with these cookies. He loves their color, the process of making them, and most especially the taste. And I love hearing him say pumpkin cookies because it sounds more like, “putt-in chuchies.”

Prep Time
20 mins
Cook Time
12 mins
Chill Dough
1 hr
Total Time
32 mins
Course: Dessert
Cuisine: American
Servings: 18 cookies

Ingredients

1 CUP canned pumpkin, not an entire can
1 cup white sugar
1/4 cup brown sugar, lightly packed
1/2 cup vegetable oil
1 large egg
1 tablespoon vanilla extract
1 teaspoon ground cinnamon
1 teaspoon pumpkin pie spice*
2 teaspoons baking powder
1 teaspoon baking soda
1/2 teaspoon salt
2 cups white flour
1 cup semi-sweet miniature chocolate chips
1 and 1/3 cups milk chocolate chips, separated
Optional: red food dye

Instructions

In a large bowl, add in ONE CUP of canned pumpkin (not pumpkin pie filling and not an entire can of pumpkin), white sugar, brown sugar, vegetable oil, the egg, and vanilla.
Beat until completely smooth. If desired add in the food dye. This gives the darker more "pumpkin looking" cookie. These photos are of dyed cookies.
Without stirring in between these additions, add in the cinnamon, pumpkin pie spice, baking powder, baking soda, salt, flour, and both types of chocolate chips (1 cup of the milk chips).
Now with everything layered on top, beat together all of the ingredients until *just* combined.
Cover tightly and chill the dough for at least one hour up to 10 hours. Chilling is not necessary but it gives you the bigger pumpkin bakery-style cookies.
When ready to bake, preheat the oven to 350 degrees F and line a large tray with parchment paper or a silpat liner. Place 6 mounds of the dough on the cookie sheet. Scoop the dough to make a higher ball dough rather than a wide ball of dough. Use about 3 tablespoons to 1/4 cup dough to get the large bakery style cookies.
Don't do more than 6 cookies or they will run together.
Bake for 12-15 minutes (slightly under-bake for best results of getting a soft and chewy cookie) and remove. Use the remaining 1/3 cup of chocolate chips to place on the cookies right out of the oven if desired.
For a fudgy pumpkin pie type cookie, chill the cooked cookies in the fridge -- delish!
These cookies have a more developed pumpkin flavor by the second day or after chilling.

Recipe Notes

*We like a mild amount of spice in these pumpkin cookies. If you like lots, use another teaspoon of pumpkin pie spice or an additional 1/4 teaspoon nutmeg and 1/8 teaspoon ground cloves.

Easy Teriyaki Salmon

Easy Teriyaki Salmon


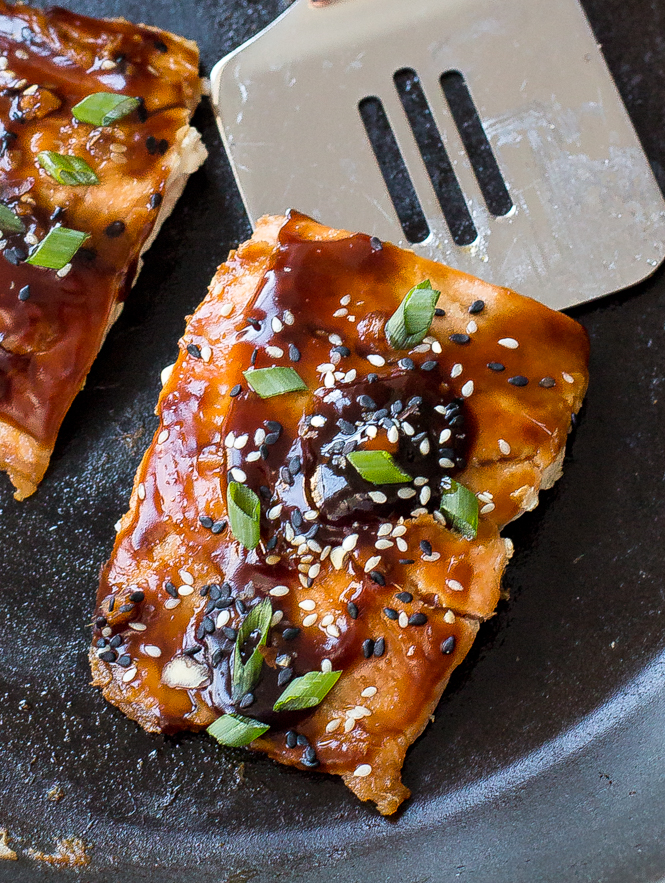
Easy Teriyaki Salmon pan-fried to perfection and served with a homemade teriyaki sauce! Serve with rice and veggies to make it a meal!

I’ve been eating tons of salmon lately. It is hands down my favorite fish to eat. It’s mild and super easy to prepare.

The salmon get’s marinated in a simple teriyaki sauce then pan fried. The sauce compliments the salmon perfectly and is sweet, tangy and thick. I reserve half the sauce for marinating and the other half for glazing the salmon during cooking.

I love making my own teriyaki sauce at home. It’s so much easier to control the sweetness and the salt level. I used the same homemade teriyaki sauce as my Easy Teriyaki Beef Meatballs and my Teriyaki Baked Salmon. This sauce is really easy to prepare and is amazing on chicken as well.

The teriyaki sauce consists of soy sauce, water, ginger, garlic and brown sugar. The sauce gets nice and thick with a simple cornstarch slurry (1 teaspoon cornstarch + 1 tablespoon cold water).


This is the perfect dinner when you are short on time but want something amazing. Serve with sticky rice, vegetables and enjoy!

PREP TIME: 10 MINUTES
COOK TIME: 10 MINUTES
TOTAL TIME: 20 MINUTES
SERVINGS: 4

INGREDIENTS

*NOTE: Prep time does not include marinating time*
1 tablespoon oil
4 salmon filets skinless
1 clove garlic minced
½ teaspoon ginger minced
¼ cup low sodium soy sauce It is important to use low sodium. I find regular makes the sauce too salty
⅛ cup water
2-3 tablespoons brown sugar depending on how sweet you like it
1 tablespoon rice wine vinegar
1 teaspoon sesame oil
1 teaspoon cornstarch
1 tablespoon water
green onions for garnish if desired
sesame seeds for garnish if desired

INSTRUCTIONS

Add garlic, ginger, soy sauce, 1/8 cup water, brown sugar, rice wine vinegar and sesame oil to a medium bowl.
Add half of the marinade to a ziplock bag and the other half to a small saucepan and set aside.
Place salmon filets in the ziplock bag and marinate for 30 minutes.
Heat oil in a large skillet. Add salmon filets making sure not to overcrowd pan (I had to cook two at a time).
Cook 3-4 minutes on each side until desired doneness.
Meanwhile heat the reserved marinade in the saucepan and bring to a simmer.
Add cornstarch and water to a small bowl and whisk to combine.
Slowly whisk in the cornstarch mixture to the marinade and simmer until thickened.

Serve immediately with the teriyaki sauce drizzled on top as well as green onions and sesame seeds for garnish, if desired.


BANANA CREAM CAKE

BANANA CREAM CAKE


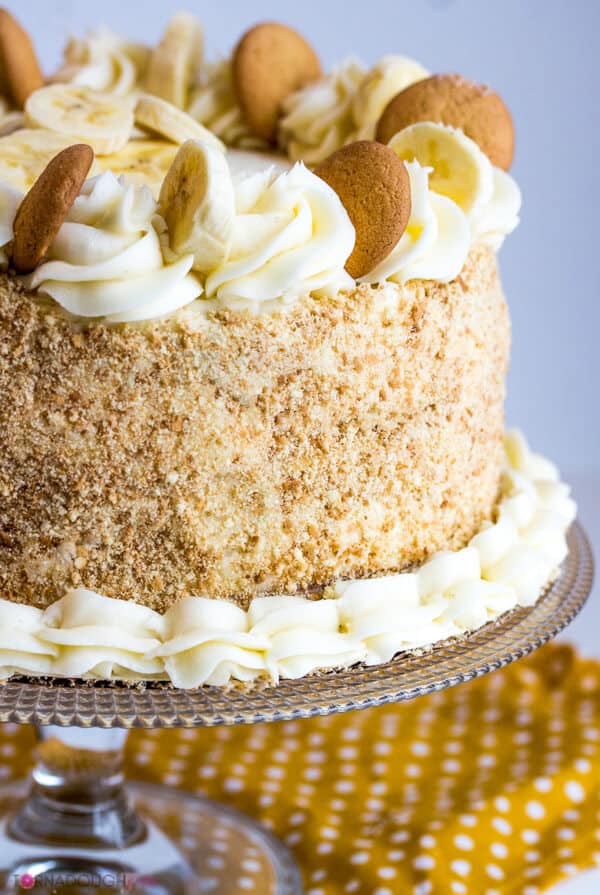
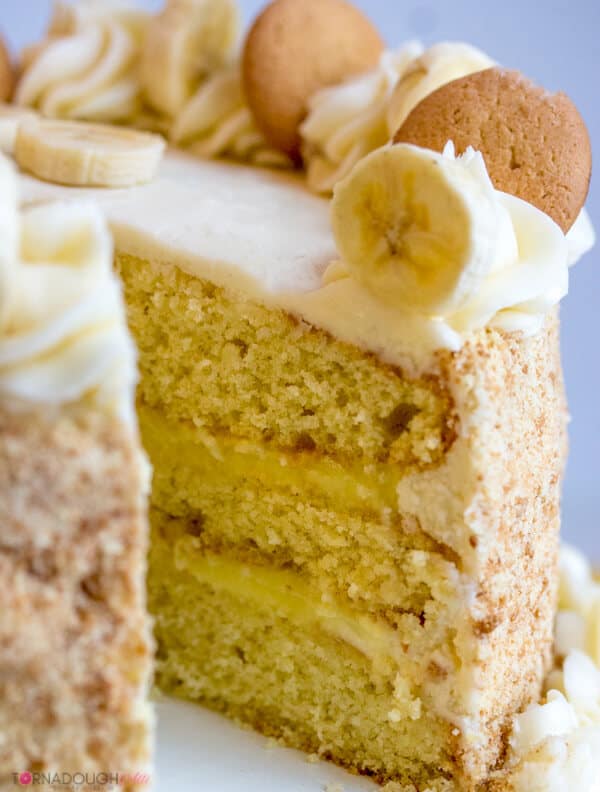
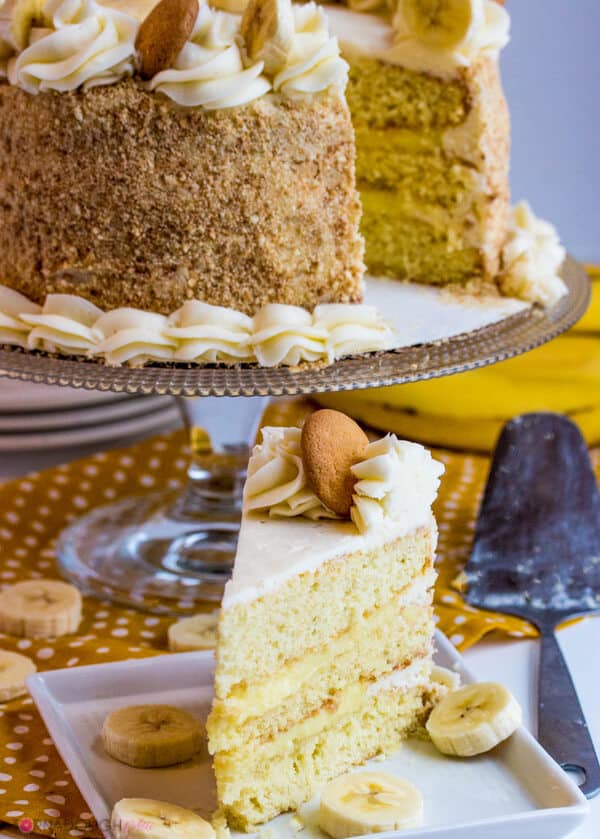
Utterly delicious this Banana Cream Cake is layered with banana pudding and sweet buttercream making this cake a great option to satisfy your sweet tooth!

So lately I’ve been really into cake. But I mean I have to admit that I’m always kinda into cake. It’s like a life in and of itself to me, if you don’t like cake I probably think there is something wrong with you, just like I think there is something wrong with my non sweets loving husband. I mean seriously, sugar makes me happy, how can it just not make everyone as happy as myself?
READERS'S FAVORITE RECIPES

I’m borderline addicted to cake, but in all honestly I’m probably fully addicted but I just don’t like to admit it….heck I have no problem admitting it. I’m Alli and I’m a cakeaholic. Woo, the first step is always the hardest, but now that it’s over, I have to come and come to terms with my little addiction here. And let me tell you, when it comes to dessert flavors, banana is one of the top ones.

So obviously a Banana Cream Cake was in order. If you don’t believe my love for all things banana, you just have to check out my Peanut Butter Banana Cake, Caramel Banana Cream Pie, Banana Cream Lofthouse Style Cookies, etc etc etc. I mean just search banana on my blog and it will come up with more desserts of one type then any on there. But hey, I ain’t complaining!


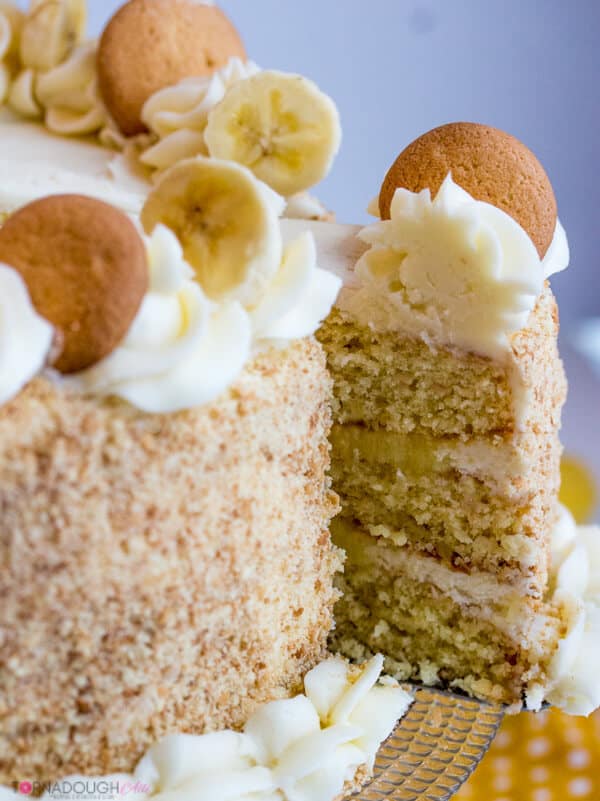
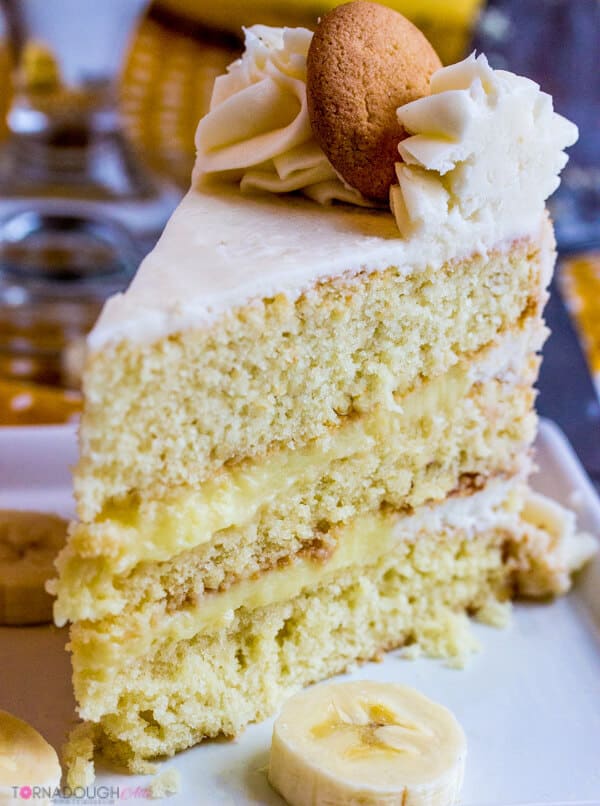
So this cake is a 3 layer cake. I mean when it comes to cake, layered ones are my favorite. I don’t usually discriminate among them, but IF I HAD to choose, I would always go for layer. I mean I get double the frosting that way. I love myself some frosting and layer cakes are usually filled with frosting and besides frosting on the top there is also frosting all up the sides, WINNER!!


Well this Banana Cream Cake is actually filled with delicious banana pudding. So I kinda took the lazy route and used a box mix for my banana pudding instead of making it homemade, which is perfectly fine to me. I didn’t feel like adding bananas to the center because usually bananas turn brown and I didn’t want brown specks in the middle of my cake, but by all means if you prefer homemade (which I usually do) go ahead and fill this bad boy with some homemade banana pudding.

So cakes are pretty simple to make, frost on the other hand…man I swear I always have such a hard time frosting them! I mean I actually tried to make a video of this cake for Facebook and the blog and let me tell you…I envy those bloggers and bakers who cake make cake decorating a seamless project, because frankly I am not one of them, so until I find the magic in actual decorating, a basic tutorial in the recipe is all you’re going to get from this gal right here.


You know I mean it’s not HARD HARD, if you want a quick and easy version of banana and pudding cake you need to check out this Banana Pudding Poke Cake. It’s all about the taste anyways, but us bloggers need to make it beautiful looking because pictures sell, so I’m happy to say that I actually loved how this cake turned out. Its sides are filled with delicious crushed up vanilla wafers and topped with swirls of buttercream, vanilla wafers and the obvious bananas. These flavors are perfect together.


Some may ask…well if its Banana Cream Cake, then why didn’t you use a whipped cream frosting? Well my friends, I don’t like whipped cream frosting, I’m not a whipped cream person really AT ALL. So as long as it’s creamy and still a vanilla flavor I’m going to call it banana cream, plus I don’t think that this cake would hold up too well when it came to a whipped cream version because of the pudding.

So anyways, all in all, if you love banana as much as I do. You want a show stopping cake and you just want to enjoy some delicious dessert, then this Banana Cream Cake is just what you need!! So go bake now and go tag me in all your recipes on Facebook or Instagram that you make of mine, I love seeing your recreations!


Course: Dessert
Cuisine: American
Prep Time: 1 hour
Cook Time: 20 minutes
Total Time: 1 hour 20 minutes
Servings: 16 slices
Calories: 685kcal

Ingredients

Cake:
2 1/4 cup all-purpose flour
2 tsp baking powder
1/2 tsp baking soda
1 tsp salt
3/4 cup butter softened
1 1/2 cup sugar
3 eggs
2 tsp vanilla
1 cup milk
Instant Banana Pudding prepared

Frosting:
1 lb butter
4 tsp vanilla
2 tsp almond extract
6-7 cups powdered sugar
1/4-1/2 cup milk
2 cups crushed vanilla wafers
Bananas and vanilla wafers for decoration optional

Instructions

Preheat oven to 350.
In bowl mix together your flour, baking powder, baking soda and salt and whisk until combined, set aside.
In another bowl beat together your butter and sugar until fluffy, add in your eggs 1 at a time until blended
Mix in your vanilla.
Alternate adding your dry ingredients and milk into your wet ingredients.
Place in 3 8" or 9" prepared cake pans and bake for about 20 minutes or until golden and they spring back.
Remove from oven and turn onto cooling racks to fully cool.
Meanwhile to make frosting, in large bowl beat your butter until light and fluffy.
Blend in your extracts and then add in your powdered sugar 1 cup at a time.
Once sugar is added add in your milk slowly until you reach your desired consistency and continue to beat on high for about 5 minutes to fluff up.
Add about 1/3 of your buttercream to a piping bag with tip cut off.
Place one layer of your cake on a turntable and then pipe a damn of frosting around the outside of the layer about 1" thick.
Spread half of your prepared pudding in the center and then top with another layer of cake and gently press down, repeat with damn and other half of your frosting.
Top with last layer of cake and then spread frosting around the top and sides of your cake until covered, reserving about 1 1/2 cups of your frosting for decorating if desired.
Take your crushed vanilla wafers and add some to your hand and press up the sides of the cake until it is covered.
Pipe the remaining frosting on top and sides of cake.
Keep refrigerated.


WITCH HAT CUPCAKES

WITCH HAT CUPCAKES


Witch Hat Cupcakes are easy Halloween Cupcakes that take just 5 ingredients to make! You kids will love helping you make these fun and easy Halloween treats!

Happy October! It’s my favorite month of year! Fall leaves, cooler weather, Halloween, and all sorts of fun treats, soups and comfort foods! Even though Halloween is one of my favorite holidays, I don’t crazy with decorations and treats. I like to keep things pretty simple.

I think most moms with small kids can agree that you don’t have a ton of time to make fancy Halloween treats for your child’s halloween parties. I love cute and festive treats–as long as they are simple!

Some great examples of impressive but EASY halloween treats include these Chocolate Chip Spider Cookies and Pumpkin Cupcakes with Cinnamon Cream Cheese Frosting.


I’ve seen several cute candy witch hats lately, like these. But I wanted to make a halloween cupcake with them because cupcakes are one of my favorite treats to bring to Halloween parties.

These Witch Hat Cupcakes are fun and festive, but super easy too. My kids love to help make the Oreo witches hats and add the sprinkles.

Witch Hat Cupcakes that take just 5 ingredients to make! You kids will love helping you make these fun and easy Halloween cupcakes!

Prep Time30 mins
Cook Time25 mins
Total Time55 mins
Course: Dessert
Cuisine: American
Servings: 12 cupcakes
Calories: 204kcal


Ingredients

12 chocolate cupcakes
6 Oreo cookies
12 Hershey's chocolate kisses
1 batch cream cheese frosting (exclude the cinnamon)
green and orange food coloring
white and orange sprinkles

Instructions

After making the cream cheese frosting, separate 1/2 cup of the frosting into a separate bowl.
Color the larger amount of frosting green, and color the smaller amount of frosting orange.
Gently split the Oreo in half.
Place a very small spoonful of orange frosting in the center of the top of the Oreo cookie.
Place a Hershey's kiss on top and press down. Add some sprinkles. Set aside.
Pipe the green frosting into the center of the cupcake (don't go all the way out to the edges!) and wind it gently up into a few layers.
Place an Oreo witches hat on top. Refrigerate cupcakes (covered) until ready to serve